
Master DTF Design Software Today
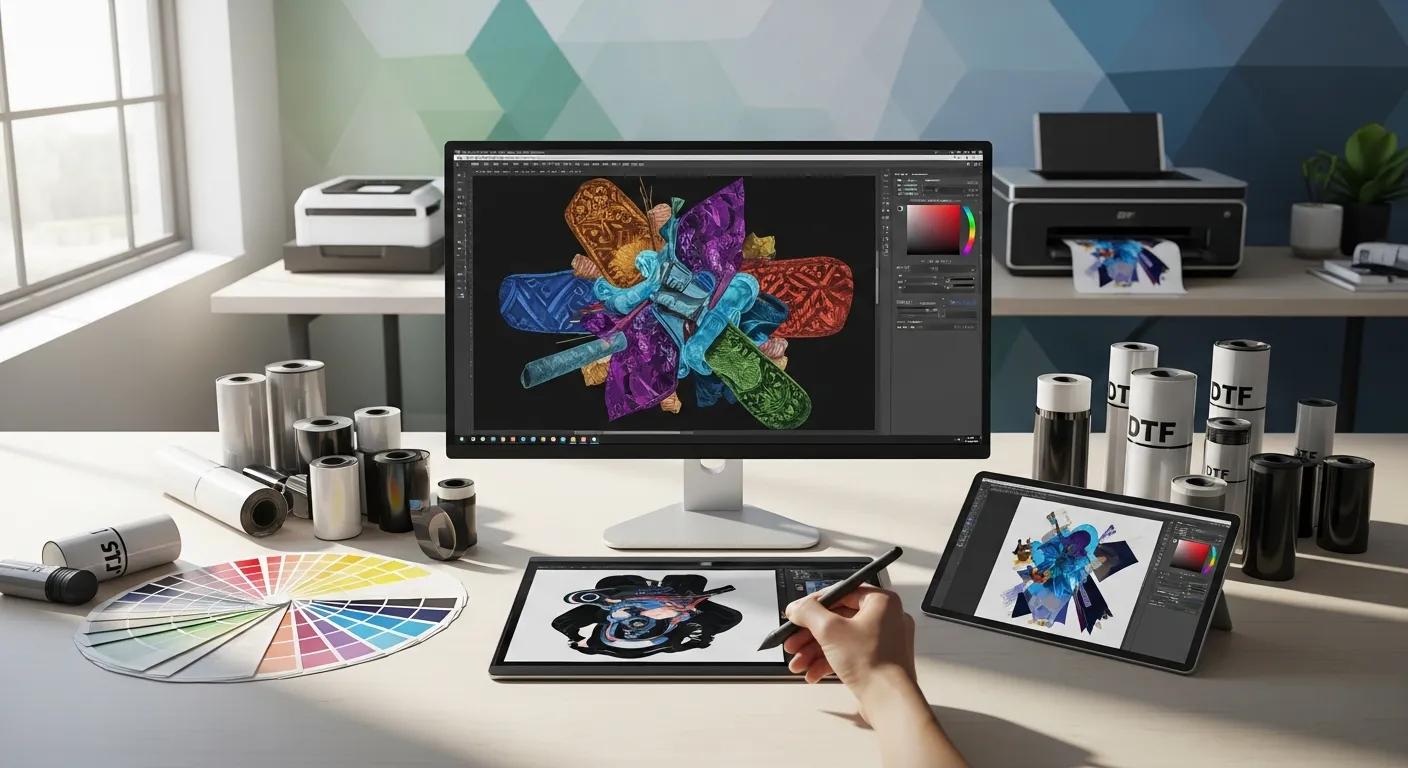
Direct-to-film (DTF) design software organizes artwork, color management, and RIP workflows so printed transfers match your intent and last through wear. This guide explains how vector, raster, and RIP tools interact to create crisp DTF transfers and UV DTF 3D PermaStickers, and it shows practical steps for file prep, gang sheeting, and troubleshooting. Many makers lose vibrancy or durability because files are the wrong resolution, lack proper white-underbase separation, or are exported in incompatible formats; this guide provides concrete solutions to those problems. You will learn how to choose vector and raster editors, what RIP features matter, how to prepare gang sheets efficiently, and how to optimize ICC profiles and file exports for consistent results. Each H2 breaks the workflow into actionable tasks—from initial art to finished transfer—so you can apply modern DTF software techniques with confidence. Throughout, expect recommended tools, step-by-step lists, and comparison tables that make picking software and preparing production-ready files straightforward for both beginners and pro shops.
What Is DTF Design Software and Why Is It Essential for Transfers?
DTF design software refers to the combined set of vector editors, raster editors, and RIPs that together translate artwork into printer-ready transfers and manage white ink, halftoning, and layout. By controlling resolution, color separations, and white-underbase generation, these tools ensure prints reproduce intended color, fine detail, and adhesion characteristics on a variety of fabrics. Proper software removes guesswork from workflows and reduces reprints, saving time and material costs while improving end-user durability. Understanding the roles of each software class helps decide where to spend learning resources and budget for consistent production.
What Are the Differences Between Vector, Raster, and RIP Software?
Vector editors create resolution-independent shapes and text that scale cleanly for logos and gang sheets, while raster editors handle photo-realistic imagery and pixel-level retouching where DPI matters. RIP software acts downstream, taking vector and raster artwork and applying printer-specific rules: color conversion to device ink sets, white ink underbase generation, halftoning, ink-laying order, and machine commands. Use vectors for crisp edges and nesting efficiency, rasters for photographs and soft gradients, and RIPs to translate those assets into consistent printer output across media types. Choosing the right combination reduces artifacts and mismatches between screen and printed transfers.
How Does DTF Design Software Improve Print Quality and Durability?
DTF design software improves print quality by enforcing correct resolution, embedding color profiles, and defining white ink placement so colors remain vibrant on both light and dark garments. Proper handling of alpha channels, underbase knockouts, and ink coverage prevents edge fraying, ink flaking, and loss of fine details after repeated washing. Software options that include proofing, soft-proof views, and halftone control make it possible to simulate outcomes and catch problems before production. Focusing first on these file-prep practices reduces rework and leads directly into tools and workflows that optimize transfers for longevity and wash resistance.
Which Are the Best Vector Graphics Software for Scalable DTF Designs?
Vector graphics tools are the backbone for logos, text, and gang sheet layouts because they produce infinitely scalable artwork and export clean PDF/SVG/EPS files compatible with RIPs and layout builders. The right vector tool speeds up path cleanup, spot-color control, and precise placement of trim/bleed that RIPs expect. Consider cost, platform support, and export fidelity when choosing a vector editor for DTF design; these tradeoffs determine how easily artwork moves from designer to production. Below is a comparison to help match features to common DTF workflows and use-cases.
Different vector tools offer distinct advantages for DTF workflows:
| Software | Key DTF Features | Best For / Value |
|---|---|---|
| Adobe Illustrator | Precision pen tools, advanced swatches, export to PDF/SVG with embedded profiles | Professional studios requiring tight color control and RIP compatibility |
| Affinity Designer | Robust vector toolset with affordable licensing and PDF export | Cost-conscious designers wanting near-professional features |
| Inkscape | Open-source SVG editing with basic PDF/EPS export | Beginners and budget shops needing scalable assets without subscription |
This table clarifies which vector tool aligns with common DTF needs, from professional swatch control to budget-conscious scalable exports. Choosing a vector editor that exports clean, RIP-friendly PDFs or SVGs reduces prepress friction and accelerates gang sheet workflows.
How Does Adobe Illustrator Enhance Vector DTF Design?
Adobe Illustrator enhances DTF workflows through precise path editing, reliable spot-color management, and export presets that preserve vector integrity for RIP processing. The application’s artboard and layer system lets designers prepare nested layouts and separate varnish or clear layers when needed, while swatches and color libraries make it easier to maintain consistent brand colors. Illustrator also supports embedding ICC profiles and exporting PDFs with transparency handling that RIPs can interpret, which reduces unexpected knockouts or overprints during production. These features make Illustrator a solid choice when final artwork must integrate smoothly with print production tools and gang-sheet builders.
What Are the Alternatives to Adobe Illustrator for Vector Design?
Affinity Designer and Inkscape provide practical alternatives to Illustrator with different budgets and workflows in mind; Affinity offers a polished paid experience while Inkscape provides a free, open-source route for SVG-based files. Affinity strikes a balance between professional features and lower cost, including export options compatible with common RIPs, while Inkscape covers core vector tasks with some manual export cleanup required for advanced print jobs. CorelDRAW remains an option on some Windows-centric shops but Affinity and Inkscape are frequently sufficient for most DTF logo and nesting tasks. Selecting an alternative depends largely on team familiarity, file-exchange needs, and whether advanced spot-color automation is required.
What Are the Top Raster Image Editors for Photo-Realistic DTF Artwork?
Raster editors handle photos and detailed artwork where pixel-level control, color correction, and high-resolution exports determine print fidelity. For DTF transfers intended to reproduce photographs or complex gradients, tools that manage layers, masks, and color profiles are essential to prevent banding and maintain smooth tones. Key considerations include maximum editable resolution, reliable alpha-channel export, and soft-proofing support to preview how RGB images convert to CMYK or printer-specific profiles. Below are recommended raster editors and workflow tips for maintaining image integrity across production.
| Tool | Strengths for DTF | Typical Use |
|---|---|---|
| Adobe Photoshop | Advanced retouching, layer masks, color proofing and 16-bit editing | High-end photo reproduction and soft-proofing |
| Affinity Photo | Cost-effective raster editing with professional filters | Designers needing Photoshop-like features without subscription |
| GIMP / Photopea | Free or browser-based options for basic edits and PSD compatibility | Quick edits and budget workflows for simple raster needs |
This comparison highlights which raster editors are best for photo realism, color adjustments, and export workflows. Choose a raster editor that supports high-bit-depth editing and can export TIFF/PNG with embedded profiles to protect color fidelity.
How Does Adobe Photoshop Support Raster DTF Design?
Adobe Photoshop supports DTF design by providing advanced adjustment layers, masks, and soft-proofing that reveal how high-resolution images will reproduce under specific ICC profiles. Photoshop’s ability to export 16-bit TIFFs, preserve alpha channels, and flatten complex compositions while maintaining transparency control helps avoid unexpected artifacts during RIP processing. Photographers and designers use Photoshop to remove background noise, sharpen critical details, and apply selective color corrections that preserve skin tones and subtle gradients. These capabilities make Photoshop the go-to for photo-realistic transfers destined for accurate reproduction.
Which Free Raster Software Options Are Best for DTF Design?
Free tools like GIMP and browser-based Photopea offer essential raster edits such as layer masking, color adjustment, and PNG/TIFF export, making them useful for small shops and beginners preparing DTF artwork. While these tools may lack advanced soft-proofing or 16-bit workflows, they can still produce production-ready files if designers set proper DPI, manage layers carefully, and export lossless formats with transparency when required. For budget creators, a workflow that includes test prints and careful color checks bridges the gap between free editors and paid software. When higher fidelity or complex color management is needed, upgrading to a pro raster editor is recommended.
How Does RIP Software Optimize DTF Printing Workflow?
RIP (Raster Image Processor) software transforms vector and raster files into precise printer instructions, handling color separation, white-underbase generation, halftoning, and ink optimization that directly impact print quality and material use. A good RIP ensures consistent color across runs, creates efficient nesting to reduce film and ink waste, and provides fine control over white ink placement for dark garments. RIPs often include ICC profile integration and layout tools that automate sequencing for multi-layer prints and specialty UV applications. Understanding the RIP’s role helps designers prepare files so the RIP can do its best work without excessive manual intervention.
- It generates white-underbase channels to preserve color vibrancy on dark substrates.
- It converts artwork to printer-specific color separations and applies ICC profiles.
- It optimizes halftones and ink maps for the printer’s nozzle resolution and ink set.
These functions reduce reprints and yield predictable results, setting up the next step: comparing RIP platforms and features in practical terms.
| RIP Software | Feature | Effect on DTF Output / Workflow |
|---|---|---|
| Caldera | Advanced color management and nesting | Improves color consistency and reduces material waste |
| Cadlink Digital Factory | White ink control and ink-saving modes | Balances vibrancy with lower ink usage and predictable underbase |
| DigiRIP | Fine halftone control and device link support | Preserves detail and smooth gradients on transfers |
This table shows how specific RIP features translate into tangible gains on the press, from ink savings to improved detail, which designers should account for when preparing files.
What Are the Key Features of Leading DTF RIP Software?
Leading RIPs provide ICC profile integration, granular white ink controls, and nesting/layout automation that reduce manual prepress time and improve yield. Features like ink-saving algorithms, custom halftone screens, and device-link profiles allow shops to tune output for specific fabrics and inks while preserving fine details. RIPs that include proofing previews, automated trapping, and batch processing speed up high-volume workflows and minimize operator error. Prioritizing RIP features that match your printer’s capabilities yields predictable, repeatable transfer production.
How Does RIP Software Manage White Ink and Color Separation?
RIPs control white ink by generating underbase layers, selectively placing white only where color needs opacity, and offering knock-out or overprint strategies to optimize adhesion and brightness. Effective separation workflows in the RIP let you decide whether white is printed beneath entire art or only under saturated colors, balancing opacity with flexibility for stretchable prints. RIP halftone engines translate color ramps into dot patterns that preserve gradients without banding, while trapping and color-conversion settings prevent halos and misregistration. Mastering these RIP controls is crucial before finalizing gang-sheets or UV-specific varnish layers.
What Free DTF Design Software Is Available for Beginners and Budget Creators?
Budget creators can prepare production-ready DTF files using free and low-cost tools when they follow consistent export rules and preflight checks. Free vector and raster tools can generate scalable art and high-resolution images, but designers must manually ensure DPI, color profiles, and transparency are handled correctly before uploading to a RIP or gang sheet builder. Learning a short checklist for preparing files in these tools reduces common mistakes and helps bridge the gap to professional outcomes. Below are practical tool options and a guide to using them effectively for DTF.
- Inkscape for vector SVG/PDF exports suitable for logos and nesting.
- GIMP and Photopea for raster edits and PSD compatibility when working with photos.
- Canva for mockups and layout concepts, with the caveat of limited color control.
Each tool serves a role in a low-cost pipeline; the next paragraph explains practical steps to convert those outputs into production-ready files.
Which Free Tools Offer Vector and Raster Capabilities for DTF?
Inkscape provides solid SVG and PDF exports for scalable assets, while GIMP and Photopea cover raster edits and basic PSD workflows that many printers can accept. Canva simplifies mockups and quick layout checks but lacks advanced color-profile and export features needed for precision color matching. Free tools are best paired with a disciplined preflight process and test prints to confirm that opacity, resolution, and color fidelity meet production standards. When workflows scale, consider transitioning to paid editors that streamline embedding ICC profiles and advanced export options.
How to Use Free Software Effectively for DTF File Preparation?
When using free tools, set canvas dimensions to final print size and 300 DPI, separate any white-underbase into its own layer, and export high-quality PNG or flattened PDF with transparency preserved where required. Run a simple preflight: confirm resolution, remove hidden layers, and simulate proofs where possible before creating gang sheets or uploading to a RIP. Keeping a test swatch process—printing small samples—is essential to validate color and adhesion before full runs. These steps reduce surprises and make free software outputs reliable for small-batch production or proofing.
How Do You Design for UV DTF Transfers and 3D PermaStickers?
Designing for UV DTF and 3D PermaStickers introduces clear/varnish channels, height mapping for tactile effects, and substrate-aware color strategies that differ from standard DTF. UV-capable workflows require explicit layers for clear coatings or spot varnishes, attention to edge bleed for stickers, and nesting that accounts for rigid or flexible media. Designers must preview how gloss, texture, and cured UV inks affect perceived color and edge fidelity. Understanding these unique constraints enables artwork that leverages UV printing’s advantages—dimensionality and durable finishes—without common failures.
What Software Features Are Unique to UV DTF Design?
UV DTF design needs spot varnish layers, multi-channel exports that include white/color/clear separation, and tools that can preview specular highlights or raised varnish effects. Height or bump-map previews help visualize 3D PermaSticker depth so designers can decide where to emphasize gloss or texture. Multi-channel export workflows and the ability to tag layers for varnish or clear channels ensures the RIP and press know which areas receive additional UV curing. These features let designers create tactile, glossy transfers that maintain fine detail and adhesion after curing.
What Are the Best Practices for Preparing UV DTF Artwork?
Prepare UV artwork by separating clear/varnish layers from color and white layers, keeping varnish artwork on its own named layer for easy identification by the RIP and press operator. Account for edge bleed and substrate translucency, and run small cured tests to confirm adhesion and color shift after UV curing, since UV inks can appear different post-cure. Use higher-resolution artwork for varnish details to avoid jagged gloss edges and remember to flatten or export channels as required by the target RIP. These steps reduce production rework and ensure 3D PermaStickers meet tactile and visual expectations.
Transfer Kingz offers UV DTF 3D PermaStickers and emphasizes vibrant color range, fine-detail reproduction down to three pixels, easy application, and durability that stands up to frequent washing. Their UV-capable products leverage spot-clear layers and dimensional effects typical of 3D PermaStickers while accommodating files prepared with multi-channel exports. Choosing UV workflows that separate varnish and white channels and including small cured tests aligns with Transfer Kingz’s product expectations, helping designers get predictable results when ordering UV DTF 3D PermaStickers.
How to Create a DTF Gang Sheet Using Transfer Kingz Builder and Design Software?
A gang sheet consolidates multiple designs on a single film to save cost and speed production; building one efficiently requires consistent art sizing, bleed settings, and smart nesting so the RIP produces minimal waste. Design-ready assets should be exported with transparent backgrounds where appropriate, grouped by curing and white-underbase needs, and sized for final application. Uploading prepared assets to an automated gang sheet builder reduces manual layout time and ensures spacing adheres to press limits. Below is a practical step-by-step workflow to create a gang sheet that balances cost and print quality.
- Art Prep: Standardize final sizes, set canvas to final print dimensions, and create separate layers for color and white underbase.
- Export: Save each asset as high-quality PNG or PDF with transparency and embedded color profile.
- Upload & Nest: Import assets into the gang sheet builder and use auto-nesting to maximize film usage while respecting spacing rules.
This numbered workflow makes it straightforward to move from single artworks to efficient gang sheets; the following paragraph explains how Transfer Kingz’s builder simplifies layout and ordering.
Transfer Kingz provides a free online Custom DTF Gang Sheet builder that streamlines upload, auto-nesting, and proofing, helping to reduce layout errors and lower per-transfer cost through efficient nesting. After technical prep in your vector or raster tool, uploading to the builder lets the system automatically arrange pieces for minimum waste while letting you review spacing and orientation. The builder integrates ordering so once layout is validated you can proceed to production quickly, combining the benefits of careful file prep with automated layout optimization that saves time and shipping cost.
What Steps Are Involved in Designing and Building a Gang Sheet?
Designing a gang sheet starts with finalizing artwork at actual print size, setting 300 DPI for raster pieces, and creating a separate, clearly named white-underbase layer to prevent confusion. Next, export each asset as a high-quality PNG or PDF with embedded profiles and ensure transparent areas remain intact for accurate nesting. Upload assets to the gang sheet tool, arrange or accept auto-layout, and run a final visual proof focusing on spacing, rotation, and bleed around edges. Completing a test strip or small run verifies color and adhesion before committing to larger quantities, closing the loop between design and production.
How Does Transfer Kingz Gang Sheet Builder Simplify Layout Optimization?
The Transfer Kingz Gang Sheet Builder simplifies layout by offering auto-nesting that groups artworks for optimal film usage, rules-based spacing to protect edges, and quick proofing so designers can validate orientation and bleed. These features minimize manual layout time and reduce human error that leads to wasted film or misaligned cuts. For designers who prepare assets in Illustrator, Photoshop, or free tools, the builder accepts common production-ready formats and returns a layout preview useful for a final check. That automation shortens lead time and supports both small and mixed-batch orders.
How to Optimize Color Management and File Formats for Flawless DTF Prints?
Color management and accurate file formats are the bridge between on-screen designs and printed outcomes; proper embedding of profiles, correct DPI, and sensible file choices prevent color drift and loss of detail. A consistent workflow—design in a controlled color space, soft-proof with ICC profiles, and export using lossless formats—keeps prints aligned with expectations. Below is a technical checklist and recommended export table to use when preparing files for DTF or UV DTF transfers, followed by a brief note tying these practices into production compatibility.
Before the table, remember these color rules:
- Design in a documented color space and avoid multiple conversions.
- Soft-proof using ICC profiles that simulate the target printer or substrate.
- Export with embedded profiles so RIPs can interpret color intent correctly.
| File Format / Setting | Attribute | Recommended Value / Why |
|---|---|---|
| PNG (24/32-bit) | Raster with transparency | Use for images requiring alpha channels and lossless compression |
| TIFF (16-bit) | High-fidelity raster | Use for photo-realistic transfers needing color depth and no compression artifacts |
| PDF / EPS | Vector + mixed content | Use for logos and scalable art to preserve paths and spot colors |
| DPI | Resolution | 300 DPI for most transfers; increase for very small detail areas to preserve clarity |
| ICC Profile | Color embedding | Embed a printer or device ICC when available to preserve color intent in RIP |
This export table gives a quick reference to choose formats and settings that maintain color fidelity and detail. Adhering to these values reduces unexpected shifts when artwork goes through a RIP and onto film.
What Is CMYK Color Management and ICC Profile Setup in DTF Software?
CMYK color management involves converting artwork from RGB to the printer’s required color space while using ICC profiles to maintain perceived color across devices. Set up soft-proofing in your editor to see how RGB artwork will map to CMYK or a printer-specific profile, then export with the chosen profile embedded to preserve intent. Avoid multiple conversions between color spaces and keep original masters in RGB to allow flexible re-exporting. Confirm with the printer or RIP documentation which ICC profiles they accept and test with small prints to validate the soft-proof.
Which File Formats and Resolutions Ensure High-Quality Transfers?
Use PNG or TIFF for raster artwork that requires transparency or high bit depth, and PDF/EPS for vector-based art to preserve paths and spot colors; always export at 300 DPI for most transfer sizes, increasing resolution when fine detail under 1 mm is required. Prefer lossless formats to avoid compression artifacts and embed ICC profiles whenever possible to communicate color intent to RIPs and presses. Flatten complex effects only when necessary and keep a layered master for later edits. These practices minimize artifacts and ensure transfers reproduce sharpness and color as designed.
Transfer Kingz accepts production-ready files exported in standard formats and is compatible with common RIP workflows; preparing artwork as outlined above—embedded profiles, separate white layers, and high-resolution exports—helps ensure smooth processing through their gang sheet and UV DTF production paths. This compatibility reassurance reduces prepress back-and-forth and shortens time to finished transfers when ordering custom DTF or UV DTF products.
What Are Common Design Pitfalls and Troubleshooting Tips for DTF Software Users?
Common pitfalls include low DPI images, missing white underbase layers, improper bleed, hidden layers that affect exports, and incorrect color profiles that shift hues at print time. These errors typically cause reprints, poor adhesion, or mismatched tones, increasing time and material costs. A concise preflight checklist and small test prints can catch most issues before full production, saving both money and reputation. Below are practical checks and durability-focused practices to ensure consistent, long-lasting transfers.
A preflight checklist helps avoid frequent mistakes:
- Confirm final art at 300 DPI or higher for photographic elements.
- Ensure white-underbase is on a separate, clearly named layer.
- Remove hidden layers and stray objects that may print unexpectedly.
- Verify embedded ICC profiles and export formats.
Implementing this checklist consistently reduces errors and leads into recommended durability practices described next.
How to Avoid File Preparation Errors That Affect Print Quality?
Run a final preflight that checks resolution, named layers, color profiles, and bleed before exporting; use a checklist to validate each asset and perform a small proof print where possible. Remove unused effects and hidden layers, flatten transparency only after confirming how the RIP will interpret it, and ensure vector strokes are expanded if the RIP handles strokes inconsistently. Having a standardized export template with correct DPI, bleed, and profile settings reduces human error across batches. These steps convert ad-hoc file prep into a repeatable process that the press can trust.
What Are Best Practices for Ensuring Durable and Vibrant Transfers?
Design for durability by ensuring sufficient ink coverage in saturated areas, separating varnish or clear layers when needed, and recommending appropriate curing/pressing parameters to the print operator. Advise end users with simple care instructions—wash inside-out on gentle cycles and avoid high-heat drying—to prolong transfer life; clear communication reduces customer complaints and improves perceived quality. Test stretch and wash resistance during proofing, and prefer designs that tolerate slight misregistration on highly elastic fabrics. Following these guidelines supports long-lasting, vibrant transfers that meet customer expectations.
For designers and production teams ready to move from learning to ordering, Transfer Kingz offers custom DTF transfers and UV DTF 3D PermaStickers with options emphasizing vibrant color, fine-detail reproduction, and durable, easy application. Their free gang sheet builder and production compatibility with common file formats make it straightforward to submit production-ready artwork, while in-house UV capabilities support textured, dimensional sticker products. Designers who follow the file-prep and color-management steps in this guide will find the ordering process smoother and more predictable when working with these services.
Optimizing Heat Press Parameters for DTF Printing Quality
Direct-to-Film (DTF) printing really changed the industry by offering flexible, high-quality textile decoration, but Vistaprint’s industrial production faces recurring failures in print adhesion and color durability, leading to waste and customer complaints. This study investigates how heat press temperature and dwell time affect the quality of DTF prints on black cotton T-shirts, TPU-based granulates side by side. Using a full-factorial experimental design and a three-stage approach, samples were first screened for adhesion and color stability after washing. Only the best performers advanced to detailed microscopic analysis for fiber contamination. Statistical analysis using ANOVA showed that press temperature is the dominant factor across all quality metrics. Results demonstrate that setting the press to 170 degrees C with a 10 second dwell time minimizes color change (delta E), reduces black density loss, and limits white-layer contamination for both granulates tested. The recommended process window enables Vistaprint to standardize DTF settings, thus improve quality control and as a result reduce customer complaints and production waste.
Optimizing Heat Press Parameters to Improve the Quality of DTF Printing, 2025
0 comments