
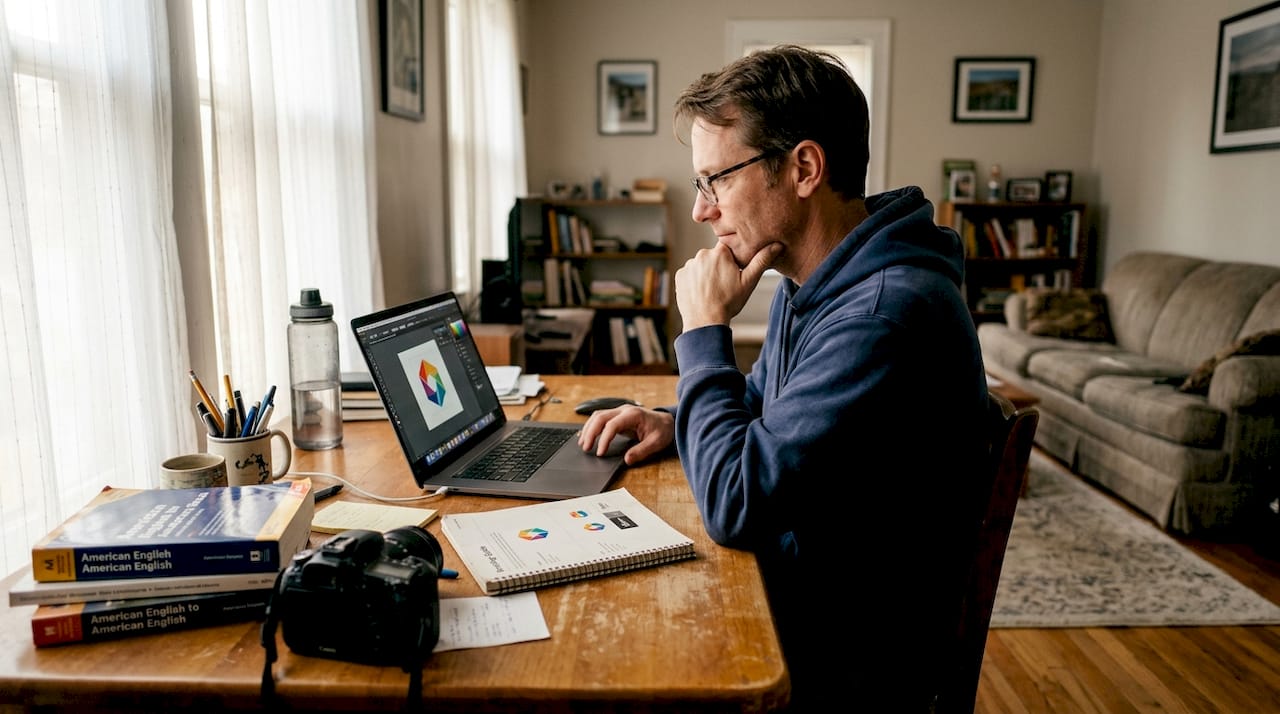
You’ve pressed print, waited for your transfer, and peeled it back only to find a blurry, washed-out mess on your shirt. That frustration is almost always traced back to one place: the artwork file. Designing at 300 DPI at your exact print size is the single most important rule in DTF artwork preparation, yet it’s the step most beginners skip. This guide walks you through everything you need to know, from understanding what DTF artwork actually is, to setting up your file, avoiding common mistakes, and knowing what a great finished print looks like.
Table of Contents
- What is DTF artwork and why quality matters
- Required tools, materials, and software for designing DTF artwork
- Step-by-step guide to creating DTF artwork
- Common mistakes in DTF artwork and how to fix them
- What to expect from your finished DTF print
- Turn your DTF artwork into professional custom prints
- Frequently asked questions
Key Takeaways
| Point | Details |
|---|---|
| Use 300 DPI resolution | Always design artwork at 300 DPI for clarity and professional results. |
| Choose compatible file formats | PNG, PSD, and TIFF support transparency and sharp details for DTF printing. |
| Follow step-by-step workflow | Sequence your design process to minimize errors and achieve high-quality prints. |
| Review common mistakes | Prevent issues like blurring and color mismatch by checking key settings before export. |
| Connect with expert printers | Professional printing services turn your completed artwork into lasting custom products. |
What is DTF artwork and why quality matters
Direct-to-Film (DTF) printing is a process where your design is printed onto a special film, coated with adhesive powder, cured, and then heat-pressed onto fabric. Unlike screen printing, which requires separate screens for each color, or heat transfer vinyl (HTV), which cuts shapes from colored sheets, DTF handles full-color, photo-realistic designs in a single pass. That flexibility is what makes it so popular for small runs and custom orders.
DTF artwork is used across a wide range of products, including:
- Custom t-shirts and hoodies
- Hats and caps
- Tote bags and accessories
- Promotional merchandise
- Team uniforms and branded apparel
The dtf design process demands precision because the film captures every pixel of your file. A low-resolution image that looks fine on screen will print with visible pixelation and soft edges on fabric.
“DTF artwork must be designed at 300 DPI resolution for optimal results.”
Poor artwork quality leads to real business consequences. Blurry prints mean reprints, wasted film, and unhappy customers. Running a dtf quality checklist before every order is one of the simplest ways to protect your margins and your reputation. Now that you see the impact of art quality, let’s break down what you need to succeed.
Required tools, materials, and software for designing DTF artwork
You don’t need a studio full of expensive gear to create great DTF artwork. What you do need is the right combination of hardware and software, set up correctly from the start.
Hardware basics:
- A computer or tablet with enough processing power to handle large image files
- A stylus or drawing tablet for detailed illustration work
- A reliable internet connection for uploading files to your print provider
Software options and file compatibility:
| Software | Best for | Supported file types |
|---|---|---|
| Adobe Photoshop | Raster editing, photo-based designs | PSD, PNG, TIFF |
| Adobe Illustrator | Vector artwork, logos, text | AI, SVG, EPS |
| Affinity Designer | Budget-friendly vector and raster | AFDESIGN, PNG, PDF |
| Canva Pro | Quick mockups, simple graphics | PNG, PDF |
| CorelDRAW | Apparel industry standard | CDR, SVG, PNG |
Raster files (like PNG and TIFF) store image data as pixels, so resolution matters enormously. Vector files (like AI and SVG) use mathematical paths and scale without quality loss, but they still need to be exported as raster files at the correct DPI for DTF printing. Using design software set for 300 DPI assures sharp output every time.
Choosing the right dtf design software for your workflow can save you hours of rework. Match the tool to your skill level and the type of artwork you create most often.
Pro Tip: Before exporting any file, open your software’s export settings and confirm the resolution is set to 300 DPI and the color mode is set to RGB. Many designers forget to check this and only discover the error after a failed print.
With tools in hand, you’re ready to set up your first artwork file.
Step-by-step guide to creating DTF artwork
Following a consistent process from concept to export eliminates most of the errors that cause bad prints. Here’s the sequence that works.
- Define your concept. Sketch your idea or gather reference images. Know the final print dimensions before you open any software.
- Create a new document at the correct size. Set the canvas to your exact print dimensions and resolution to 300 DPI from the very beginning. Never scale up later.
- Design in layers. Keep text, graphics, and background elements on separate layers. This makes editing easier and prevents accidental merging.
- Work in RGB color mode. DTF printers use RGB color profiles. Designing in CMYK can cause color shifts when the file is processed.
- Handle transparency carefully. Use a transparent background (not white) so your design sits cleanly on any fabric color. Save as PNG or PSD to preserve transparency.
- Review at actual print size. Zoom your canvas to 100% or use print preview to see exactly how the design will look on the garment.
- Export in the correct format. Save as PNG or TIFF at 300 DPI. Flatten only if required by your print provider.
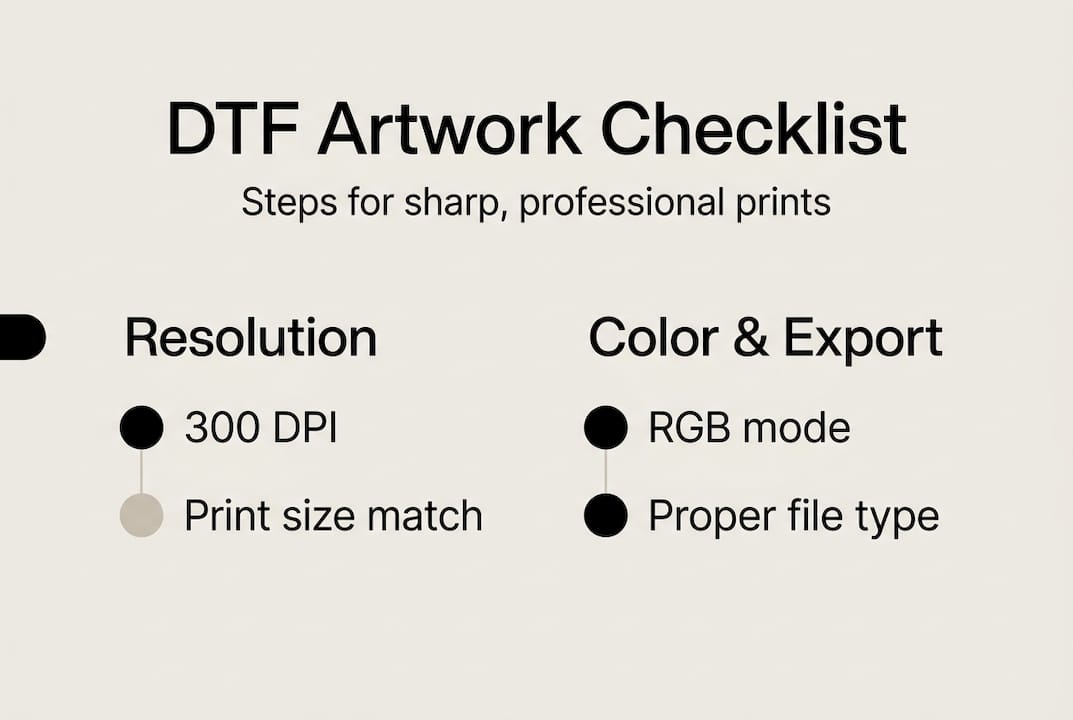
Key artwork checkpoints:
| Checkpoint | What to verify |
|---|---|
| File resolution | 300 DPI at final print size |
| Color mode | RGB (not CMYK) |
| Background | Transparent (PNG or PSD) |
| Layer structure | No accidental merges or hidden layers |
| File format | PNG, TIFF, or PSD |
Final artwork must match print size at 300 DPI for optimal sharpness. Scaling a small file up to a larger print size is one of the most common causes of blurry results. Understanding the full dtf transfer workflow helps you see where your artwork fits into the bigger production picture. You can also review a detailed dtf print workflow guide to align your file prep with what happens after you upload.
Pro Tip: Always check your print preview at actual size before exporting. What looks sharp at 25% zoom can reveal soft edges or pixelation at 100%.
With your artwork created, let’s troubleshoot common issues before sending to print.
Common mistakes in DTF artwork and how to fix them
Even experienced designers make these errors. Knowing what to look for saves you time, money, and a lot of frustration.
The most frequent DTF artwork mistakes:
- Low resolution files. Printing below 300 DPI leads to blurry, low-quality transfers. Always start at 300 DPI, never upscale a low-res file.
- Wrong print size. Designing at 2 inches and printing at 10 inches destroys quality. Set your canvas to the final size from the start.
- CMYK color mode. Colors shift when a CMYK file is converted for DTF printing. Always design in RGB.
- White background instead of transparent. A white background will print as a white rectangle around your design. Use a transparent background and save as PNG.
- Flattened layers with hidden elements. Merging layers before review can lock in mistakes. Keep layers editable until final export.
- Oversaturated colors. Extremely bright or neon colors may not reproduce accurately. Test with a small sample print first.
The dtf troubleshooting guide covers these issues in detail, and the dtf transfer checklist gives you a fast pre-flight routine to run before every order.
Pro Tip: Many professional design programs include a built-in preflight or document check feature. Run it before exporting to catch resolution warnings, missing fonts, or color mode conflicts automatically.
Once your file is error-free, you’re ready to see the result on your apparel.
What to expect from your finished DTF print
A correctly prepared DTF artwork file produces results that are genuinely impressive. Knowing what to look for helps you evaluate your prints objectively and catch any issues early.
Signs of a successful DTF print:
- Sharp, clean edges on all text and graphic elements
- Vibrant, accurate colors that match your on-screen design
- No pixelation, banding, or blurry gradients
- Smooth transitions in photo-realistic artwork
- No white halo or background artifacts around the design
- Consistent color across the full print area
DTF prints deliver sharpness and intricate detail when artwork is designed correctly at 300 DPI. That level of detail holds up through repeated washing when the transfer is applied at the right temperature and pressure. This is one of the reasons DTF has become the go-to method for small businesses that need professional results without large minimum orders.
To evaluate your print against industry standards, hold it under good lighting and compare it to your digital mockup. Check fine lines, small text, and gradient areas first. Those are the spots where resolution problems show up first. A solid dtf setup guide will also help you confirm your heat press settings are dialed in, since even a perfect file can underperform with incorrect application.
Ready to bring your designs to life? Here’s how you can streamline your next steps with expert help.
Turn your DTF artwork into professional custom prints
You’ve built the knowledge to create sharp, production-ready DTF artwork. Now it’s time to put that artwork to work. Transfer Kingz makes it easy to go from a finished file to a professional print without the guesswork.

We offer fast, reliable dtf transfers in Dallas and serve businesses across the state with our dtf transfers Texas service. Whether you’re printing a single custom piece or fulfilling a bulk order, our team handles your files with care and delivers consistent, vibrant results. Our dtf shirt transfers are printed with premium inks on high-quality film, with no minimum order requirements and quick turnaround times. Upload your 300 DPI file, choose your size, and let us handle the rest.
Frequently asked questions
What resolution should I use for DTF artwork?
You should design at 300 DPI at your exact print size for the best quality and sharpest detail on fabric.
What file formats are best for DTF printing?
PNG, PSD, and TIFF files are the top choices because they support transparency and maintain high resolution without compression artifacts.
How do I prevent blurry DTF prints?
Set your canvas resolution to 300 DPI at the final print size before you start designing. Printing below 300 DPI consistently produces blurry, low-quality transfers that can’t be fixed after the fact.
Can I use vector files for DTF artwork?
Yes, vector files like AI or SVG work well for logos and text, but you must export them as a raster file (PNG or TIFF) at 300 DPI before submitting for DTF printing.
What steps are needed to export DTF artwork for printing?
Verify your file resolution is 300 DPI, confirm the color mode is RGB, check that the background is transparent, and export as PNG or TIFF. Running through a quick checklist before every export keeps errors from reaching the print stage.
0 comments