

Yes: DTF transfers work on most canvas types when you nail the prep, heat, pressure, and peel method. Start around 320°F with medium pressure for 10 to 15 seconds, adjust for canvas thickness, and use cold peel to cut cracking risk. Expect some texture from the weave. That’s normal, not a defect.
TL;DR:
- Testing different temperature settings between 290°F and 350°F is crucial because heat consistency and canvas thickness influence adhesion and cracking risk.
- Using a cold peel and a second, lower-temperature press after cooling significantly reduces cracks and improves long-term durability on textured canvas surfaces.
- Applying powder evenly and sieving it before curing ensures a consistent “orange peel” texture, preventing cracks caused by uneven curing or heavy solids.
- Lighter pressure is recommended for stretched frames and delicate canvases to prevent warping or popping staples, especially near edges.
- Starting with sample transfers and adjusting ink limits, powder application, and pressure based on thorough test results saves time and prevents costly mistakes.
Table of Contents
- Quick DTF on Canvas Settings and Workflow Cheat Sheet
- Step-by-Step: Applying DTF to Canvas From File to Finished Print
- Materials and Tools That Actually Matter for Canvas Work
- How to Fix Cracking, Bubbling, and Poor Adhesion on DTF Canvas Prints
- Handling Stretched Frames, Gallery Wraps, and Canvas Bags Differently
- Caring for Finished DTF Canvas Pieces So They Last
- Transfer Kingz and Anthony: Tips From the Workshop Floor
- When DTF Beats the Alternatives for Canvas Projects
- Order Sample DTF Transfers for Your Canvas Projects
- Sources
Quick DTF on Canvas Settings and Workflow Cheat Sheet
Before you touch a heat press, pin these numbers somewhere you’ll actually look at them. Canvas isn’t cotton. It’s stiffer, thicker, and far less forgiving of guesswork.
Pro Tip: Run one throwaway test square before your real piece. Five minutes of testing saves you a ruined canvas and a wasted transfer.
Here’s the baseline that works across most canvas weights and blends:
- Temperature: 320°F to 350°F (160°C to 177°C), starting low and adjusting up only if adhesion looks weak
- Time: 10 to 18 seconds depending on canvas thickness (thin canvas panels need less, gallery-wrapped frames need more)
- Pressure: Medium for textured or primed canvas; lighter for thin, stretched frames that can bow under heavy pressure
- Peel method: Cold peel by default, letting the transfer cool fully before lifting the film
- Lock-in step: A brief second press at a slightly lower temperature after peeling to seat the adhesive without over-baking it
A widely cited starting baseline is around 320°F with medium pressure for 10 to 15 seconds, and most hobbyists land somewhere close to that after a test or two. The reason cold peel dominates canvas work specifically: letting the transfer cool before peeling, combined with a short second press at a lower temperature, reduces cracking that shows up weeks later when the canvas flexes or gets bumped. Hot peel has its place on stretchy fabrics where speed matters more than rigidity. Canvas is the opposite case. It rewards patience.
Community testing outside formal manufacturer guides tends to echo this range, with hobbyists reporting workable results anywhere from roughly 290°F to 345°F depending on their press and powder combo, backed by short cool-down pauses between presses. Treat that as a starting neighborhood, not gospel. Your press’s heating consistency matters more than the number on the dial.
Step-by-Step: Applying DTF to Canvas From File to Finished Print
Every crack, bubble, or peeling edge traces back to one of six steps. Skip none of them.
- Prep your artwork at 300 DPI. Mirror the design horizontally before sending it to print (standard for any DTF file), and add a white underbase layer wherever the design sits on a colored or textured canvas base. If your design has heavy solid blocks of color, reduce ink density in those areas. Over-inked solids are the single biggest predictor of cracking later.
- Print and apply adhesive powder. Once printed, apply hot-melt adhesive powder evenly across the wet ink, then shake off excess and check for clumps. Clumped powder creates thick, uneven ridges that crack under pressure.
- Cure the powder. Follow your powder’s specific instructions, whether that means an oven cure or a controlled press cure. The goal is a consistent “orange peel” texture across the whole sheet, since uneven curing produces the same uniformity problems as uneven powder application.
- Prep the canvas itself. Lint-roll the surface to pull off dust and loose fibers, then pre-press it for 5 to 7 seconds at a low temperature. This step removes trapped moisture and flattens the weave before the real press happens. Pre-pressing to remove moisture and flatten the surface measurably improves adhesion and cuts down on bubbling during the final application. If you’re working with a store-bought stretched canvas, peel off any plastic wrap completely. Trapped plastic residue is an easy, invisible cause of adhesion failure.
- Align and press. Lay the transfer face down where you want it, cover it with a Teflon sheet or silicone protective sheet, and back the canvas with a firm board or a pressing pillow so pressure distributes evenly instead of concentrating on the frame edges. Apply your baseline settings from the section above.
- Peel and lock in. Let the piece cool, then peel cold. If the transfer feels tacky or incomplete at the edges, don’t panic. Lay the protective sheet back down and give it a brief second press at a slightly lower temperature. That’s the lock-in step, and it’s the difference between a print that survives handling and one that flakes at the corners six months later.
Pro Tip: If you’re pressing a design with fine detail or small text, resist the urge to crank the temperature to “make sure it sticks.” Higher heat on fine detail work increases cracking risk without improving adhesion. Trust the pressure and time instead.
Materials and Tools That Actually Matter for Canvas Work
Not every DTF film and powder combo behaves the same on canvas, and the differences show up fast once you start pressing.
Standard DTF films work fine on most canvas projects, but films marketed as canvas-optimized tend to flex better with the weave instead of fighting against it, which is where a lot of cracking originates in the first place. Powder choice matters just as much. TPU-based hot-melt powders generally stay more flexible after curing than harder generic hot-melt blends, and flexibility is exactly what canvas needs since the surface has texture and, in stretched frames, slight give. Watch the powder’s cured texture: a consistent, fine “orange peel” pattern signals even coverage and proper curing. A patchy or glossy-in-spots texture means uneven powder application, and that unevenness becomes tomorrow’s crack line.
On the equipment side:
- A clamshell or swing-away heat press with reliable, even heat distribution across the platen
- Teflon or silicone protective sheets to prevent direct contact between the heating element and the transfer
- Firm backing boards or dedicated pressing pillows to support canvas so pressure doesn’t concentrate unevenly on frame edges
- A lint roller or soft brush for pre-press surface cleaning
- A heat-resistant pad if you’re working around staples or wooden frame edges
Transfer Kingz explains how ink limits and film handling directly affect first-run success on textured substrates like canvas, which matters most when you’re working with intricate designs that carry a lot of fine detail.
How to Fix Cracking, Bubbling, and Poor Adhesion on DTF Canvas Prints
Almost every problem you’ll hit on canvas falls into one of three buckets, and each one has a specific fix.
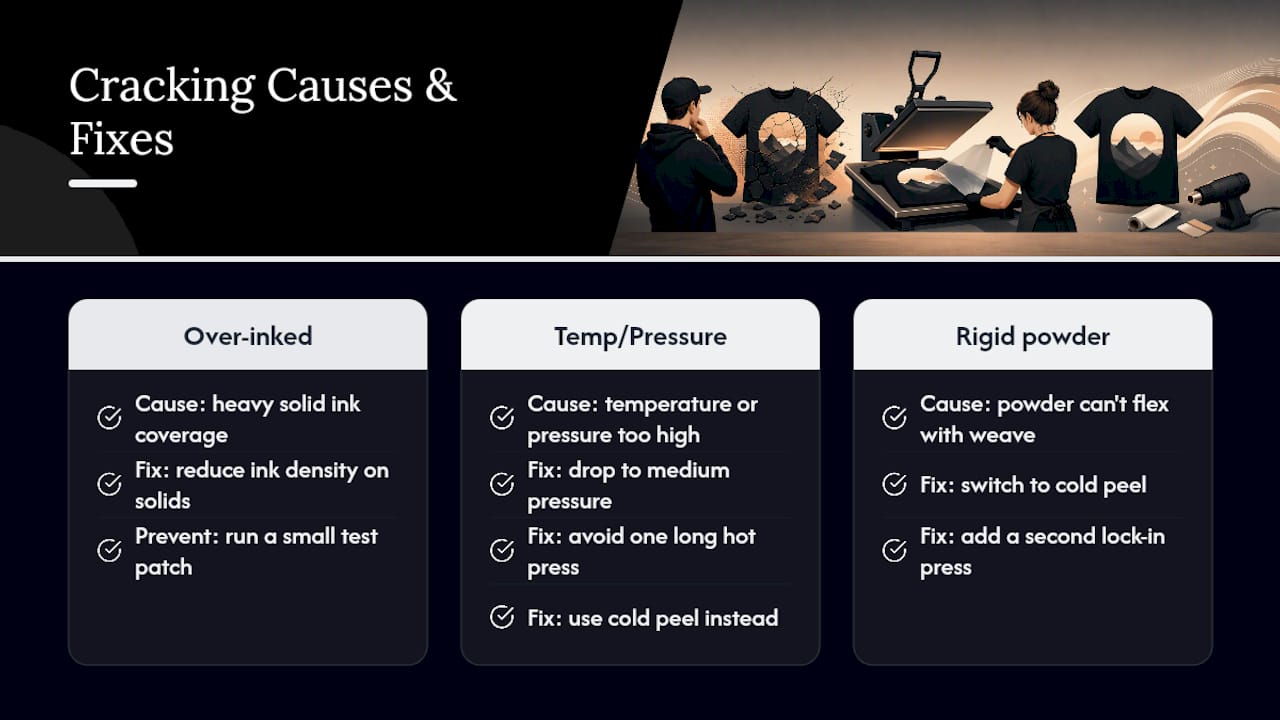
Cracking usually comes from three sources working together: over-inked designs, temperature or pressure set too high, and a rigid powder that can’t flex with the canvas weave. The weave interacting with a stiff film or heavy ink coverage is the most common cause of visible cracking on canvas specifically, as opposed to smoother fabrics. Fix it by cutting ink density on solid color blocks, dropping to medium pressure, switching to cold peel if you’re not already, and adding that second lock-in press instead of pushing everything into one long, hot press.
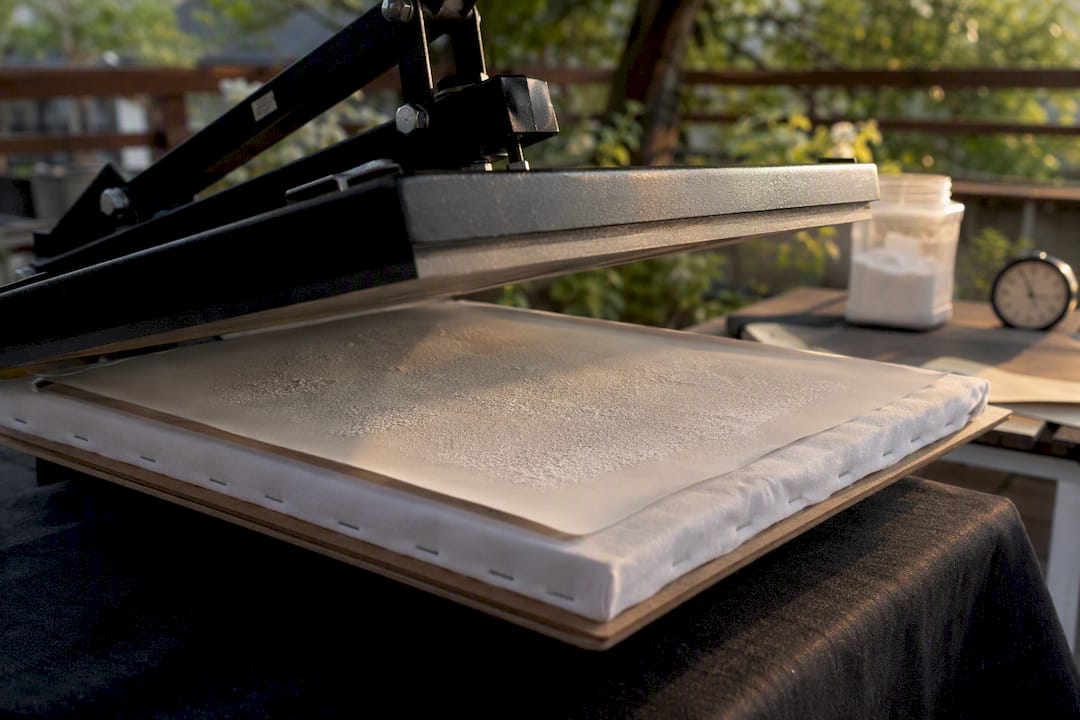
Bubbling and adhesion gaps almost always trace back to moisture, uneven powder, or insufficient pressure. Pre-dry the canvas with that 5 to 7 second low-temp pre-press, sieve your powder before application to catch clumps, and back the canvas with a firm board so pressure reaches the full design evenly rather than dipping in the middle.
Color and density issues call for adjustments upstream, not downstream. Bump your file to 300 DPI if it isn’t there already, dial back ink limits on heavy solids, and run a small test patch before committing your final piece. This one step catches most color problems before they become expensive mistakes.
Pro Tip: If a re-press doesn’t fully resolve an edge lift, don’t keep hammering the same spot with heat. Two clean presses beat five desperate ones, and excessive reheating is what causes scorching and yellowing on lighter canvas colors.
Handling Stretched Frames, Gallery Wraps, and Canvas Bags Differently
Canvas isn’t one material. It’s a category, and each form factor presses differently.
Stretched frames need lighter pressure than you’d think, since too much force risks bowing the wood or popping staples along the back edge. Never press directly over staple lines, and if your design runs close to the frame’s edge, slide a heat-resistant pad underneath to protect the wood from direct contact with a hot platen.
Loose canvas and tote bags behave more like heavy fabric than rigid board, which means they need firm support to stay flat. A backing board or pressing pillow underneath keeps the surface from shifting mid-press, and shifting is one of the fastest ways to get a blurred or double-struck transfer.
A quick note on expectations: canvas weave will show through your finished print to some degree, especially on thicker or more heavily textured canvases. Design around it rather than fighting it. Simpler graphics, bold color blocks, and moderate detail levels read cleaner on canvas than fine linework does, since the weave texture competes with tiny details for visual attention.
Caring for Finished DTF Canvas Pieces So They Last
Your peel method choice from earlier in the process directly affects how long the finished piece holds up. Cold peel tends to produce a more durable bond over time than hot peel on canvas specifically, so if longevity matters more than speed, stick with cold. Let every piece cool completely before you handle, stack, or ship it. Warm adhesive is soft adhesive, and soft adhesive smudges or shifts under pressure.
For washable canvas items like totes:
- Wash on a gentle cycle in cold water with a mild detergent
- Skip the dryer’s high heat setting; air dry or use low heat only
- Add a clear protective spray or a thin coat of Mod Podge over the design if you want extra scuff resistance on frequently handled items
For framed or display canvases, store them upright rather than flat whenever possible, and never stack finished prints face-to-face. Adhesive can re-soften slightly in warm storage conditions and transfer onto whatever surface is touching it. A thin sheet of parchment paper between stacked pieces solves this cheaply if upright storage isn’t an option.
Transfer Kingz and Anthony: Tips From the Workshop Floor
Anthony and the Transfer Kingz team have run enough canvas transfers to know exactly where reprints come from, and it’s rarely the equipment. The Transfer Kingz blog covers application workflows in enough depth that hobbyists moving from apparel to canvas can adapt their existing process rather than starting over.
Three shortcuts that consistently cut down on reprints:
- Lower your ink limits on solid canvas designs before printing, not after a crack shows up
- Sieve adhesive powder before every application to catch clumps that cause uneven cure texture
- Always run the two-press lock-in sequence on canvas, even when the first press looks clean
Readers moving between substrates might also want to check the guide on DTF application for cotton apparel for a sense of how ink and peel adjustments shift between fabric and rigid surfaces.
When DTF Beats the Alternatives for Canvas Projects
DTF wins for full-color art and merch made in small batches. It loses to hand-painting or giclée printing when you need heavy paint texture or museum-grade archival life. Rule of thumb: complex color and moderate handling favor DTF over heat transfer vinyl; heavy texture or maximum longevity point elsewhere.
— Anthony
Order Sample DTF Transfers for Your Canvas Projects
Testing settings on your own is worth doing, but it costs you time, film, and a few ruined canvases along the way. Transferkingz cuts that learning curve short: no minimum order requirements, support for canvas and other rigid substrates alongside standard textiles, and a team that answers real questions about ink limits and film choice before you press anything.

Ordering a small sample run first is the fastest way to validate your temperature and pressure settings before committing to a full project. Check the film handling capabilities for detailed artwork if your design carries fine linework, or browse Print Point to see current order options and turnaround times. If your finished canvas piece needs professional mounting or branded signage afterward, The Windows Tinting handles custom branding and die-cut logo work that pairs well with a finished print. Place a sample order this week and have real settings dialed in before your next canvas project.
0 comments