

Printed DTF transfers stored at 65°F–75°F and 40%–55% relative humidity typically stay press-ready for 6–12 months, with premium transfers from suppliers like Transferkingz holding up to 1–2 years under ideal conditions. Poor storage — heat, humidity, direct light — can push transfers into failure within a few months, sometimes faster. Three rules prevent most of that loss:
- Control temperature. Keep storage between 65°F and 75°F. Heat accelerates ink oxidation and adhesive breakdown; freezing causes condensation that ruins adhesion.
- Control humidity. Stay in the 40%–55% RH range. High moisture causes adhesive blooming and powder clumping; very dry air makes film brittle.
- Keep transfers sealed and dark. UV light yellows white ink and shifts colors. Oxygen speeds oxidation. An opaque, airtight container addresses both.
For unprinted DTF film, the shelf life under proper conditions runs longer — often 12–24 months — because the adhesive layer hasn’t been activated yet.
Pro Tip: Label every batch with the print date the moment it comes off the printer. If you’re pulling older stock for a rush order, run a quick test press on a scrap piece first. Two minutes of QA beats a ruined customer shirt.
Key Takeaways
Properly stored DTF transfers last 6–12 months under recommended conditions, and three variables — temperature, humidity, and light/oxygen exposure — determine whether you hit that range or fall short of it.
| Point | Details |
|---|---|
| Target storage conditions | Keep transfers at 65°F–75°F and 40%–55% RH in sealed, opaque containers. |
| Shelf life under proper storage | Printed transfers last 6–12 months; premium transfers up to 1–2 years. |
| Poor storage accelerates failure | Heat, humidity, and UV exposure can cause degradation within a few months or faster. |
| Test before every production run | Run a test press on any batch over 3 months old before committing to customer orders. |
| Transferkingz transfers | Built for 50+ washes and long-term adhesion when stored and applied correctly. |
Table of Contents
- How does DTF storage life degrade at the component level?
- What are the exact storage conditions your shop should hit?
- How should you package and store DTF transfers to protect them?
- How do you build storage rules into your daily production workflow?
- How do you spot a failing transfer before it ruins a customer order?
- What shelf-life ranges should you use for inventory planning?
- What does Transferkingz recommend for storage and QA?
- What small shops actually do right (and what they skip)
- Ready to order transfers you can actually trust in storage?
- Sources
How does DTF storage life degrade at the component level?
DTF transfers are a stack of three functional layers: the pigment/ink layer on top, a hot-melt adhesive powder layer underneath, and the PET carrier film. Each layer responds differently to environmental stress, and understanding which one fails first tells you exactly which storage variable to prioritize.
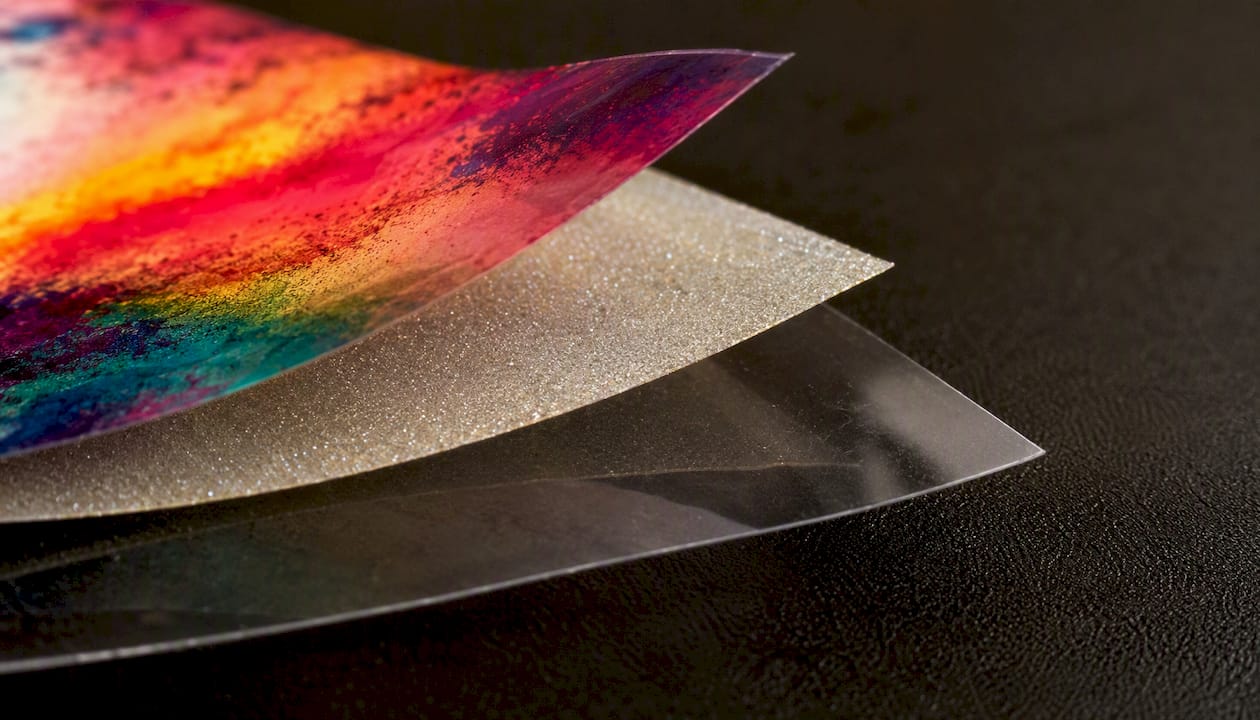
Pigment and ink layer: Pigment particles oxidize when exposed to oxygen and UV light. The result is color shift, fading, and yellowing of white ink — the most visible sign of a degraded transfer. Heat accelerates this reaction significantly.
Adhesive layer: The hot-melt adhesive is the most environmentally sensitive component. High humidity causes it to absorb moisture, which leads to blooming (a hazy, uneven surface) and weak bond strength during pressing. Very low humidity makes the adhesive brittle. Either extreme shortens the window where the transfer will press cleanly.
PET film and powder: The carrier film itself is relatively stable, but it picks up surface contamination — dust, oils from handling, chemical off-gassing from nearby materials — that interferes with ink adhesion and peel behavior. Improper roll tension or heavy stacking can cause permanent curl or edge lifting before a transfer ever reaches the heat press.
Proper storage slows oxidation and preserves adhesion, color vibrancy, and wash durability. The chemistry is straightforward: reduce heat, moisture, light, and oxygen contact, and each layer ages at a fraction of its worst-case rate. Neglect any one of those variables and the failure modes compound quickly.
For a deeper look at how film construction affects adhesion and color, Transferkingz’s film guide covers the tradeoffs in practical terms.
What are the exact storage conditions your shop should hit?
These are the operational targets. Post them near your storage area.
- Temperature: 65°F–75°F (18°C–24°C). This range keeps adhesive chemistry stable and slows ink oxidation. Above 85°F, degradation accelerates noticeably. Below 50°F, condensation risk rises when transfers return to room temperature.
- Relative humidity: 40%–55% RH. Below 35% RH, film and adhesive become brittle. Above 60% RH, moisture absorption causes adhesive blooming and powder clumping.
- Light exposure: zero UV. Store transfers in opaque containers or boxes. Fluorescent shop lighting with UV output causes the same color shift as sunlight — just more slowly. No windows, no open shelving under overhead lights.
- Oxygen exposure: minimize it. Sealed poly bags or airtight bins slow oxidation of the ink layer. Vacuum sealing gives the longest protection for transfers you won’t press for months.
- Airflow and placement: Keep storage away from HVAC vents (temperature swings) and off concrete floors (cold, moisture-wicking surfaces). A shelf at mid-height in a climate-controlled room is the practical sweet spot.
Shop setup checklist:
- Digital thermometer/hygrometer combo (under $20 at most hardware stores)
- Airtight plastic storage bins with lids
- Silica gel desiccant packs inside each bin
- Opaque poly bags or black plastic sheeting for individual batches
- Dedicated shelf away from exterior walls and vents
Avoid refrigeration. The temperature differential when you pull cold transfers into a warm shop creates condensation directly on the adhesive layer — exactly what you’re trying to prevent.
How should you package and store DTF transfers to protect them?
Supplies you need:
- Resealable poly bags or impulse-sealed poly bags
- Airtight plastic bins (Sterilite or similar)
- Silica gel desiccant packs
- Acid-free interleaving sheets or release liner
- Opaque cardboard or plastic boxes for outer protection
- Labeling materials (thermal labels or permanent marker)
For printed transfers stored flat:
- Stack transfers face-to-face or with acid-free interleaving between each sheet to prevent adhesive transfer between layers.
- Squeeze out excess air and seal the poly bag. An impulse sealer gives a tighter seal than a zip closure.
- Drop one silica gel pack into the bag before sealing.
- Place sealed bags flat in an airtight bin. Don’t stack more than 10–15 sheets without a rigid separator.
- Label the outside of the bin with the batch date and ink type.
For transfer rolls and unprinted film:
Keep rolls in their original packaging when possible. If repackaging, wrap loosely in acid-free tissue, then seal in a poly bag. Store horizontally on a shelf — vertical storage puts uneven pressure on the roll core and causes edge distortion. Transferkingz’s film storage guidance covers flat versus roll tradeoffs by film type.
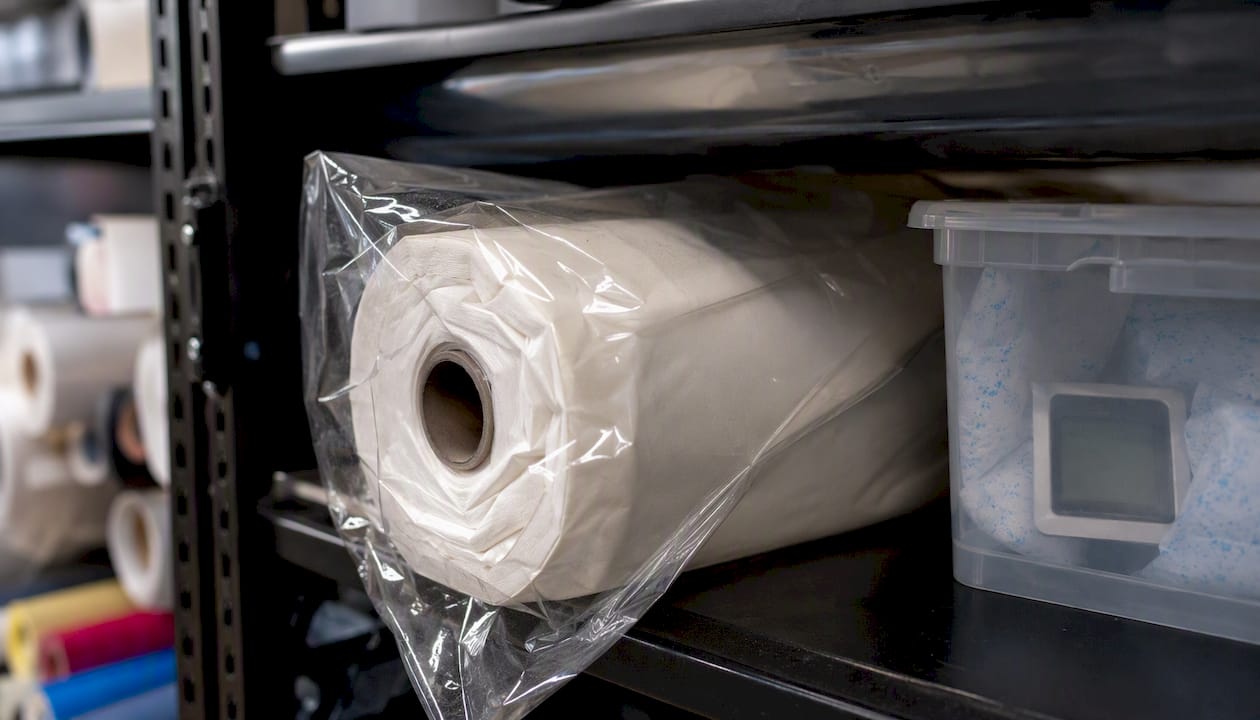
Pro Tip: A $15 digital hygrometer inside your storage bin tells you exactly what’s happening to your transfers. Regenerate silica gel in a 250°F oven for two hours rather than buying new packs every month.
How do you build storage rules into your daily production workflow?
Good storage habits only protect transfers if they survive contact with your actual production process. That means labeling, rotation, and a short acclimation step before pressing.
Labeling basics: Every batch gets a label at packing time with the print date, ink/film batch number, press settings used, and who packed it. A simple thermal label printer makes this fast enough that no one skips it.
FIFO rotation:
- New stock goes to the back of the bin or shelf.
- Oldest stock pulls from the front for the next order.
- Color-coded labels by quarter (blue = Q1, green = Q2, etc.) let anyone on the floor identify age at a glance without reading dates.
Acclimation before pressing: Transfers stored below shop temperature need 30–60 minutes at room temperature before pressing. Cold adhesive doesn’t bond as cleanly, and the temperature differential can cause condensation on the transfer surface. Pull stock from storage at the start of your shift, not right before the press run.
Quality control test press: For any batch older than three months, press one transfer onto a scrap piece of the same fabric before running a customer order. Check hot-peel behavior, edge adhesion, and color accuracy. Transferkingz’s production optimization guide includes inventory controls and test-press routines that work well for small shops.
How do you spot a failing transfer before it ruins a customer order?
Visual signs to check before pressing:
- Yellowing of white ink areas (most common early indicator)
- Uneven gloss or a hazy surface on the adhesive side
- Edge lifting or curling on flat-stored sheets
- Powder flaking or visible crystallization on the adhesive layer
- Surface brittleness when you flex the transfer slightly
Tactile and functional checks: A healthy transfer bends without cracking and has a slightly tacky adhesive surface. If it feels stiff, snaps when flexed, or the adhesive surface looks dry and powdery, it’s degraded.
Troubleshooting steps:
- Run a test press at your standard settings. If adhesion is weak, increase press time by 5 seconds and try again.
- Check hot-peel behavior. If the transfer tears or leaves residue, the adhesive has broken down.
- Try a cold-peel approach if hot-peel is failing — some marginally degraded transfers respond better.
- Document the failure with photos and batch info before discarding. Transferkingz support can assess whether the issue is storage-related or a product defect.
Reject and discard if:
- White ink has yellowed visibly
- Adhesive powder is flaking off before pressing
- The transfer tears during a test peel
- Colors are noticeably shifted from the original proof
Following Transferkingz’s care instructions after application also matters — proper washing practices reduce peeling incidents by about 40%.
What shelf-life ranges should you use for inventory planning?
| Material | Properly Stored (65°F–75°F, 40%–55% RH) | Poor Storage (heat, humidity, UV) |
|---|---|---|
| Printed DTF transfers | 6–12 months; premium up to 1–2 years | Degradation in 1–3 months or faster |
| Unprinted DTF film | 12–24 months | 3–6 months before curl/contamination |
| Pre-pressed / applied goods | Governed by wash care, not storage | Peeling risk rises without proper care |
Practical inventory policy:
- Re-test any printed transfer stock at the 3-month mark with a test press.
- For high-stakes orders (large runs, specialty fabrics, customer-supplied blanks), use only stock under 6 months old.
- Reserve older stock (6–12 months) for internal samples, test runs, or low-risk applications.
- Discard anything showing visible yellowing or adhesive breakdown regardless of age.
Properly stored transfers show minimal quality loss for roughly 6–12 months — that’s the benchmark ImperialDTF’s storage research supports, and it aligns with what Transferkingz’s premium transfers deliver in practice.
What does Transferkingz recommend for storage and QA?
Transferkingz’s transfers are built to last 50+ washes when applied and cared for correctly — but that durability assumes the transfer reaches the press in good condition. Their guidance on preventing common failure modes covers storage, pressing parameters, and handling as a connected system, not isolated steps.
Transferkingz’s recommended shop practices:
- Store transfers in sealed, labeled batches immediately after receiving or printing.
- Run a test press on any batch before committing to a production run.
- Contact support with QA photos if a batch shows unexpected adhesion or color issues — batch and date info speeds up the assessment.
- Follow the published DTF care instructions for end customers to protect wash durability after application.
The company’s durability guide outlines seven specific steps for extending print life, covering both pre-press storage and post-press care.
What small shops actually do right (and what they skip)
Most storage failures in small shops aren’t dramatic. They’re slow and invisible — a batch of transfers that pressed fine in January starts peeling in March, and nobody connects it to the unsealed bin sitting near the dryer vent.
The shops that avoid repeat returns do two things consistently: they label every batch the day it arrives, and they run a test press before any order over 20 pieces. That’s it. No elaborate system, no expensive equipment.
The mistake I see most often is treating storage as a one-time setup rather than an ongoing check. Desiccant packs saturate. Bins get left open. Transfers migrate to a shelf near a window. Build a 60-second weekly check into your routine — glance at the hygrometer, confirm bins are sealed, pull the oldest batch to the front. That habit is worth more than any single piece of storage equipment.
Ready to order transfers you can actually trust in storage?
Storing transfers properly protects your investment, but it starts with transfers worth protecting. Transferkingz prints on premium films with inks formulated for long-term adhesion and color stability — the kind that actually hit that 6–12 month shelf life rather than degrading in weeks.

No minimum order quantities, same-day local pickup available, and nationwide shipping means you can order closer to your production schedule and keep less aging inventory on the shelf. That’s a real reduction in storage risk, not just a storage tip. For shops in Texas, the Dallas custom DTF printing page has ordering details and local pickup options. Ready to place an order or ask a QA question? Visit the Transferkingz Print Point to get started.
Sources
- Proper Storage of DTF Transfers: Shelf Life, Chemistry, and Long-Term Performance – ImperialDTF
0 comments