
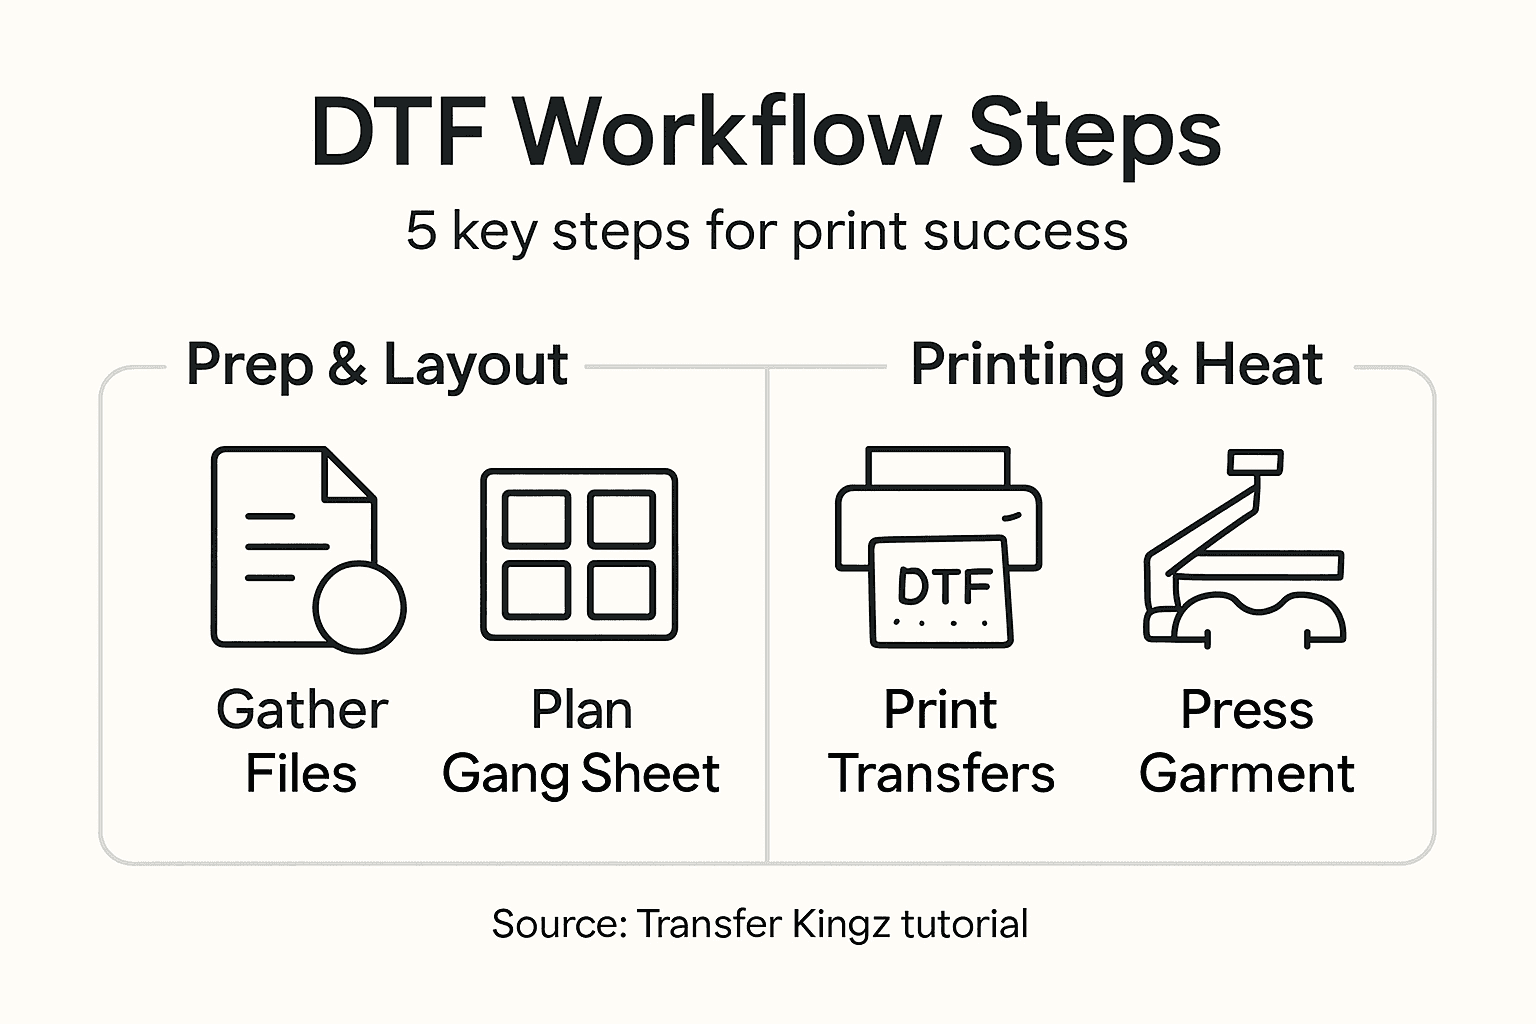
Growing a small clothing brand means juggling creativity and day-to-day demands, especially when custom orders increase. Organizing your artwork and mastering efficient DTF transfer methods is the difference between professional results and wasted materials. By focusing on steps like preparing designs with proper resolution at 300 DPI and strategic gang sheet planning, you set a strong foundation for vibrant prints and happier customers. Whether you ship products to Canadian boutiques or launch your own European label, refining your workflow gives your business the edge it needs.
Table of Contents
- Step 1: Prepare Artwork And Select Gang Sheet Options
- Step 2: Set Up Printer And Arrange Transfer Materials
- Step 3: Print Film Transfers Using Premium Inks
- Step 4: Apply Transfers With Precise Heat Pressing
- Step 5: Inspect Printed Garments For Quality Assurance
Quick Summary
| Key Point | Explanation |
|---|---|
| 1. Prepare Artwork Correctly | Gather and verify files in PNG, PDF, or AI formats, ensuring 300 DPI resolution and CMYK color mode for optimal results. |
| 2. Organize Your Workspace Efficiently | Keep all materials like DTF film and adhesive powder within reach, promoting a smooth workflow to prevent delays and mistakes. |
| 3. Use Premium Inks for Printing | Invest in high-quality DTF inks specifically designed for vibrant and durable transfers, avoiding generic inks that compromise quality. |
| 4. Apply Transfers with Careful Monitoring | Set correct temperature and pressure on the heat press, ensuring proper adhesion and avoiding common pitfalls like misalignment. |
| 5. Conduct Thorough Quality Control | Inspect each garment for transfer adhesion, color accuracy, and defects, ensuring consistent quality before delivery to customers. |
Step 1: Prepare artwork and select gang sheet options
This step sets up your entire DTF printing workflow, so getting it right saves you time, money, and frustration later. You’ll gather your artwork files, check their specifications, and decide how to arrange them on a gang sheet for maximum efficiency.
Start by collecting all the designs you want to print. Make sure each file is in the right format (PNG, PDF, or AI files work best) and stored somewhere you can easily access. If you’re working with customer designs or multiple projects, create a dedicated folder to keep everything organized. This prevents the chaos of hunting through your computer for that one file you need right now.
Next, verify your artwork meets DTF printing requirements. Proper resolution at 300 DPI ensures your prints come out sharp and vibrant, not blurry or pixelated. Check your color mode too—CMYK is the standard for DTF transfers, not RGB. If your designs are in RGB, convert them now before you proceed to the next step. This prevents color surprises when your transfer prints.
Here’s a summary of key artwork preparation checks for DTF printing:
| Factor | Correct Option | Common Issue if Missed |
|---|---|---|
| File Type | PNG, PDF, or AI | Unsupported formats, errors |
| Color Mode | CMYK | Color shifts during printing |
| Resolution | 300 DPI | Blurry, pixelated prints |
| File Organization | Dedicated folder | Lost files, workflow delays |
Now comes the layout planning. Think about how many designs you want to fit on a single film sheet and what sizes they need to be. You’ll want spacing between designs for cutting, plus margins around the edges. A crowded sheet might save materials short term, but poor spacing leads to wasted transfers and frustrated customers. Many small brand owners use custom gang sheet builders to handle the technical arrangement automatically, which takes the guesswork out of layout planning.
Consider your production goals too. Are you running small batch custom orders or prepping bulk inventory? Your gang sheet strategy differs based on your business model. Single large designs need different layout thinking than multiple small designs packed together. Plan this now so your next steps flow smoothly.
Compare production approaches for gang sheet planning:
| Business Model | Gang Sheet Strategy | Benefit |
|---|---|---|
| Small batch orders | Multiple designs, varied sizes | Maximizes film usage |
| Bulk inventory | Large, repeated designs | Faster, consistent workflow |
Pro tip: Keep your original artwork files at their native resolution and save gang sheet versions separately—this prevents accidentally printing low-resolution versions when you meant to use high-quality files.
Step 2: Set up printer and arrange transfer materials
With your artwork ready, it’s time to prepare your DTF printer and organize all the materials you’ll need for the transfer process. This step determines whether your prints come out crisp and vibrant or suffer from alignment issues and quality problems.
Start by checking your printer’s settings and ensuring the driver software is up to date. Load your prepared gang sheet file into your design software or RIP program, then configure the printer to match your film type and ink settings. Different transfer materials require different printer settings, so verify you’re using the correct profile for your specific film. Taking two minutes here saves headaches later when prints don’t match expectations.
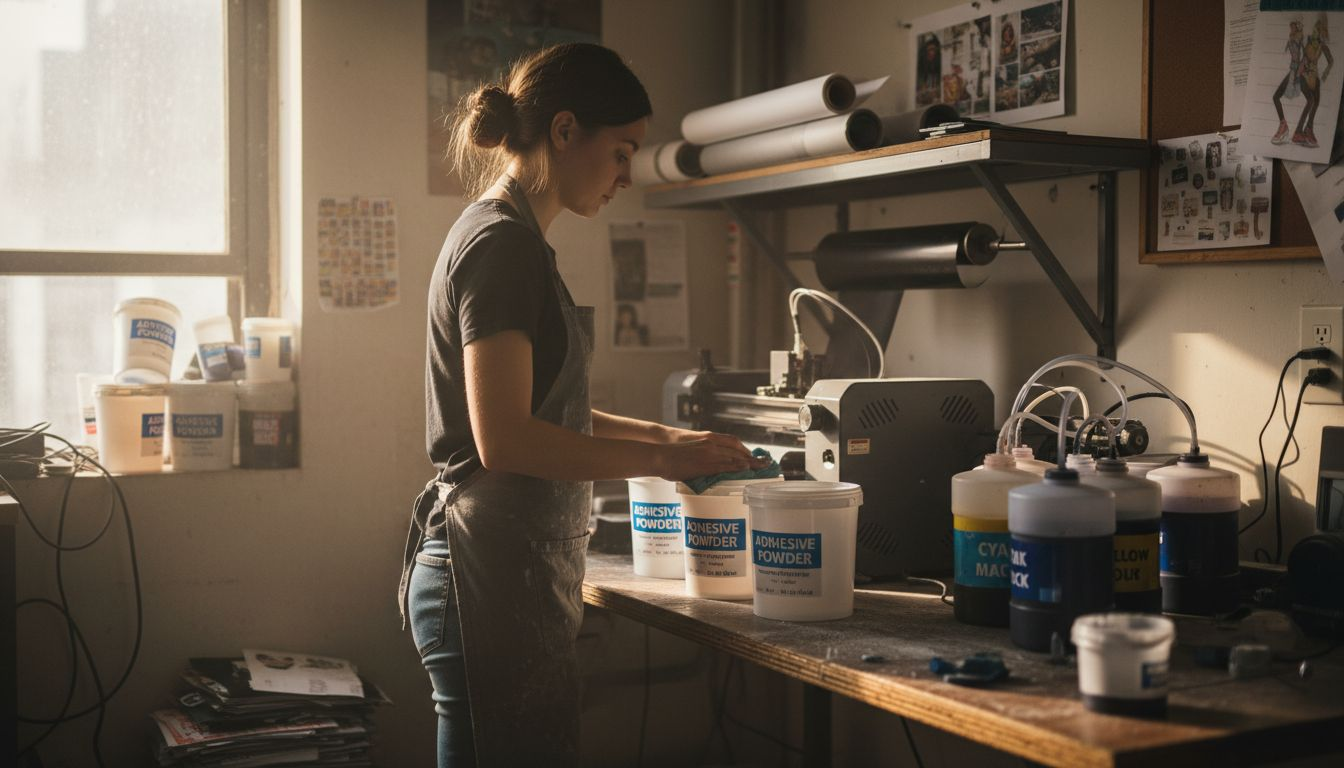
Next, stock up on all the transfer materials you need. You’ll require DTF film, adhesive powder, and the appropriate ink cartridges for your printer model. Before beginning production, review what you need by checking a perfect DTF transfer checklist to ensure nothing gets forgotten during your workflow. Running out of adhesive powder halfway through a job wastes time and frustrates your customers.
Organize your workspace logically. Keep film rolls or sheets within arm’s reach of your printer, place your adhesive powder dispenser nearby, and arrange your curing oven or heat press in a convenient location. Your production area should flow smoothly from printer to powder application to curing. A cluttered workspace leads to mistakes, spilled materials, and slower production times.
Test print one design before committing to your full batch. Feed a test sheet through the printer, apply powder, and cure it to verify everything works correctly. This catches color issues, alignment problems, or equipment malfunctions before they ruin 50 transfers. Small brands can’t afford to waste materials, so this test run is non-negotiable.
Pro tip: Keep your DTF film stored flat in a cool, dry place away from direct sunlight, and always let film acclimate to room temperature for 30 minutes before opening the package to prevent moisture issues.
Step 3: Print film transfers using premium inks
This is where your designs come to life. Printing with quality inks directly onto DTF film creates the foundation for vibrant, durable transfers that your customers will love wearing. The ink quality and print settings you choose now determine whether your final product stands out or fades after a few washes.
Before hitting print, double check your printer settings one more time. Verify that your color profile matches your ink type and film, and confirm the print quality is set to maximum or best quality mode. Rushing through this step to save time backfires when prints come out dull or misaligned. Give yourself 30 seconds to review everything before you press go.
Use premium DTF ink formulations designed specifically for DTF printing, not generic inkjet inks. Premium inks contain pigments that bond properly to the film and cure correctly under heat, producing colors that don’t crack or peel. Cheap inks save money upfront but ruin your reputation when transfers fail. Your brand depends on quality, so invest in inks built for DTF.
Feed your film through the printer carefully, ensuring it sits flat and feeds straight. Crooked film leads to misaligned prints and wasted materials. Watch the first few transfers come through to spot any issues immediately. If colors look off, alignment is wrong, or the nozzles aren’t spraying correctly, you’ll catch it before printing 100 bad transfers.
Once printing finishes, let the ink dry completely before moving to the powder application stage. Most modern DTF inks dry in seconds, but don’t rush this. Handling wet ink causes smudging and color contamination. Fresh prints need a moment to set before the next step in your workflow.
Pro tip: Clean your printer’s nozzles every few days of production to prevent clogging and color banding, which degrades print quality and wastes expensive premium inks.
Step 4: Apply transfers with precise heat pressing
Applying your DTF transfers correctly makes the difference between prints that last for years and ones that peel or crack after a few washes. This step requires attention to temperature, pressure, and timing, but once you nail it, you’ll produce professional quality transfers consistently.
Start by preparing your garment. Lay it flat on your heat press and smooth out any wrinkles or bunches. A wrinkled shirt creates uneven heat distribution, leading to poor adhesion in some areas. Take 10 seconds to get the garment sitting perfectly before you begin. Your finished product depends on this foundation.
Set your heat press to the correct temperature and pressure for your specific fabric type. Cotton typically requires around 300 to 320 degrees Fahrenheit, while polyester or blends may need adjustment.
Place your printed and powered transfer face down onto the garment with the film side facing up. Position it carefully because once you close the press, you can’t easily reposition it without creating alignment issues. Press down with consistent, even pressure for the recommended time, typically 10 to 15 seconds depending on your equipment and fabric. Don’t rush this step or apply excessive pressure, as both cause problems.
When the timer sounds, lift the heat press carefully and let the transfer cool for a few seconds. Peel away the film slowly and at a slight angle. If the powder and ink stick to the film instead of transferring to the fabric, your temperature or pressure was too low. A second press cycle often fixes this issue and improves durability anyway.
Pro tip: Keep a temperature gun handy to verify your heat press is reaching the actual temperature you set, as many presses drift over time and cause inconsistent transfer results.
Step 5: Inspect printed garments for quality assurance
Quality control is where you protect your brand reputation. Before sending finished garments to customers, you need to inspect each piece for defects, color accuracy, and durability. This final checkpoint catches problems before they damage customer relationships.
Start by examining the transfer adhesion. Run your finger across the printed area firmly. Does the transfer feel bonded securely to the fabric, or does it shift or peel slightly? A properly applied transfer should feel like part of the garment, not a separate layer sitting on top. If you notice peeling, your heat press temperature or dwell time was too low. Make adjustments before printing more units.
Check color accuracy next. Compare your printed garment against your original artwork or a color reference sample in good lighting. Colors should match closely without unexpected shifts toward yellow, purple, or other unwanted tones. If all garments show the same color issue, your printer profile needs adjustment. If only some garments have problems, you likely have inconsistent heat press temperature or pressure across the platen.
Look for common defects like missing ink spots, color banding, or white powder residue. Missing ink indicates nozzle clogs that need cleaning before your next production run. Color banding shows horizontal lines across the transfer, usually from uneven ink distribution. White powder left on the fabric means you didn’t remove excess adhesive powder before pressing. Each issue has a specific fix, but you need to spot them first.
Following DTF printing best practices helps prevent most quality issues, but inspection catches the rest. Test garment durability by flexing and stretching the transfer gently. It should move with the fabric without cracking or peeling. Wash one test garment in hot water with detergent to verify the transfer survives normal care.
Pro tip: Create a simple checklist with photos showing acceptable versus defective transfers, then use it consistently for every batch so quality standards stay uniform across all your production.
Streamline Your Apparel Printing Workflow with Premium DTF Transfers
Mastering the DTF transfer workflow is essential for producing vibrant and durable custom apparel without costly mistakes or delays. If you struggle with organizing artwork, optimizing gang sheets, or achieving consistent heat press results this article’s insights paired with Transfer Kingz’s solutions can transform your printing experience. Avoid common pitfalls like color shifts, poor adhesion, and wasted materials by leveraging our specialized tools and high-quality products designed for every step of your production.
Explore our DTF transfers, custom apparel printing, heat transfers, t-shirt printing, high-quality prints to get premium films, inks, and transfer supplies that ensure exceptional print quality and reliability.

Elevate your printing process by visiting Transfer Kingz today. Organize your designs effortlessly, access professional-grade transfer materials, and place orders with no minimums. Let us help you save time, reduce errors, and deliver customer-ready apparel that stands out. Start optimizing your workflow now with expert guidance and industry-leading products at Our Shop that support every stage from artwork preparation through heat pressing.
Frequently Asked Questions
What is the first step in preparing for DTF printing?
The first step is to gather and prepare your artwork files, ensuring they are in the correct format and meet DTF printing specifications. Organize your files in a dedicated folder to streamline your workflow and prevent losing important designs.
How do I verify that my artwork meets DTF printing requirements?
Check that your artwork is in the proper file format (PNG, PDF, or AI), set to CMYK color mode, and has a resolution of 300 DPI. This ensures sharp and vibrant prints, avoiding common issues like blurriness or color shifts during printing.
What printer settings should I use for printing DTF transfers?
Configure your printer to match your DTF film type and ink settings by using the appropriate profile for your specific materials. Always double-check that your print quality is set to maximum before starting the printing process.
How can I ensure successful transfer application with heat pressing?
Set your heat press to the correct temperature and pressure based on the fabric type, and ensure your garment is smooth and flat before pressing. Carefully place your transfer face down and press it with even pressure for the recommended duration to achieve a durable bond.
What are some common quality control checks after printing garments?
Inspect each printed garment for transfer adhesion, color accuracy, and defects like missing ink or white powder residue. Run your finger across the transfer to check its bond with the fabric, and wash a test garment to confirm the transfer withstands normal laundering.
0 comments