

TL;DR:
- A home heat press setup involves organizing your workspace, selecting suitable equipment, and calibrating settings for consistent transfers.
- Properly adjusting heat, time, and pressure ensures transfers last through many washes and prevents peeling.
A home heat press setup is the process of arranging your workspace, selecting your equipment, and configuring your machine to apply heat transfers to garments and other substrates with consistent, professional results. Getting this right from the start determines whether your prints last through dozens of washes or peel after the first one. This guide covers everything you need: machine types, calibration settings, garment preparation, and peeling technique. Whether you’re a hobbyist making custom tees or a small business owner building a production workflow, these steps apply directly to your situation.
What is home heat press setup and why it matters
A home heat press setup is more than just plugging in a machine. It combines three variables: heat, time, and pressure. All three must be correct for a transfer to bond properly. If even one is off, the print will fail regardless of how well the other two are dialed in. That’s the foundational rule every home presser needs to internalize before touching a garment.
The standard industry term for this process is “heat transfer application,” and it covers everything from heat transfer vinyl (HTV) to Direct-to-Film (DTF) transfers and sublimation. Each transfer type has its own requirements, but the setup principles stay the same. A well-organized workspace, a calibrated machine, and properly prepared materials are the three pillars of every successful press.
Transferkingz, a leader in the DTF transfer industry, builds its entire product line around the assumption that home users and small businesses can achieve professional results when their setup is correct. That assumption is right, and this guide shows you exactly how.
What equipment do you need for a home heat press?
The machine type you choose shapes your entire workflow. Three formats dominate the home market.
- Clamshell presses open vertically like a clamshell. They take up less space and cost less, making them the most popular choice for beginners. The trade-off is that your hands stay close to the hot platen when positioning transfers.
- Swing-away presses move the top platen completely to the side. This gives you full, safe access to the lower platen for positioning, and it delivers more even pressure across the entire surface.
- Draw-type presses pull the lower platen out toward you before pressing. They offer the same safety benefit as swing-away models and work well in tight spaces.
For most home setups, a 15x15-inch swing-away press hits the right balance of workspace safety, platen coverage, and price. A clamshell works fine for flat items and small runs.
Beyond the machine, your workspace needs a sturdy, heat-resistant table. A wobbly surface causes uneven pressure, which ruins transfers. Place the press near a dedicated outlet rated for its amperage draw. Most home presses run on standard 110V circuits, but check the machine’s spec sheet before plugging in. Keep a fire extinguisher within reach and never leave the press unattended while it’s heating.
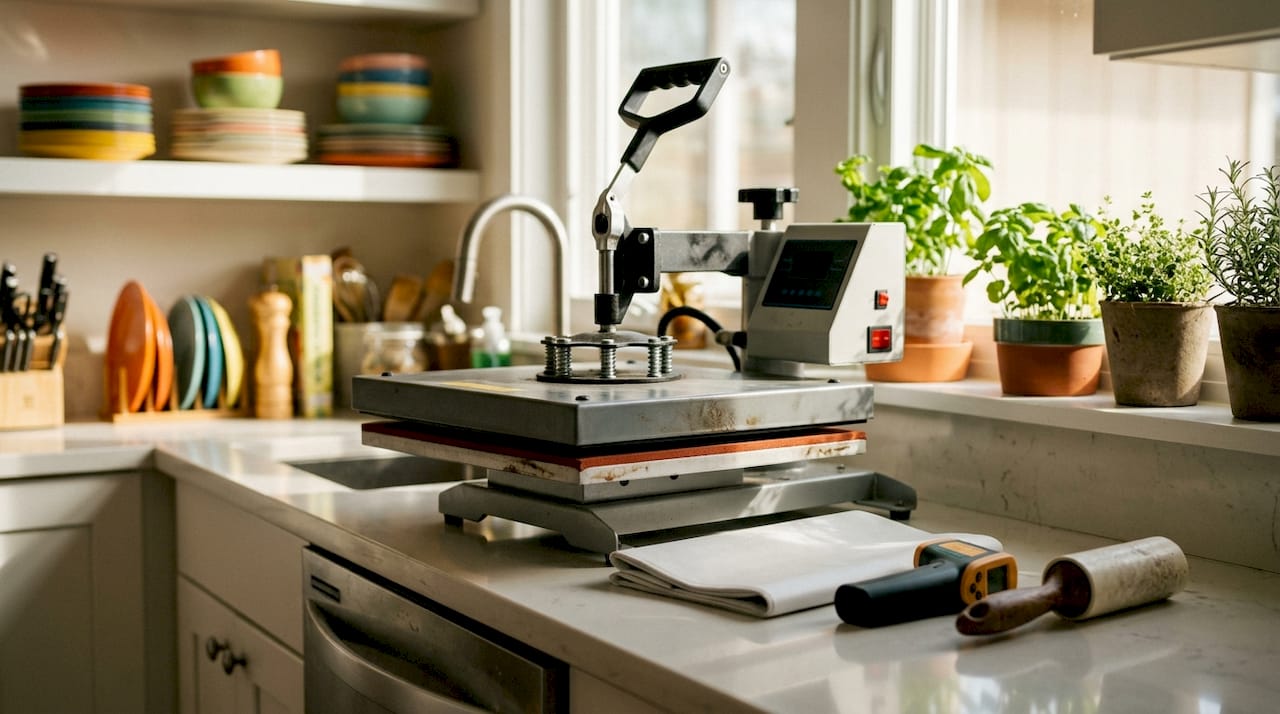
Pro Tip: Keep a small cart or shelf next to your press for Teflon sheets, transfer materials, and a lint roller. Reaching across a hot platen to grab supplies is how accidents happen.
How do you configure temperature, time, and pressure settings?
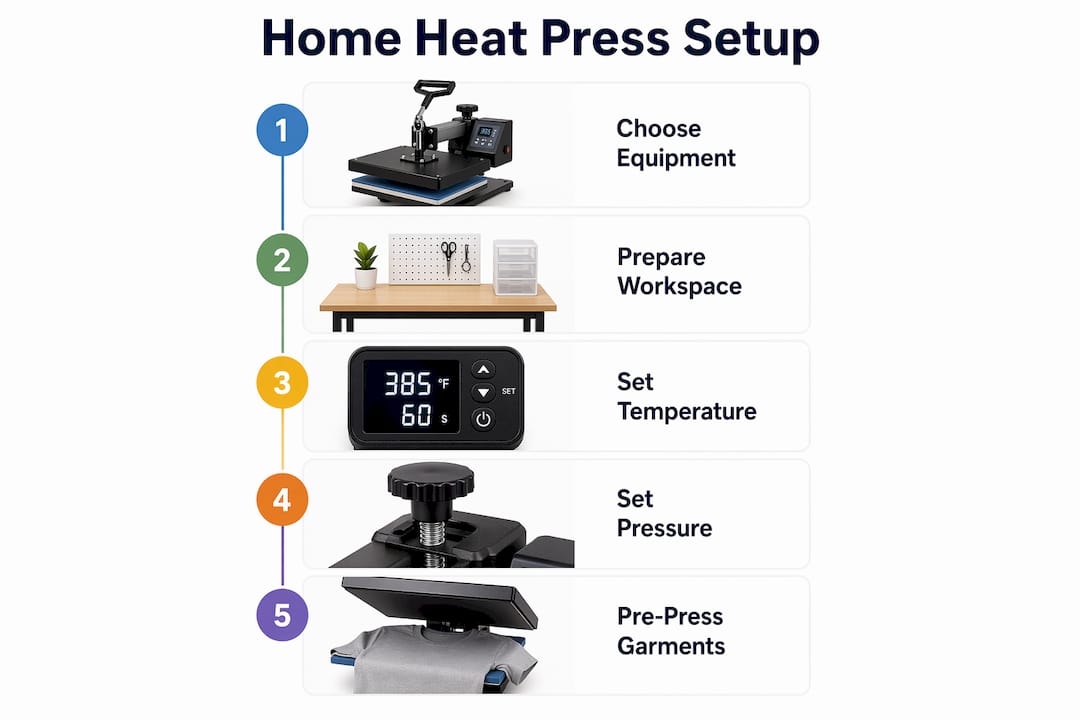
Calibration is where most beginners get stuck. The good news is that manufacturer settings are baselines, not absolutes. Budget home presses often run hotter or cooler than the dial indicates, so treat every new machine as unproven until you test it.
Temperature and time by transfer type
Different transfer materials require very different settings. Use this table as your starting reference, then verify with test presses.
| Transfer Type | Temperature | Time |
|---|---|---|
| Heat Transfer Vinyl (HTV) | 305°F–320°F | 10–15 seconds |
| Sublimation transfers | 385°F–400°F | 45–60 seconds |
| Plastisol transfers | 350°F–375°F | 8–10 seconds |
| DTF transfers | 300°F–320°F | 10–15 seconds |
These temperature and time ranges are the industry standard starting points. Sublimation runs significantly hotter and longer because the dye must gas into the fabric fibers. HTV and DTF transfers bond at lower temperatures because the adhesive layer does the work.
How to set pressure correctly
Pressure is the most overlooked variable. Too little pressure leaves the transfer partially unbonded. Too much crushes the fabric and distorts the design. The standard test is the “paper drag” method: slide a sheet of paper between the closed platens. You should feel moderate resistance, not a free slide and not a locked grip.
- Close the press on a folded towel the same thickness as your garment.
- Adjust the pressure knob until you feel firm, even resistance.
- Open the press, remove the towel, and place your actual garment.
- Do a 3-second test press on a scrap piece of the same fabric.
- Inspect the scrap for even heat distribution before pressing your real transfer.
Pro Tip: Use an infrared thermometer to spot-check your platen temperature. Point it at three spots: center, left edge, and right edge. A difference of more than 10°F across the platen means your machine has hot spots, and you’ll need to rotate your garment or adjust placement to compensate.
Testing on scrap fabric before pressing a finished garment prevents wasted materials and catches calibration errors before they cost you money.
How do you prepare garments and transfers before pressing?
Preparation is the step most beginners skip, and it’s the reason most beginner prints fail. Skipping the pre-press step is the single most common cause of bubbles and incomplete bonding. Moisture trapped in fabric fibers turns to steam under the platen and lifts the transfer before the adhesive sets.
The fix is simple. Pre-press every garment for 3–5 seconds before placing your transfer. This removes moisture and flattens wrinkles, giving the adhesive a clean, dry surface to bond to.
Follow these preparation steps in order:
- Lint roll the garment. Dust and fibers break the bond between transfer and fabric.
- Pre-press for 3–5 seconds. Remove moisture and wrinkles completely before positioning anything.
- Let the garment cool for 5–10 seconds. Placing a transfer on a hot garment can cause it to shift before you close the press.
- Position your transfer carefully. Use a ruler or alignment tool to center the design. Once the press closes, repositioning is not possible.
- Cover with a Teflon sheet. A Teflon sheet or heat-resistant cover protects the platen from adhesive residue and shields sensitive fabrics from direct heat.
- Mirror your design when required. HTV requires a mirrored cut because you press the adhesive side down. DTF and sublimation transfers are printed ready to press, so no mirroring is needed.
Cleaning the lower platen with a damp cloth between sessions also prevents adhesive buildup from contaminating future garments.
How do you execute the press and peel correctly?
Pressing is straightforward once your machine is calibrated and your garment is prepared. The most important rule: start the timer only after full pressure is applied. Pressing the timer the moment you close the press is a common mistake. The platen needs a half-second to make full contact before the clock starts.
Never open the press mid-cycle. Lifting the platen early interrupts heat transfer and leaves the adhesive partially cured. The result is a transfer that looks fine initially but peels within a few washes.
Hot peel vs. cold peel
Peeling technique is as important as pressing parameters. The wrong peel method ruins an otherwise perfect press.
- Hot peel transfers are designed to be peeled immediately after pressing, while the garment is still hot. Waiting too long causes the carrier film to bond too tightly to the design.
- Cold peel transfers must cool completely before you remove the carrier. Peeling while hot tears the design or leaves patches on the film.
Check your transfer’s instructions before pressing. DTF transfers from Transferkingz specify the correct peel method on the product page.
Peel at a 45-degree angle and move slowly. Watch the edges of the design as you peel. If any part of the design lifts with the carrier film, lay it back down, re-press for 5 seconds, and try again. Rushing the peel is the fastest way to ruin a finished garment.
Pro Tip: Keep a peeling transfers log for your first 20 presses. Note the transfer type, temperature, time, pressure, and peel result. Patterns emerge quickly, and you’ll dial in your machine’s quirks within a week.
Maintenance extends machine life significantly. Wipe the platen after every session, check the pressure knob for wear monthly, and inspect the power cord for fraying. A well-maintained press lasts years longer than a neglected one.
Key Takeaways
A successful home heat press setup requires correct calibration of heat, time, and pressure working together, with no single variable able to compensate for another that is off.
| Point | Details |
|---|---|
| Pre-press every garment | A 3–5 second pre-press removes moisture and prevents bubbles and adhesion failure. |
| Calibrate with test presses | Treat manufacturer settings as baselines and verify with scrap fabric before pressing real garments. |
| Match settings to transfer type | HTV, sublimation, plastisol, and DTF transfers each require different temperature and time ranges. |
| Peel at 45 degrees | Slow, angled peeling prevents design lifting and preserves transfer durability. |
| Start the timer after full pressure | Beginning the timer before full platen contact leads to undercured transfers that peel early. |
What I’ve learned after years of watching home setups go wrong
The most expensive mistake I see home pressers make is trusting the dial. A press that reads 320°F at the dial might run 295°F at the platen edge. That 25-degree gap is the difference between a transfer that lasts and one that peels after the second wash. An infrared thermometer costs less than a single ruined garment, and it pays for itself on the first session.
The second thing I’d tell every beginner is that the beginner heat press checklist matters more than the machine brand. I’ve seen entry-level presses produce flawless results because the operator followed every preparation step. I’ve also seen expensive machines produce garbage because the operator skipped pre-pressing and guessed at pressure.
The pre-press step feels like wasted time until you skip it once and spend 20 minutes trying to figure out why your transfer has bubbles. Moisture is invisible. You can’t see it in the fabric, but the press finds it every time.
Finally, patience with the peel is where most good presses get ruined. The garment is hot, the design looks great, and the temptation is to rip the carrier off fast. Slow down. Peel at 45 degrees. Watch the edges. That 10-second difference in peeling speed is the difference between a print that lasts 50 washes and one that starts lifting after five.
— Anthony
Ready to press with transfers that are built for home setups
Getting your machine calibrated and your workspace organized is the hard part. The transfers you press should make the rest easy.

Transferkingz specializes in high-quality custom DTF transfers designed for exactly the kind of home and small business setups covered in this guide. Every order ships with clear application instructions, no minimum quantities, and fast turnaround times. Whether you’re pressing one shirt or a hundred, Transferkingz delivers vibrant, durable transfers that work with the settings and techniques you’ve just learned. For Texas-based home pressers, DTF printing in Texas is available with local support and the same premium quality.
FAQ
What is the correct temperature for HTV heat transfers?
HTV requires 305°F–320°F for 10–15 seconds. Always verify with a test press on scrap fabric before pressing a finished garment.
Why does my heat transfer have bubbles after pressing?
Bubbles almost always mean moisture was trapped in the fabric. Pre-pressing for 3–5 seconds before applying the transfer removes that moisture and eliminates the problem.
What is the difference between hot peel and cold peel?
Hot peel transfers are removed immediately after pressing while still warm. Cold peel transfers must cool completely before you remove the carrier film. Check the transfer’s instructions to confirm which method applies.
How do I know if my heat press pressure is correct?
Slide a sheet of paper between the closed platens. You should feel moderate resistance. If the paper slides freely, increase pressure. If it locks completely, reduce pressure.
Do DTF transfers work with a standard home heat press?
Yes. DTF transfers apply at 300°F–320°F for 10–15 seconds, which falls within the range of most home presses. Best practices for heat pressing confirm that consistent pressure and a proper pre-press are the keys to clean DTF results.
0 comments