
TL;DR:
- Regularly maintaining your DTF printer with daily, weekly, and monthly routines prevents costly clogs and print failures. Using manufacturer-approved cleaning solutions, controlling environmental conditions, and scheduling deep cleans strategically are key to consistent, high-quality prints. Proper upkeep extends equipment lifespan and ensures reliable production, saving time and money in the long run.
If you own a Direct-to-Film printer and have ever watched a print job come out with streaks, missing colors, or ghost lines, you already know the cost of neglected maintenance. Learning how to maintain DTF equipment the right way is not complicated, but it does require consistency. Skip a few end-of-day routines and you are looking at clogged printheads, ruined film, and repair bills that dwarf what a proper upkeep routine would have cost. This guide walks you through daily, weekly, and monthly care so your machine runs clean, your prints look sharp, and your shop stays productive.
Key takeaways
| Point | Details |
|---|---|
| Daily care prevents most failures | A 5-minute daily routine addresses white ink clogs before they become expensive printhead damage. |
| Know your cleaning agents | Use manufacturer-approved solutions and never use alcohol on the encoder strip to avoid alignment damage. |
| Environment matters as much as cleaning | Stable temperature (20–24°C) and humidity (40–60%) reduce ink viscosity problems and nozzle clogs. |
| Deep cleaning is a last resort | Reserve deep cleaning for persistent clogs or after storage. Overusing it wastes cleaner ink and machine time. |
| Verify after every cleaning session | Run a nozzle check immediately after any maintenance to confirm the printer is ready for production. |
How to maintain DTF equipment: your essential toolkit
Before you can run a solid maintenance program, you need the right supplies on hand. Scrambling to find a cleaning solution after a clog appears is how small problems become half-day shutdowns.
Here is what every shop should stock:
- Lint-free cloths for wiping exterior surfaces and platens without leaving fibers
- Non-woven fabric swabs for cleaning the capping station, wiper blade, and delicate printhead components
- Manufacturer-approved cleaning solution or cleaner ink for all internal components
- 75% isopropyl alcohol for select internal surfaces (but not the encoder strip, as explained below)
- Wiper blades as replacements when the current blade shows visible wear or hardening
- Dampers to have ready when ink flow becomes inconsistent
- Disposable gloves to protect your hands and avoid contaminating print surfaces
| Tool | Purpose | Replenishment frequency |
|---|---|---|
| Lint-free cloths | Exterior and platen wipe-down | Weekly |
| Non-woven swabs | Capping station and wiper cleaning | Daily |
| Cleaner ink | Internal component and encoder strip cleaning | Monthly or as needed |
| Isopropyl alcohol (75%) | Internal surfaces excluding encoder strip | Monthly |
| Wiper blades | Replace worn blades to protect printhead | Every 1–3 months |
| Dampers | Restore ink flow when output becomes uneven | Every 3–6 months |
One critical detail that trips up a lot of decorators: the encoder strip requires cleaner ink only. Alcohol dissolves the fine markings on the strip, and once those are gone, your printhead alignment suffers in ways that are difficult to diagnose and expensive to fix. Keep your cleaning agents labeled and separate so no one on your team reaches for the wrong bottle.
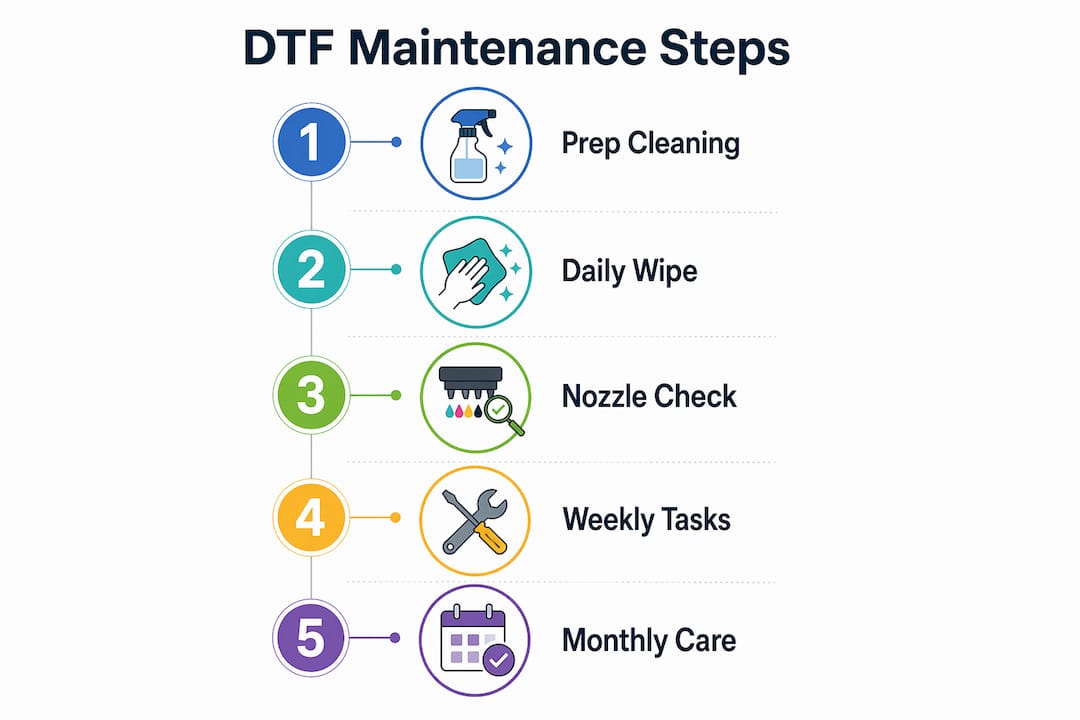
Your daily maintenance routine
Think of daily maintenance as a 5-minute investment that protects a machine that likely cost thousands of dollars. A practical 5-minute daily workflow prevents white ink clogs and the costly failures they cause. White ink is the most problematic ink in any DTF setup because its pigment particles settle and solidify faster than other colors.
Here are the steps to run through every single day:
- Agitate the white ink cartridge or bag before printing. White ink pigment settles quickly, so gently shaking or stirring it before use keeps the pigment evenly suspended and prevents the thick deposits that cause clogging.
- Run a nozzle check pattern and read the results before starting production. A clean, complete pattern means you are good to go. Missing segments indicate which nozzle rows need attention.
- Clean the capping station and wiper blade. The capping station is the rubber-sealed area where the printhead rests when idle. End-of-day cleaning reduces nozzle clog risk during the hours your printer sits unused. Use a non-woven swab dampened with cleaner ink to remove dried ink buildup from both the capping station and wiper blade.
- Wipe down the exterior and platen area with a lint-free cloth. Film dust and loose particles settle on print surfaces and can transfer to the film path.
- Check ink levels in every channel. Running a channel dry introduces air bubbles into the ink lines, and clearing those takes far more time than a quick refill would have.
- Inspect the film path for adhesive residue, debris, or smears. Even a small contaminant on the film path can create repeating print defects across a full production run.
- Clean the capping station one final time at the end of the day before shutting down. Skipping end-of-day cleaning leads directly to ink drying on the nozzle plate, which escalates maintenance needs and expense over time.
Pro Tip: Run your nozzle check immediately after any cleaning step, not just at the start of your shift. Validating maintenance effectiveness right away confirms the printer is production-ready and stops you from wasting film on a defective run.
The biggest mistake most small shops make is skipping the end-of-day cleanup when things get busy. Those are precisely the days when it matters most.
Weekly and monthly maintenance tasks
Daily routines handle surface-level care. Weekly and monthly procedures go deeper and protect the parts of your machine that daily wiping cannot reach.
Weekly tasks
- Clean the encoder strip carefully using cleaner ink and a non-woven swab. This narrow clear strip runs horizontally across the printer carriage and tells the machine where the printhead is at all times. A dirty encoder strip causes banding and misalignment.
- Empty and clean the waste ink tank. Overflow from a full waste tank can damage internal components and create a messy, time-consuming repair situation.
- Clean the rubber rollers that guide the film through the printer. Ink residue on rollers creates uneven film tension, which shows up as wavy or misaligned prints.
- Inspect the wiper blade for hardening, cracks, or curling. A degraded wiper leaves ink smears on the printhead rather than cleaning it.
Monthly tasks
- Inspect the dampers and replace any that show air bubbles, discoloration, or reduced flow. Dampers act as filters between your ink supply and the printhead, and worn dampers starve the printhead of consistent ink delivery.
- Flush the ink lines if you notice color inconsistency that does not resolve after standard cleaning. This process uses cleaner ink to push old, partially settled ink through the lines.
- Clean internal components including the ink pad and film tray using the appropriate cleaning solutions. Use isopropyl alcohol for appropriate internal surfaces but never on the encoder strip.
- Run a full calibration check to verify printhead alignment and color output match your expected standards. Update firmware and RIP software if manufacturer updates are available.
| Task | Frequency | Estimated time |
|---|---|---|
| Encoder strip cleaning | Weekly | 5–10 minutes |
| Waste ink tank emptying | Weekly | 5 minutes |
| Roller cleaning | Weekly | 10 minutes |
| Wiper blade inspection | Weekly | 2 minutes |
| Damper inspection and replacement | Monthly | 15–30 minutes |
| Ink line flushing | Monthly or as needed | 20–30 minutes |
| Full calibration check | Monthly | 15–20 minutes |
| Firmware and software update | Monthly | 10–20 minutes |
Scheduling weekly and monthly tasks on specific days prevents them from being pushed back indefinitely. Many shops tie weekly maintenance to a slow production day or the start of the week.
Deep cleaning and troubleshooting persistent issues
Deep cleaning is not a regular procedure. It is reserved for specific situations: the printer has been in storage, it was transported and may have experienced ink settling, or there are persistent clogs that standard cleaning cycles cannot resolve.
Here is what a deep clean process looks like in practice:
- Gather your supplies: cleaner ink (plan for approximately 300ml consumed during the process), non-woven swabs, gloves, and your printer’s manual for model-specific steps.
- Start with automatic cleaning cycles. Run 2-3 automatic cycles before attempting any manual intervention. Most clogs respond to automatic cycles, which saves cleaner ink and avoids unnecessary contact with sensitive components.
- If automatic cycles do not resolve the issue, fill the capping station with cleaner ink and allow it to soak against the printhead nozzle plate for 15 to 30 minutes. This softens dried ink deposits.
- After soaking, run another automatic cleaning cycle to draw the dissolved ink through.
- Manually wipe the printhead nozzle plate with a dampened non-woven swab if the soak did not fully clear the clog. Use light, single-direction strokes and never scrub.
- Run a nozzle check to assess results. Repeat the soak-and-cycle sequence if needed, but limit manual contact to protect the nozzle plate surface.
- Reassemble and run a final nozzle check before returning to production.
Pro Tip: Schedule deep cleaning strategically around production, not during it. The process takes 30–45 minutes and consumes significant cleaner ink, so plan it for a downtime window rather than discovering mid-run that you need it.
One pattern worth noting: shops that run solid daily and weekly routines rarely need deep cleaning more than once or twice a year. If you find yourself deep cleaning monthly, the daily routine is being skipped somewhere. You can find additional guidance on diagnosing common DTF issues to help you identify the root cause before reaching for deep cleaning as a default.
Maintaining the right print environment
Your printer’s physical environment is often overlooked in discussions about the upkeep of DTF machines, but it directly affects ink behavior and print consistency. Ink is sensitive to temperature and humidity, and a poorly controlled room creates problems that no cleaning routine can fully compensate for.
The recommended range is 20–24°C with 40–60% humidity, kept stable throughout the day. Environments outside this range cause white ink to thicken, color ink to dry prematurely at the nozzle, or film to curl and feed unevenly.
Here are the key do’s and don’ts for your print environment:
Do:
- Place your printer away from windows where direct sunlight causes temperature spikes
- Use a room thermometer and hygrometer to monitor conditions actively
- Run your printer daily, even for small jobs, to keep ink circulating through the lines
- Use a humidifier in dry climates or during winter months when indoor air dries out
Don’t:
- Position your printer near air conditioning vents or fans that create airflow extremes directly over the machine
- Allow the printer to sit completely unused for more than two or three days without running a nozzle check and cleaning cycle
- Use generic or off-brand inks that may have different viscosity profiles and behave unpredictably with your specific hardware
- Ignore worn parts hoping they hold out longer. A degraded wiper blade or cracked damper creates cascading problems that cost more to fix than the part itself
Keeping your printer active is one of the most underappreciated best practices for DTF equipment. A machine that sits idle lets ink settle and dry at the nozzle, especially white ink. Even a small 4x4 test print every couple of days during slow periods keeps the ink lines healthy. For a broader look at how maintenance habits connect to overall output quality, the DTF transfer quality checklist from Transferkingz is worth bookmarking.
My honest take on DTF equipment maintenance
I have worked with enough print shops to see a clear pattern. The operators who treat maintenance as a non-negotiable workflow step almost never face the catastrophic failures that sideline a business for days. The ones who skip it because they are busy are the same ones posting in forums at midnight asking why their printhead needs replacement after six months.
The most common mistake I see in smaller operations is treating deep cleaning as the first response to any problem. In my experience, excessive deep cleaning actually accelerates wear on nozzle plates and burns through expensive cleaner ink faster than necessary. If your daily routine is solid, deep cleaning becomes a rare event, not a weekly scramble.
What I have also learned is that environment control is the maintenance step that gets the least attention and causes the most undiagnosed problems. A shop running at 30% humidity in winter will fight white ink clogs constantly and blame the ink or the printer when the real fix is a $30 humidifier.
The practical advice I give every small shop is this: write out your daily checklist, tape it to the wall next to the printer, and follow it even on the days that feel too busy. Those are exactly the days when shortcuts create the biggest repair bills later. And if you want operational scheduling guidance that goes beyond the printer itself, print shop management resources can help you build a workflow where maintenance fits naturally rather than competes with production.
— Anthony
How Transferkingz supports your DTF printing operation
Whether you are running a tight maintenance schedule or looking to upgrade the quality of your transfers, Transferkingz is built to support apparel decorators at every production level.

Transferkingz specializes in premium DTF transfers that deliver sharp, vibrant results right out of the box, so even when your printer is down for maintenance or you need to fulfill an urgent order, you have a reliable production option. The team also offers custom DTF printing services for businesses across the region, with quick turnarounds and no minimum order requirements. If you are in Texas, explore the full range of custom DTF printing options available for regional orders. Transferkingz is the kind of partner that keeps your shop moving even on maintenance days.
FAQ
What should I clean on my DTF printer every day?
Clean the capping station, wiper blade, and film path daily, and always agitate white ink before printing. Run a nozzle check at the start and end of each day to catch problems early.
How often should I replace DTF printer dampers?
Inspect dampers monthly and replace them when you see air bubbles, discoloration, or reduced ink flow. Most shops replace dampers every three to six months depending on print volume.
When does a DTF printer need a deep clean?
Deep cleaning is appropriate after long storage, after the printer has been transported, or when persistent clogs do not resolve after two to three automatic cleaning cycles. It consumes roughly 300ml of cleaner ink and takes 30 to 45 minutes.
Can I use isopropyl alcohol to clean all internal printer parts?
No. While 75% isopropyl alcohol works on select internal surfaces, it should never be used on the encoder strip. Alcohol dissolves the encoder strip markings, which causes printhead misalignment that is difficult and costly to correct.
What temperature and humidity is best for DTF printing?
Keep your print environment between 20–24°C with 40–60% relative humidity. Conditions outside this range cause ink viscosity changes that lead to nozzle clogs and inconsistent output.
0 comments