

Try these three fixes first: move your files to a local drive, plug your computer into a wired connection, and zip large file batches before uploading. Those three steps alone clear most DTF upload failures. If you’re mid-order on Transferkingz and something stalls, start here before doing anything else.
Quick checklist to run right now:
- Retry the upload once before anything else
- Plug your device into power and disable sleep mode
- Switch from Wi-Fi to a wired connection or smartphone hotspot
- Close all other apps that might have your files open
- Zip multiple files into a single archive
- Confirm your export or render has fully finished
Files still syncing from iCloud or Google Drive are a silent culprit. If your artwork lives in a cloud-synced folder, the upload tool may try to read a file that’s still being written. Copy everything to your local desktop first.
Pro Tip: Start screen recording before you reproduce the failure. A 30-second clip showing the stall percentage and any error message is worth more than a paragraph of description when you contact support. Name your files clearly too — “logo_v3_final_CMYK.png” beats “untitled(2).png” every time.
Table of Contents
- How to troubleshoot transfer issues step by step
- What’s actually causing your network upload failures?
- How to prepare your artwork files so uploads don’t fail
- How to fix heat-press application problems
- What to send Transferkingz support to get a fast resolution
- Preflight checklist to prevent future transfer problems
- Key Takeaways
- The one thing most people overlook
- Get print-ready help from Transferkingz
- Useful sources and further reading
How to troubleshoot transfer issues step by step
Work through this in order. Each step rules out one layer of the problem.
1. Confirm the file is ready Check that your export finished completely. A file still rendering or being indexed by iCloud or Google Drive can cause mid-upload stalls. Close the source app, wait 60 seconds, then upload.
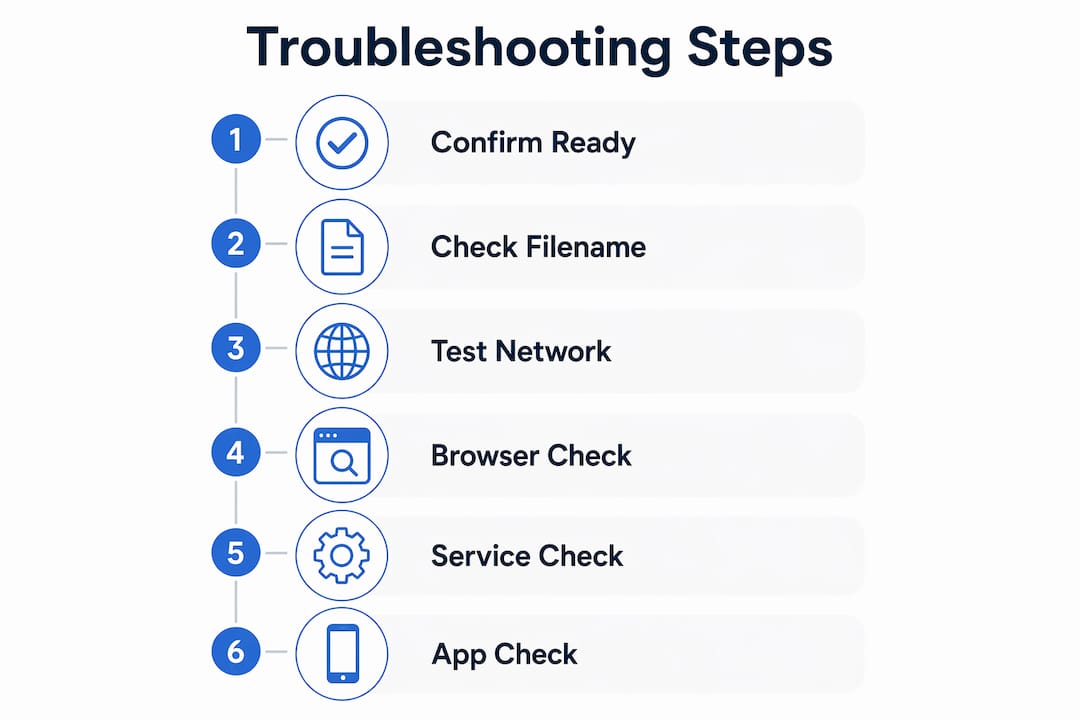
2. Check filename and path Keep filenames under 255 characters, no special characters, no duplicate names in the same batch.
3. Test your network Switch to a wired Ethernet connection or a mobile hotspot. If the upload succeeds on hotspot, your Wi-Fi or router is the problem.
4. Browser and extension check Try incognito mode or a different browser. Disable extensions one at a time. Update your browser and OS if either is behind.
5. Service-side check If you get a 502, 504, or ERR_NETWORK_CHANGED error, wait 15 minutes and retry. These often point to a proxy or load-balancer timeout rather than anything you did wrong.

6. Application check If the transfer printed but won’t adhere, run a swatch test before pressing the full run.
| Symptom | Most likely cause | First fix |
|---|---|---|
| Stalls at 0–1% | File still open or rendering | Close source app, re-export |
| Hangs at 99% | Network drop on final chunk | Retry on wired or hotspot |
| 502/504 error | Server-side timeout or proxy | Wait 15 min, retry |
| ERR_NETWORK_CHANGED | IP change mid-upload | Switch to hotspot, disable VPN |
| Transfer won’t adhere | Press settings or peel method | Run swatch test |
What’s actually causing your network upload failures?
For larger files, a wired Ethernet connection is the right call. If that’s not possible, a stable 5G hotspot beats a crowded office Wi-Fi every time. Avoid uploading while roaming or on a shared network.
The reason some uploads survive a brief connection drop and others don’t comes down to how the upload client is built. Services using chunked uploads with exponential backoff retry each failed chunk automatically, waiting 1 second, then 2, then 4, before giving up. Single-stream uploaders restart from zero on the first error. If Transferkingz’s uploader supports chunked transfer, a brief blip won’t kill your session. A sustained drop will.
Step-by-step network isolation:
- Run a speed test at fast.com to confirm your connection is stable
- Switch to a wired connection or mobile hotspot
- Disable your VPN, then retry
- Try a different browser or incognito mode
- Temporarily disable antivirus HTTPS inspection and retry a large file
Common error codes and what they mean:
- ERR_CONNECTION_TIMED_OUT — your device couldn’t reach the server; check firewall or VPN
- ERR_NETWORK_CHANGED — your IP changed mid-upload; use a stable wired or hotspot connection
- 408 / 504 / 524 — a proxy or load-balancer timeout cut the connection; retry after a few minutes
Pro Tip: If short uploads succeed but large ones fail consistently at the same file size, your antivirus HTTPS inspection is likely the culprit. Temporarily disable it, test a large upload, then re-enable it. If that fixes it, add the upload domain to your antivirus whitelist.
How to prepare your artwork files so uploads don’t fail
Always move final files to your local SSD or HDD, close the editing app, and wait until the export is completely finished before uploading. That single habit prevents a large share of failed transfers caused by cloud sync.
iCloud and Google Drive both index files in the background. If your artwork folder is synced, the file may appear ready while still being written. The fix is simple: copy the finished file to a local folder that isn’t watched by any sync service, then upload from there.
File prep checklist:
- Format: PNG (preferred for DTF), PDF, or PSD with flattened layers
- Color profile: sRGB or CMYK depending on your printer’s requirement — check with Transferkingz before submitting
- Resolution: 300 DPI minimum; 150 DPI is acceptable for oversized prints above 24 inches
- Transparency: preserve for PNG; flatten for formats that don’t support alpha channels
- Filename: no spaces, no special characters, under 255 characters
| Spec | Recommended | Notes |
|---|---|---|
| Format | PNG, PDF | PSD accepted with flattened layers |
| Color profile | sRGB | Confirm CMYK support with vendor |
| Resolution | 300 DPI | 150 DPI for large-format only |
| Max file size | Check vendor limit | Zip batches over 500 MB |
| Transparency | Preserve (PNG) | Flatten for non-alpha formats |
For a deeper look at format choices, the best file format for DTF transfers guide covers export settings that reduce print failures.
Pro Tip: Zip multiple files into a single archive before uploading. This prevents background processes from accessing individual files mid-stream and reduces per-file interruptions that cause partial uploads.
How to fix heat-press application problems
Run a controlled swatch test first. Press a small sample with documented settings, inspect it, then adjust. Guessing your way through a full production run wastes transfers and time.
Common failure modes and likely causes:
- Incomplete adhesion — temperature too low or press time too short
- Edge lifting — pressure uneven or cold peel attempted too soon
- Sticky film residue — hot peel on a cold-peel transfer, or temperature too high
- Color shift or fading — temperature too high, burning the ink layer
| Setting | Starting point | Notes |
|---|---|---|
| Temperature | 300°F (150°C) | Adjust ±10°F based on fabric |
| Press time | 10–15 seconds | Thicker substrates need longer |
| Pressure | Medium-firm | Consistent across platen |
| Peel method | Cold peel (default) | Check transfer spec sheet |
| Peel timing | After full cool | 30–60 seconds for cold peel |
These are example starting points. Always verify against the spec sheet for your specific transfer.
Swatch test protocol:
- Preheat your press for 5 minutes at target temperature
- Pre-press the blank garment for 3–5 seconds to remove moisture
- Position the transfer, press for 10–15 seconds at medium-firm pressure
- Allow to cool fully before peeling (cold peel)
- Inspect edges, corners, and fine detail areas
- Photograph the result before and after washing
Pro Tip: Note the room temperature and humidity when you press. High humidity (above 60%) causes adhesion problems that look like press errors. If your workspace is humid, pre-press the garment longer to drive out moisture before applying the transfer.
What to send Transferkingz support to get a fast resolution
Lead your support message with your order ID, the original files zipped, and a short video or screenshots showing the failure. Vendors can diagnose most problems in one exchange when they have that package upfront.
Support escalation checklist:
- Order number and product SKU
- Original artwork file (zipped)
- Device OS and browser version
- Network type used (Wi-Fi, wired, hotspot)
- Steps you already tried
- Screenshot or screen recording of the error
- Swatch photo if the issue is application-related
Contact template:
Subject: Order #[XXXXX] — Upload/Application Issue
Order ID: [XXXXX] File name(s): [list files] Device/OS: [e.g., MacBook Pro, macOS 14] Browser: [e.g., Chrome 124] Network: [Wi-Fi / wired / hotspot] Error message: [exact text or screenshot attached] Steps tried: [list what you did] Swatch result: [photo attached if applicable]
A screen recording showing the stall percentage matters because it tells support whether the failure is client-side (stalls at 0–1%) or server-side (hangs at 99%). A swatch photo pinpoints whether an adhesion problem is press-related or a film defect.
Preflight checklist to prevent future transfer problems
Run this before every upload or production run. It takes two minutes and prevents most reprints.
- Move final files to a local drive, not a cloud-synced folder
- Confirm export is complete and the source app is closed
- Zip batches larger than 500 MB
- Verify filename: no spaces, no special characters, under 255 characters
- Check file format, DPI, and color profile against vendor specs
- Run a swatch test with labeled settings before pressing the full run
- Note workspace temperature and humidity
- Confirm press settings match the transfer spec sheet
Pro Tip: Schedule large uploads for early morning or late evening when network traffic is lower. Set up a dedicated “upload station”: one wired computer, one browser profile used only for uploads, and a local folder named “UPLOAD_READY” where files go only after they’re fully exported and zipped. It sounds small, but it eliminates the most common upload errors in production environments.
Key Takeaways
Most DTF transfer failures come down to three fixable things: where your file lives, how stable your network is, and whether your press settings match the transfer spec.
| Point | Details |
|---|---|
| Local files + stable network | Always upload from a local drive over a wired or hotspot connection to prevent stalls. |
| Swatch test every run | Press a labeled sample first, document settings, and inspect before committing to a full production run. |
| Send the right evidence | Include order ID, zipped files, a screen recording, and swatch photos when contacting support. |
| Preflight before every order | Run the two-minute checklist before uploading to catch format, DPI, and filename errors early. |
| Transferkingz support | Transferkingz offers upload guidance and order support — use the contact template above to get fast resolution. |
The one thing most people overlook
The most common cause of repeated upload failures isn’t a broken file or a bad connection. It’s a cloud-synced folder. Artists and small business owners work in Google Drive or iCloud because it’s convenient, then upload directly from those folders without thinking twice. The file looks ready. The export finished. But the sync client is still indexing it, and the upload tool hits a locked file halfway through.
The fix is boring but reliable: one local folder, named clearly, used only for files that are done. No sync service touches it. That habit alone cuts troubleshooting time dramatically for most production setups.
Transferkingz has help resources and order support available directly through the site. If you’ve worked through this guide and still have an unresolved issue, reach out with your order ID and the evidence checklist above.
Get print-ready help from Transferkingz
When troubleshooting takes longer than the actual print run, the problem is usually upstream: a file that wasn’t quite ready, a setting that wasn’t confirmed, or a press that needed a calibration swatch. Transferkingz is built to reduce exactly that friction.

With no minimum order quantities, same-day local pickup, and upload support baked into the ordering process, you spend less time diagnosing and more time producing. The Print Point service page covers print checks and test print options for readers who want vendor-assisted verification before committing to a full run. If you’re unsure whether your film can handle fine detail, the digital transfer film FAQ answers that directly. Upload your artwork, confirm your specs, and place your order at transferkingz.com.
Useful sources and further reading
The sources below back the diagnostic steps in this guide. Bookmark the ones that match your most common failure type.
- WeTransfer upload troubleshooting — network, browser, and file-access fixes for upload stalls
- HexaTransfer timeout guide — explains proxy timeouts, chunked uploads, and exponential backoff
- AWS Transfer Family troubleshooting — SFTP connectivity and authentication diagnostics for technical users
- Transferkingz DTF troubleshooting guide — application and print failure diagnostics specific to DTF
- DTF file setup guide — artwork prep and export settings to prevent upload errors
- DTF graphic preparation guide — additional artwork-prep perspectives for DTF transfers
| Symptom | Best source to consult |
|---|---|
| Upload stalls or fails | WeTransfer troubleshooting, Transferkingz upload guide |
| Timeout or proxy errors | HexaTransfer timeout guide |
| Application or adhesion issues | Transferkingz DTF troubleshooting guide |
| File format or export errors | Transferkingz file setup guide, DTF graphic prep guide |
| SFTP or managed transfer issues | AWS Transfer Family documentation |
When contacting support, attach or link the specific page that describes your error. It shortens the back-and-forth considerably.
0 comments