
Finding reliable ways to create vivid custom clothing often feels frustrating for small brands and independent artists. The right DTF printing method offers a practical solution, letting you produce durable, full-color designs on almost any fabric without needing pretreatment. By understanding how your printing supplies and artwork preparation shape every result, you can boost quality, cut costs, and give your customers standout apparel they will remember.
Table of Contents
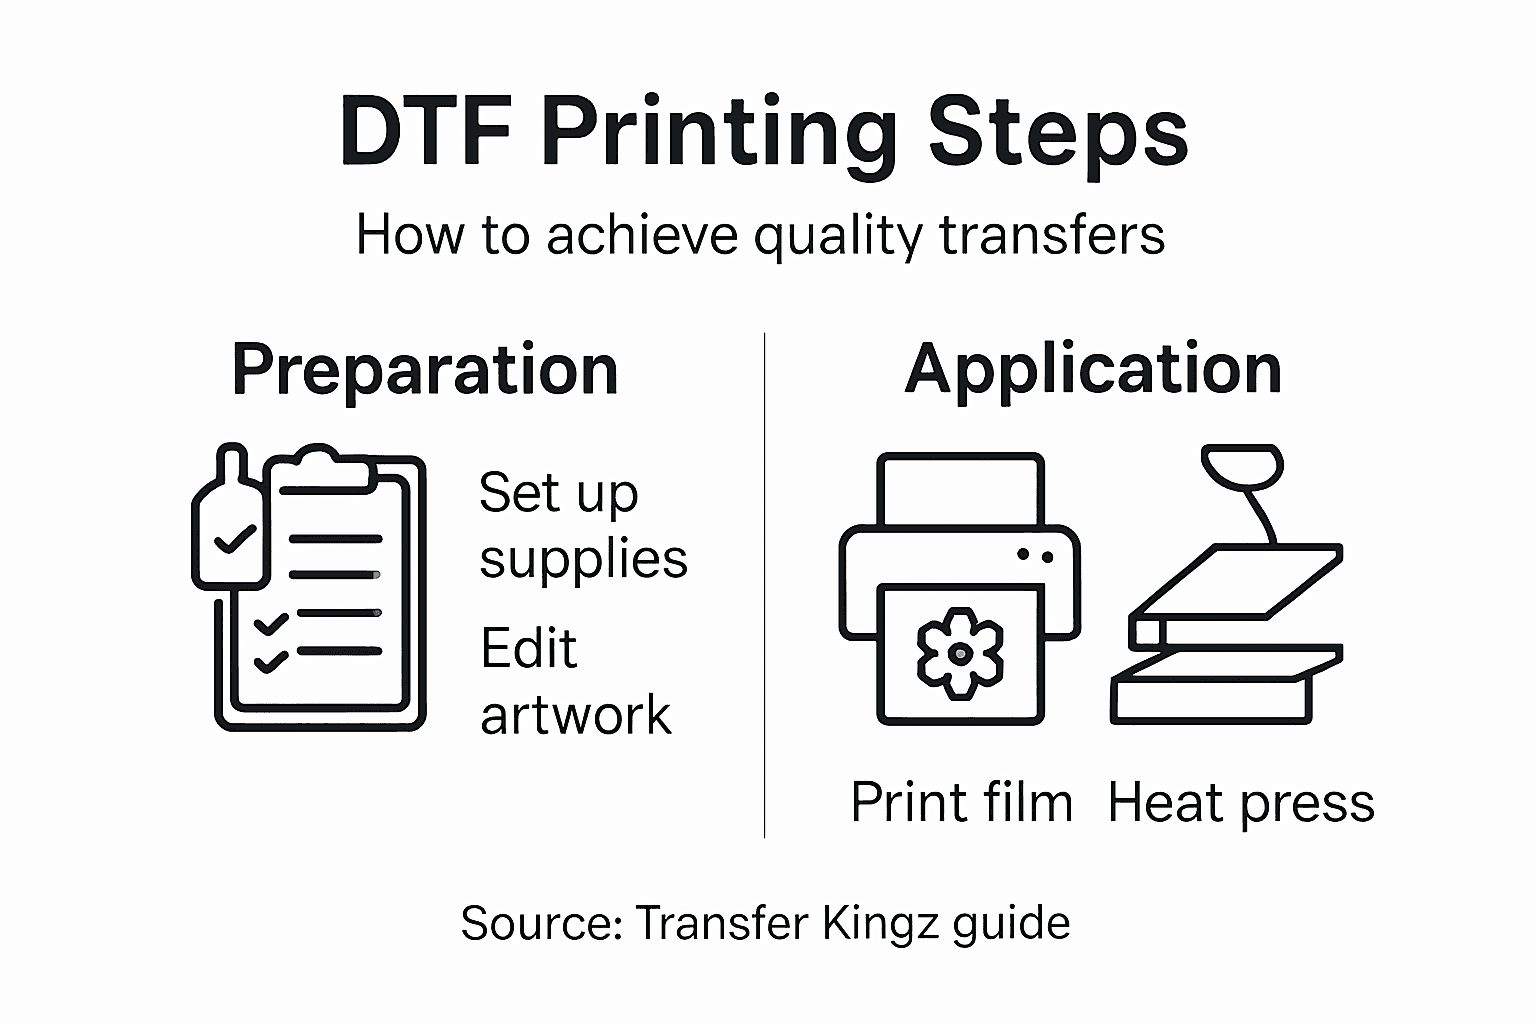
- Step 1: Gather Essential DTF Printing Supplies
- Step 2: Prepare and Arrange Your Artwork
- Step 3: Print the Design on DTF Film
- Step 4: Apply Transfers to Apparel Material
- Step 5: Inspect and Test Finished Prints
Quick Summary
| Key Point | Explanation |
|---|---|
| 1. Choose Quality DTF Supplies | Invest in a quality DTF printer, inks, and heat press to avoid costly mistakes and ensure reliable results. |
| 2. Prepare Artwork Carefully | Confirm file format and resolution; mirror images and manage colors to achieve flawless transfers on fabric. |
| 3. Monitor Printing Process | Ensure correct application of ink layers and white ink for opacity, contributing to the vibrancy and durability of prints. |
| 4. Follow Heat Press Technique | Position transfers accurately and apply the correct temperature and pressure to secure longevity and quality of designs. |
| 5. Conduct Thorough Inspections | Check for sharpness, color accuracy, and adhesion before shipping to maintain reputation and prevent returns. |
Step 1: Gather Essential DTF Printing Supplies
Before you start printing, you need to know exactly what supplies to buy. Getting this right upfront prevents costly mistakes and sets your operation up for success.
Your foundation starts with a DTF printer compatible with special films. This isn’t just any inkjet printer—it must handle the unique demands of direct-to-film work and work consistently with your chosen materials.
Water-based DTF inks are what actually transfer your designs onto garments. Quality ink formulations directly impact color accuracy and durability, so this isn’t where you skimp. You’ll also need thermoplastic polyurethane powder, which bonds your printed design to the fabric when heated.
A reliable heat press machine is non-negotiable. This equipment applies the precise temperature and pressure needed to permanently set your transfers onto clothing. Don’t treat this as optional—it’s as critical as the printer itself.
Your supply checklist includes:
- PET film sheets sized for your printer
- RIP (Raster Image Processing) software for image preparation
- Heat press or dedicated curing equipment
- Thermoplastic polyurethane hot-melt powder in adequate quantities
- Proper ventilation equipment for your workspace
Proper DTF transfer setup requires understanding how each piece works together. Your printer, inks, powder, and heat press must operate as an integrated system, not isolated components.
Ventilation often gets overlooked by new operators, but quality printing supplies integration demands safe working conditions. You’ll be handling powder and managing heat, so proper airflow protects both you and your equipment longevity.
Invest in supplies from reputable sources upfront. Cheap materials create inconsistent results that cost far more in wasted film and ruined garments than premium supplies ever would.
Sourcing reliable suppliers matters tremendously. You want vendors who understand DTF specifically and can provide consistent quality batch after batch. This consistency builds your reputation with customers.
Pro tip: Start by purchasing a smaller initial inventory of each supply to test quality before committing to bulk orders. This approach costs slightly more per unit but prevents investing hundreds in materials that don’t work with your specific printer and workflow.
Here’s how DTF printing supplies impact the final result:
| Supply Component | Main Function | Impact of Low Quality | Impact on Final Result |
|---|---|---|---|
| DTF Printer | Prints the design on PET film | Frequent clogs, inconsistent prints | Sharpness and reliability |
| DTF Inks | Transfers art to film | Faded colors, poor wash durability | Color accuracy, longevity |
| White Ink Layer | Underbase for colors | Washed-out, transparent designs | Opacity, color vibrancy |
| Heat Press | Bonds design to apparel | Peeling, damaged garments | Transfer adhesion, appearance |
| Ventilation | Ensures workspace safety | Fume buildup, machine damage | Health and equipment lifespan |
Step 2: Prepare and Arrange Your Artwork
Your design looks great on screen, but DTF printing demands specific file preparation to translate it flawlessly onto fabric. This step separates amateur results from professional quality transfers.
Start by confirming your file format and resolution. DTF printing typically requires high-resolution files at 300 DPI minimum to capture fine details and maintain color vibrancy. Low-resolution files produce blurry, pixelated transfers that damage your reputation instantly.
Color management matters significantly here. Your artwork needs RGB to CMYK conversion to ensure accurate color reproduction on fabric. What looks perfect in RGB on your monitor may shift dramatically when printed without proper color profile adjustments.
Mirror your image before sending it to print. This seems counterintuitive, but DTF transfers flip during application, so you must mirror the artwork beforehand. Forgetting this step means your text reads backward and designs face the wrong direction.
Your preparation checklist includes:
- Confirming file is 300 DPI minimum resolution
- Converting to proper color profile for DTF
- Mirroring the image for correct orientation
- Adjusting white ink layers if applicable
- Removing unnecessary background elements
- Making file “press-ready” before submission
Final artwork principles demand attention to layer structure, especially when white ink underlays are involved. White ink creates a vibrant base for colors, but incorrect layer arrangement ruins the transfer.
Test your file with a single transfer before committing to bulk orders. Print one sample, apply it to a garment, and evaluate the result carefully. This catches problems early when the cost is minimal.
Spend time perfecting artwork preparation now. Fixing problems during print production wastes materials, delays orders, and erodes customer trust faster than anything else in your workflow.
Pro tip: Save multiple versions of your artwork file—one mirrored for DTF printing and one original for your records—to prevent accidentally printing the wrong direction on future orders.
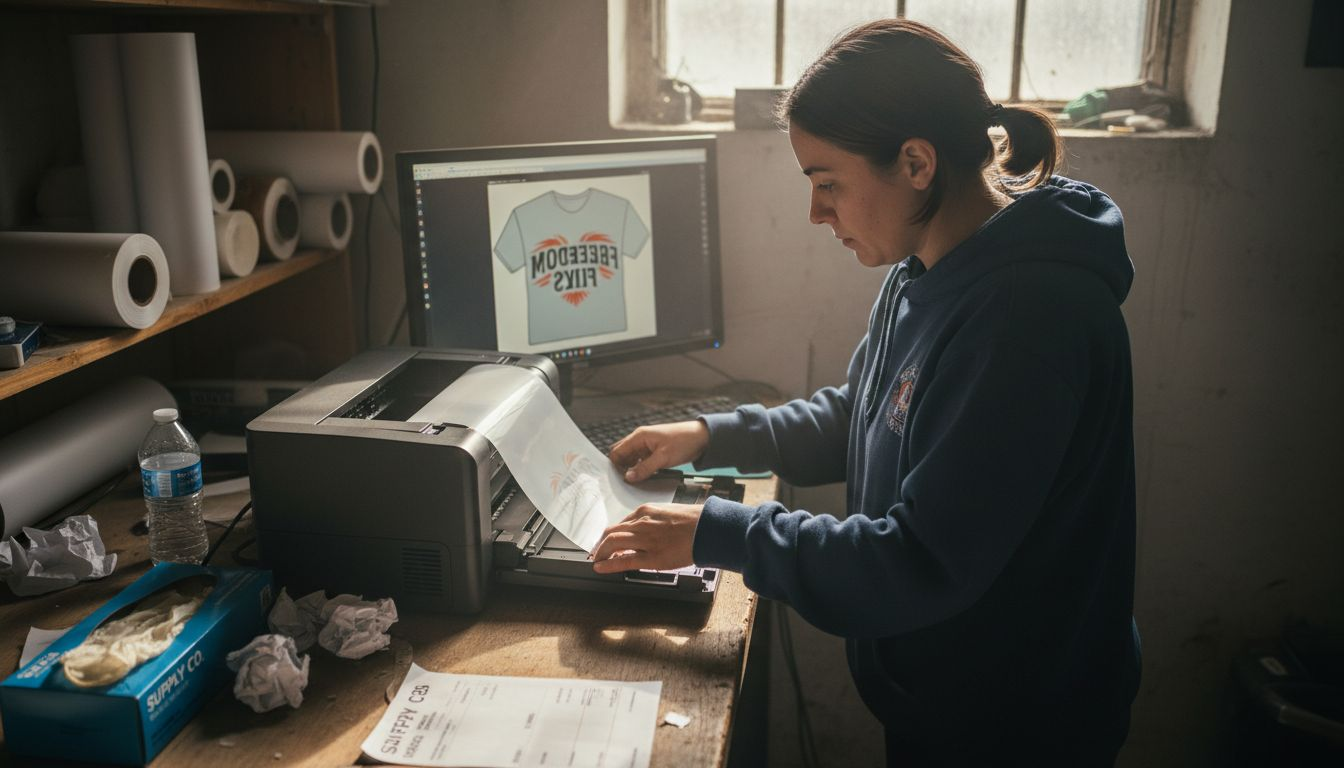
Step 3: Print the Design on DTF Film
This is where your artwork becomes physical. The DTF printer translates your digital design onto special film through a precise multi-layer process that requires attention to detail.
Load your prepared artwork file into your DTF printer’s software. Make sure the file is oriented correctly and sized appropriately for your intended garment application. Most DTF printers have software that shows you exactly how the design will print on the film.
The printer deposits ink in layers, starting with CMYK color layers that create your design’s primary hues and details. These water-based pigment inks bond specifically to the special PET film you’re using. This layering approach ensures accurate color representation.
After the color layers, the printer applies a white ink layer underneath or alongside the colors. White ink provides opacity and vibrancy, especially on darker fabrics. Without sufficient white ink, colors appear washed out and transparent when transferred to clothing.
Your printing process follows these steps:
- Load the PET film into your DTF printer correctly
- Send your mirrored artwork file to print
- Monitor the color layer application
- Verify white ink coverage is complete
- Allow ink to fully deposit before powder application
Once printing finishes, designs are digitally printed onto PET film and the ink is still wet. This is the critical moment for the next stage: powder application must happen immediately while the ink remains tacky.
Don’t rush this step. Printing speed matters less than print quality. A slightly slower print with perfect color layers beats a fast print with streaks or uneven coverage.
The white ink layer determines transfer durability more than any other factor. Skimp here and your transfers will crack, fade, or peel after a few washes.
Your printer’s settings control ink saturation, which directly impacts powder adhesion and final transfer quality. Lower saturation settings waste ink and create weak transfers. Optimal saturation creates balanced, vibrant transfers.
Pro tip: Run a test print on sample film before committing your customer’s order to production, checking ink coverage under bright light to catch any streaking or color inconsistencies before they become problems.
Step 4: Apply Transfers to Apparel Material
Your cured transfer is ready. Now comes the moment where your design permanently bonds to the garment. This step requires precision, but the process is straightforward once you understand the fundamentals.
Position your cured transfer film onto the garment exactly where you want the final design to appear. Align it carefully because once heat pressing begins, repositioning becomes difficult. Take your time getting this right.
Place the garment on your heat press bed with the transfer film facing downward against the fabric. Close the heat press and apply heat at the manufacturer’s recommended temperature and time settings. These settings vary based on fabric type, so follow your DTF ink supplier’s guidelines precisely.
Applying DTF transfers involves aligning the cured transfer film on the fabric, then using a heat press set to recommended temperature and time to bond the design. Temperature typically ranges from 300 to 350 degrees Fahrenheit, held for 10 to 15 seconds depending on your specific system.
Your application process follows these critical steps:
- Position transfer film on garment accurately
- Place garment on heat press bed
- Apply consistent pressure across entire design
- Hold at correct temperature for full duration
- Allow garment to cool completely before peeling
After the timer signals completion, allow the garment to cool fully before touching or peeling the carrier film. Removing the film while hot causes incomplete adhesion and design damage. Patience here protects your work.
Peel the carrier film away slowly and deliberately. If the film sticks or resists, the garment likely needs more cooling time. Forcing removal tears the design or leaves film residue on the fabric.
Perfect heat press timing separates professional results from amateur work. Too short, and the transfer won’t adhere. Too long, and you risk scorching fabric or damaging the design.
DTF transfers work on cotton, polyester, cotton blends, and most other common apparel fabrics without pre-treatment. This versatility makes DTF ideal for diverse custom orders.
Below is a quick reference for optimal garment compatibility with DTF transfers:
| Fabric Type | Pre-Treatment Needed | Transfer Results | Common Use Case |
|---|---|---|---|
| Cotton | Not required | Soft, durable print | T-shirts, sweatshirts |
| Polyester | Not required | Vibrant, smooth feel | Sportswear, jerseys |
| Cotton Blends | Not required | Good stretch, vivid | Hoodies, polos |
| Canvas | Not required | Textured, high detail | Bags, shoes, accessories |
Pro tip: Create a test pressure chart by pressing samples at slightly different temperatures and times, then documenting which settings produce the best adhesion for your specific garment materials and heat press model.
Step 5: Inspect and Test Finished Prints
Your transfer is applied and cooled. Before shipping to customers or adding to inventory, thorough inspection catches problems early. This quality control step protects your reputation and prevents costly returns.
Start by examining the design sharpness across the entire transfer. Look for blurriness, pixelation, or soft edges that indicate printing or pressing issues. Sharp, crisp details signal successful execution.
Check color accuracy by comparing the finished transfer to your original artwork. Colors should match your design intent without fading, muddiness, or unexpected shifts. Slight color variation between white and colored areas is normal, but dramatic differences require investigation.
Verify opacity and coverage by holding the garment up to light. The design should appear solid and vibrant without transparency or thin spots. Transparent areas indicate insufficient white ink or weak adhesion during pressing.
Evaluate print quality using standardized image quality test forms to assess color consistency, sharpness uniformity, and adhesion strength across the entire design. These standardized approaches help identify issues objectively.
Your inspection checklist should cover:
- Design sharpness and detail clarity
- Color accuracy and vibrancy
- Complete opacity without transparency
- Even adhesion across entire transfer
- No wrinkles, bubbles, or film residue
- Proper alignment on garment
Perform an adhesion test by gently pulling at design corners and edges. Quality transfers resist peeling and show strong bonding to fabric. Weak adhesion indicates pressing temperature or time issues.
Wash test one sample garment if possible. Run it through a normal wash cycle, then air dry and inspect. After washing, the design should remain vibrant and firmly adhered without cracking or fading.
Skip inspection and you’ll discover problems when customers complain. One bad review costs more than the time spent testing thoroughly upfront.
Document your findings. Record which settings, temperatures, and times produced excellent results and which created problems. This data becomes invaluable for troubleshooting future batches.
Pro tip: Keep a photo reference file of perfect transfers from your setup, then compare new batches visually against these standards to catch subtle quality issues before they reach customers.
Elevate Your Apparel Transfers With Expert DTF Solutions
Struggling with finding high-quality DTF supplies or perfecting your heat press application can slow your printing success and damage your reputation. This article lays out essential steps like using accurate white ink layers, mastering artwork preparation, and ensuring flawless adhesion to garments. The challenges of achieving vibrant colors, consistent print durability, and precise transfer placement are real. Why take the risk when you can access ready-made transfers that eliminate these hurdles?

Discover how Transfer Kingz empowers you to skip the guesswork. Choose from premium Direct-to-Film transfers created with advanced inks and films to guarantee sharp details and lasting color. Whether you are a hobbyist, small business, or production shop, our platform offers tools like gang sheet builders, fast turnaround, and no minimum orders. Start producing flawless apparel today with expert support and reliable products. Visit Transfer Kingz now and transform your custom printing workflow with industry-leading DTF transfers.
Frequently Asked Questions
What supplies do I need for DTF printing?
To start DTF printing, you need a compatible DTF printer, water-based DTF inks, thermoplastic polyurethane powder, a reliable heat press machine, PET film sheets, RIP software, and proper ventilation equipment. Invest in quality materials from reputable sources to ensure consistent results in your printing process.
How do I prepare my artwork for DTF printing?
To prepare your artwork, confirm it’s at least 300 DPI, convert the color profile from RGB to CMYK, and mirror the image before sending it to print. Ensure all necessary layers, like white ink underlays, are properly organized to achieve vibrant transfers and avoid costly mistakes.
What is the process for printing on DTF film?
Start by loading your prepared artwork file into the DTF printer software, ensuring it’s correctly oriented and sized. Print the design in multiple layers, beginning with the CMYK colors, followed by the white ink to ensure opacity and vibrancy on the final product.
How do I apply DTF transfers to apparel?
Position the cured transfer film onto the garment accurately and place it on the heat press. Apply consistent pressure at the recommended temperature for the specified time, allowing it to cool completely before peeling the film away for best adhesion.
What should I inspect after applying the DTF transfer?
Inspect the design for sharpness, color accuracy, opacity, and even adhesion across the transfer. Perform a gentle pull test on the edges and consider washing a sample garment to ensure the transfer remains intact and vibrant after laundering.
How can I troubleshoot common DTF printing issues?
Common issues can often be traced back to file preparation or equipment settings. Save notes on your successful setups and compare new batches against these standards to easily identify and correct any quality problems.
0 comments