
TL;DR:
- Textile compatibility ensures fibers, dyes, and chemicals work together for durable, color-accurate garments. Proper matching of dye class to fiber type prevents defects, color fading, and cross-staining, especially in blended fabrics. Testing fabric compatibility early reduces costs and improves print quality in apparel production.
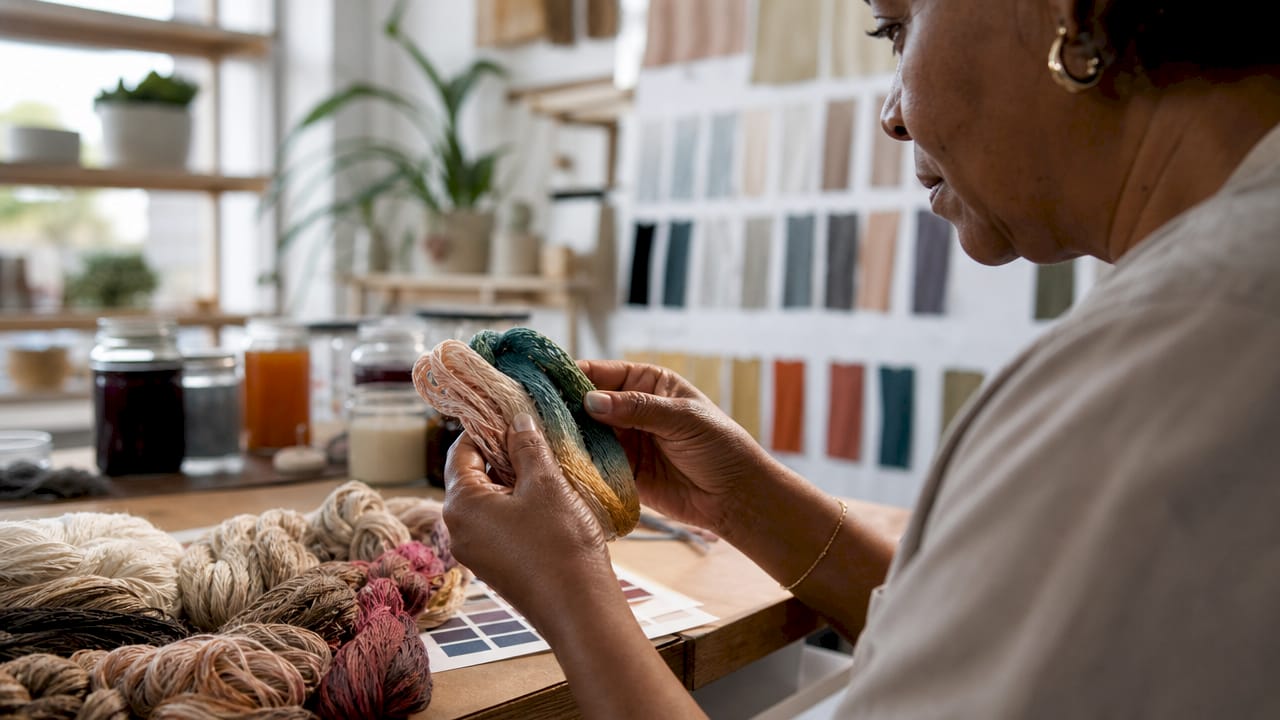
Textile compatibility is defined as the measure of how well fibers, dyes, threads, and printing chemicals interact to produce durable, color-accurate garments and prints. The industry term for this discipline is fiber-dye affinity, and understanding it separates businesses that produce consistent, high-quality apparel from those that waste materials on failed runs. For small to mid-sized clothing businesses and designers, getting fabric compatibility right before production starts is the single most effective way to reduce defects, cut costs, and protect your brand’s reputation.
Textile compatibility explained: how fiber chemistry drives dye selection
The dyeing method is dictated by fiber chemistry, not personal or aesthetic preference. Mismatches cause irreversible color defects and fastness failures that no finishing process can correct. Knowing which dye class bonds correctly to which fiber type is the foundation of every successful print run.
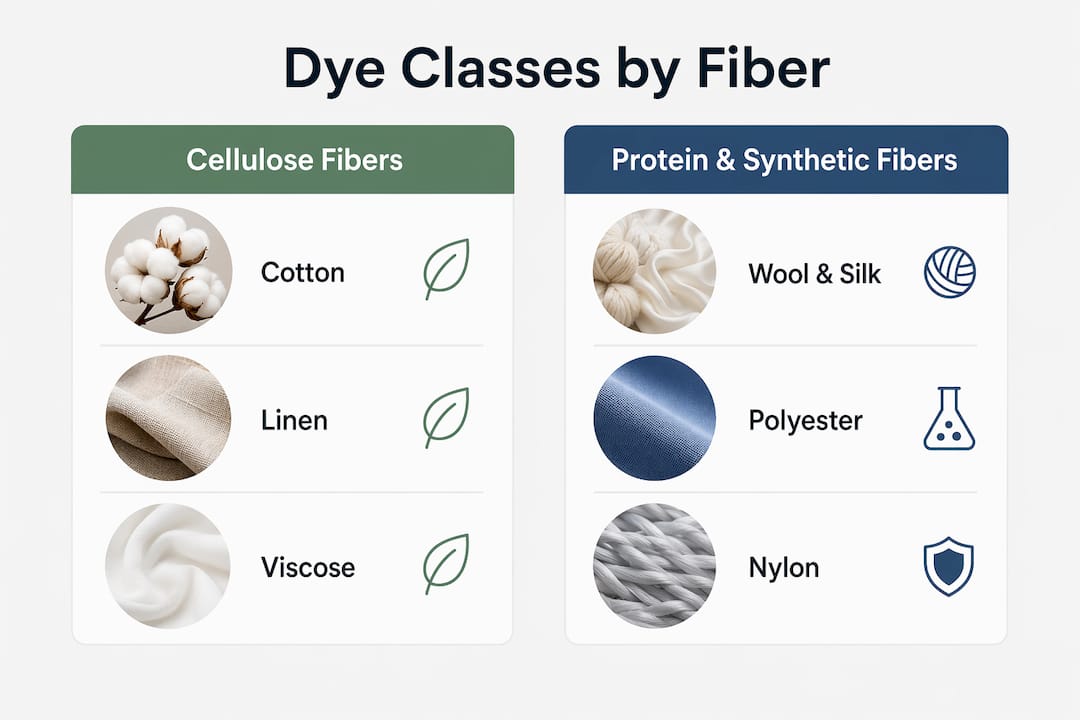
Textile fibers fall into three chemical families: cellulose, protein, and synthetic. Cellulose fibers include cotton, linen, and viscose. Protein fibers include wool and silk. Synthetics include polyester, nylon, and acrylic. Each family has a different molecular structure, and that structure determines which dye can form a lasting bond.
Reactive dyes bond covalently to cellulose fibers, producing excellent colorfastness. Covalent bonding means the dye molecule becomes part of the fiber itself, which is why reactive dyes on cotton survive repeated washing. Acid dyes bond ionically to protein fibers like wool and silk, achieving very high fastness. Disperse dyes penetrate synthetic fibers through a physical diffusion process, delivering good fastness on polyester. Basic dyes work on acrylic but produce only moderate fastness, making them a poor choice for garments that will be washed frequently.
The table below summarizes the correct dye class for each fiber family.
| Fiber type | Correct dye class | Bonding mechanism | Fastness level |
|---|---|---|---|
| Cotton, linen, viscose | Reactive | Covalent | Excellent |
| Wool, silk | Acid | Ionic | Very high |
| Polyester | Disperse | Physical diffusion | Good |
| Acrylic | Basic | Ionic attraction | Moderate |
| Nylon | Acid or reactive | Ionic | High |
Applying the wrong dye class does not just produce dull color. It causes cross-staining, where dye molecules migrate to unintended fiber zones, and it accelerates fading after the first wash cycle.
Pro Tip: When submitting a sample brief to a supplier or printer, specify the fiber content percentage and the required dye class by name. Leaving dye selection to the printer without this information is the fastest route to a rejected production run.
What makes printing on blended fabrics so difficult?
Multi-fiber blends are the most common fabrics in commercial apparel, and they are also the most technically demanding to print on correctly. A cotton/polyester blend contains two fiber families with completely different dye requirements. Cotton needs reactive dyes applied in an alkaline bath. Polyester needs disperse dyes applied at high temperature, typically around 130°C. Running both processes simultaneously in a single bath destroys the reactive dyes for cotton, producing low-quality, uneven color.
Two-bath dyeing is the industry standard for poly-cotton blends. The polyester component is dyed first with disperse dyes at high temperature. The fabric is then cooled, and the cotton component is dyed separately with reactive dyes in an alkaline bath. This sequence protects each dye class from the conditions that would degrade the other.
Cross-staining is the other major risk with blended fabrics. In cotton/polyester blends, disperse dye molecules can migrate onto the cotton fibers during the high-temperature phase, creating unwanted color deposits. Intermediate reduction clearing with Sodium Hydrosulfite and Caustic Soda at 70°C removes these surface deposits before the cotton dyeing phase begins. Cotton/wool blends present an even more severe cross-staining problem. Wool’s protein structure attracts reactive dyes intended for cotton. The solution requires syntan blocking agents and strict pH control using Tetrasodium Pyrophosphate to protect the wool fibers during the cotton dyeing stage.
| Blend type | Cross-staining risk | Recommended mitigation |
|---|---|---|
| Cotton/polyester | Significant | Two-bath dyeing, reduction clearing at 70°C |
| Cotton/wool | Severe | Syntan blocking agents, pH control with Tetrasodium Pyrophosphate |
| Polyester/nylon | Moderate | Careful disperse dye selection, temperature staging |
| Cotton/acrylic | Low to moderate | Sequential dyeing, bath separation |
Print durability on blended fabrics also depends on color uniformity across both fiber types. If one fiber component takes significantly more dye than the other, the finished print will appear patchy or faded in areas where the minority fiber dominates. Achieving uniform color requires precise dye concentration ratios calibrated to the blend percentage.
Pro Tip: Always request the exact fiber blend percentage from your fabric supplier before ordering dyes or setting up a print run. A fabric labeled “cotton/poly” could be anywhere from 50/50 to 80/20, and each ratio requires a different dye concentration split.
How to test fabric compatibility before a full production run
Testing fabric compatibility before committing to bulk production is the most cost-effective decision a clothing business can make. The Fabric Touch Tester (FTT) quantifies fabric hand-feel with 13 objective indices in under five minutes per sample. That data creates an electronic quality standard that every production batch can be measured against, removing subjective judgment from quality control.
Thermal comfort accounts for 40% of user comfort perception. This means a fabric that prints beautifully but traps heat will still generate customer complaints. Testing thermal properties alongside print adhesion gives a complete picture of how a fabric will perform in real use. Human skin can detect surface changes smaller than 0.001mm, which explains why even minor print texture inconsistencies register as defects to the end customer.
Before committing to a bulk print run, test the following:
- Fiber content verification: Confirm the actual fiber blend matches the supplier’s label using a burn test or laboratory analysis.
- Dye strike rate: Apply a small test print and wash it three times to check colorfastness before scaling up.
- Thermal response: Measure how the fabric responds to the heat levels required by your printing method, particularly for DTF and heat-transfer applications.
- Surface texture: Assess whether the fabric surface is smooth enough for fine-detail prints or whether a textured weave will break up fine lines.
- Stretch and recovery: For knit fabrics, test whether the print cracks or separates after the fabric is stretched and returns to its original shape.
Compatibility testing at the sample stage catches problems that would otherwise multiply across thousands of units. A single failed test sample costs far less than a rejected production run.
Why binder selection determines print quality on any fabric
A pigment printing binder must be compatible with pigments, thickeners, and textile fibers to avoid dispersion issues and maintain print quality across a production run. Binders are the adhesive layer that holds pigment particles to the fabric surface. When a binder is incompatible with the fiber type or the other chemicals in the print paste, the paste becomes unstable, pigment particles clump, and print definition deteriorates.
Binder compatibility is often misunderstood because its effects are not always visible in the first few prints. Poor binder compatibility shows up gradually as print sharpness declines over a production run, or as uneven pigment distribution that only becomes obvious after washing. By that point, a significant portion of the run may already be defective.
Key requirements for a binder used in mixed textile production:
- Broad fiber compatibility: The binder must adhere to cotton, polyester, and acrylic without requiring a different formulation for each fiber type.
- Mechanical stability: High-speed printing equipment subjects the print paste to significant shear forces. A binder that breaks down under mechanical stress will produce inconsistent results as print speed increases.
- Thickener compatibility: The binder must remain stable when combined with the thickener used to control print paste viscosity. Incompatible combinations cause phase separation in the paste.
- Wash fastness contribution: A good binder forms a flexible film over the pigment after curing, protecting color through repeated wash cycles.
Pro Tip: When switching fabric suppliers mid-season, always retest your binder formulation on the new fabric before resuming full production. Even a small change in fiber blend percentage can shift the binder’s adhesion performance enough to affect print quality.
Key takeaways
Textile compatibility determines print quality, colorfastness, and production efficiency. Matching dye class to fiber type, using two-bath processing for blended fabrics, and testing binder stability before bulk runs are the three practices that separate consistent producers from those who absorb avoidable losses.
| Point | Details |
|---|---|
| Fiber chemistry dictates dye class | Reactive dyes for cellulose, acid dyes for protein fibers, disperse dyes for polyester. |
| Two-bath dyeing for blends | One-bath processing at 130°C destroys reactive dyes; always separate the dyeing stages. |
| Cross-staining requires active mitigation | Use reduction clearing or syntan blocking agents depending on the blend type. |
| Test before bulk production | FTT testing and small-batch wash trials catch compatibility failures before they scale. |
| Binder stability affects the full run | Incompatible binders degrade print sharpness gradually; test binder formulations when changing fabric suppliers. |
What I’ve learned about textile compatibility after years in apparel production
Most small clothing businesses overcomplicate their textile choices before they have mastered the basics. The reality is that a Tex 27 spun polyester thread paired with an 80/12 universal needle handles the majority of woven garment production. Overstocking complex needle and thread variations before you have a baseline system in place creates confusion and inefficiency, not quality.
The businesses I have seen struggle most with textile compatibility are the ones that skip the system alignment step. Effective production requires that fabric, needle, thread, and stabilizer all work together as a unit. Treating stretch or knit fabrics as stable without proper stabilization is one of the most common causes of embroidery and print failure I have observed. It is not a dye chemistry problem. It is a system alignment problem.
My honest advice: build your compatibility knowledge from the fiber up. Start with a clear understanding of what fiber types you work with most, then lock in the correct dye class, binder, and thread system for each. Test every new fabric at the sample stage, not after you have committed to a production run. The businesses that do this consistently produce fewer defects, waste less material, and build a reputation for quality that holds up over time.
The good news is that newer fiber-integrated printing systems are reducing compatibility errors significantly. Optimized fiber-integrated systems have demonstrated error rates as low as 4.7%, a meaningful improvement over traditional methods. That kind of precision is becoming accessible to smaller operations, not just large manufacturers. The learning curve is real, but the tools available in 2026 make mastering textile compatibility more achievable than it has ever been.
— Anthony
Transferkingz and DTF printing built around fabric compatibility
Getting textile compatibility right is exactly what Transferkingz has built its DTF printing service around. Every transfer produced by Transferkingz uses premium inks and films formulated to bond correctly across a wide range of fabric types, from 100% cotton to poly-cotton blends and performance synthetics.

Clothing businesses and designers who want vibrant, wash-resistant prints without managing dye chemistry themselves can order custom DTF transfers with no minimum order requirement. Transferkingz also offers a gang sheet builder for businesses that need to maximize material efficiency across mixed design runs. Fast turnaround times and straightforward application methods mean you spend less time troubleshooting and more time producing. For businesses in the Dallas area, DTF printing services are available with the same quality standards applied to every order.
FAQ
What is textile compatibility in apparel printing?
Textile compatibility is the measure of how well fibers, dyes, binders, and printing chemicals interact to produce durable, color-accurate results. Mismatches between dye class and fiber type cause colorfastness failures and print defects that cannot be corrected after production.
Which dye works best for cotton fabrics?
Reactive dyes are the correct choice for cotton, linen, and viscose because they form covalent bonds with cellulose fibers, producing excellent wash fastness. Applying disperse or basic dyes to cotton results in poor color retention and rapid fading.
Why does printing on poly-cotton blends require two-bath dyeing?
One-bath dyeing at 130°C hydrolyzes reactive dyes, destroying their ability to bond with the cotton component. Two-bath processing dyes the polyester first with disperse dyes, then dyes the cotton separately with reactive dyes, protecting both dye classes from conditions that would degrade them.
How do I test fabric compatibility before a bulk print run?
Run a small-batch test print, wash the sample three times, and assess colorfastness, print adhesion, and surface texture. The Fabric Touch Tester quantifies hand-feel and thermal properties in under five minutes, giving you objective data to set a quality standard for the full production run.
What happens when a printing binder is incompatible with the fabric?
Incompatible binders cause poor pigment dispersion, unstable print paste, and declining print sharpness across a production run. The defects often appear gradually, meaning a significant portion of the run can be affected before the problem becomes visible.
0 comments