

For reliable DTF results, every garment needs a targeted pre-clean, a moisture-removing pre-press, and fiber-specific conditioning before you apply a transfer. Skip any of those and you risk permanent adhesion failure. The right-first-time principle is the governing rule here: prep chemistry changes fiber structure at a molecular level, so a mistake is rarely fixable after the fact.
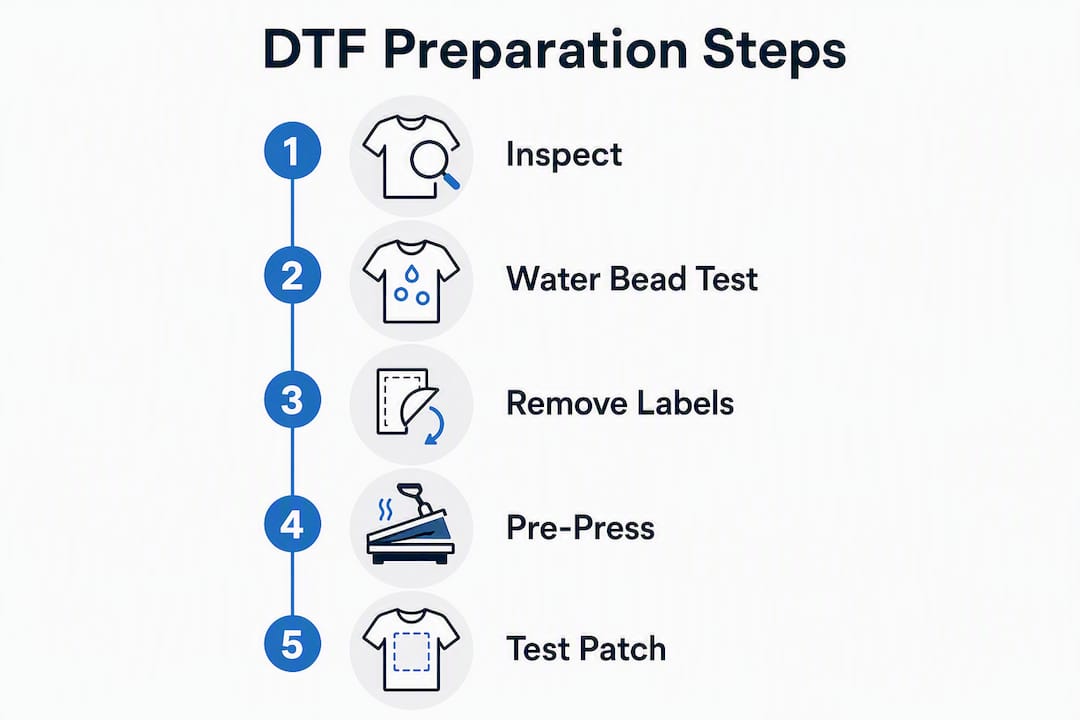
Before you touch a heat press, run through these four checks:
- Remove all hang tags, woven labels, and any adhesive residue from the print zone
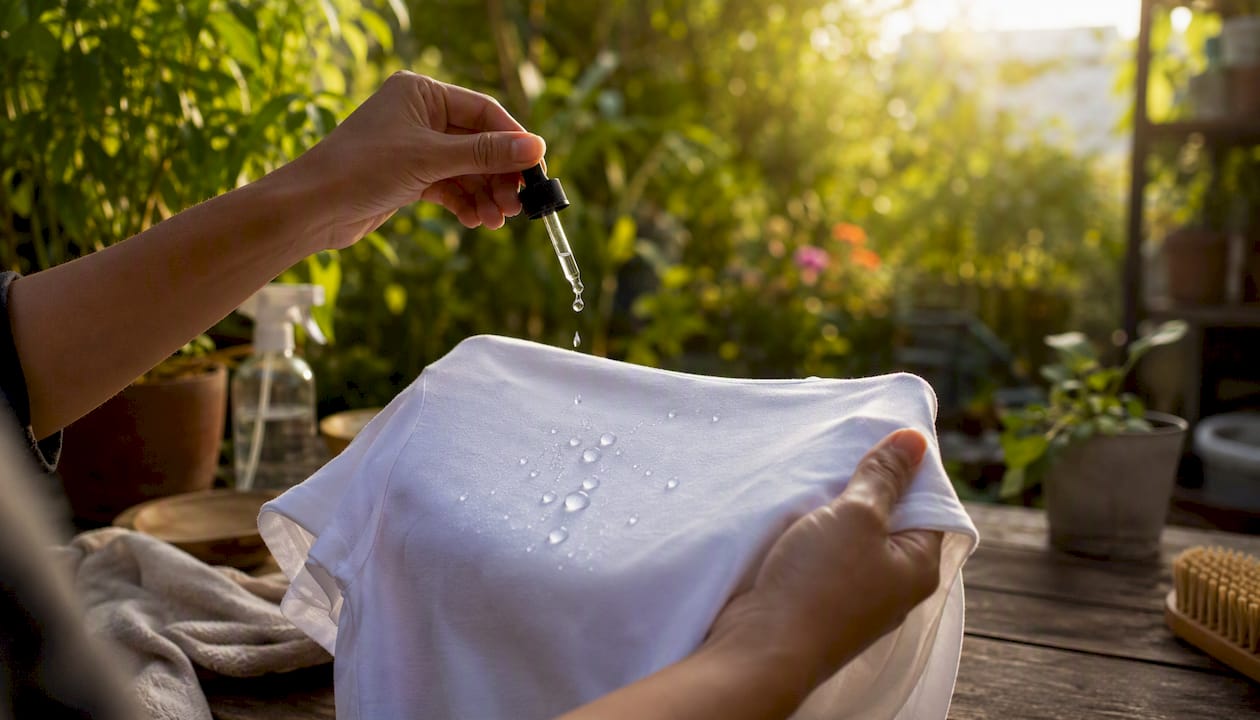
- Drip a few drops of water on the fabric surface; if it beads, a factory finish (silicone or softener) is present and must be removed before pressing
- Confirm no fabric softener or conditioner was used in any prior wash
- Verify the garment is fully dry, wrinkle-free, and lint-free
Pro Tip: Never skip the water-bead test. A garment that beads water will reject DTF adhesive just as reliably as it repels water. Catch it now, not after you’ve pressed a full batch.
Table of Contents
- What tools and materials do you need before you start?
- How do you prepare textiles step by step for DTF transfers?
- How does fiber type change your preparation approach?
- How do you run a pre-press test patch?
- How long does preparation take, and what does it cost?
- What preparation mistakes cause the most DTF failures?
- How does Transferkingz support your prep process?
- Key Takeaways
- The prep mistake that shows up more than any other
- Ready to order DTF transfers with prep support built in?
What tools and materials do you need before you start?
| Tool / Material | Why It Matters |
|---|---|
| Heat press (calibrated) | Pre-press removes moisture and sets fabric tension before transfer application |
| Lint roller | Removes surface fibers and debris; mimics industrial singeing for small batches |
| Enzyme-based detergent | Gentle desizing alternative that breaks down starch sizing without damaging fabric |
| pH-neutral detergent | Safe for synthetics, blends, and specialty fabrics during pre-wash |
| Clean lint-free pressing sheet | Protects transfer film and garment surface during pre-press |
| Thermometer or temp strip | Confirms actual platen temperature matches dial setting |
| Nitrile gloves | Required when handling enzyme solutions or any chemical pre-treatment |
For environmental choices, enzyme-based and bio-scouring products replace harsh alkali treatments and reduce chemical waste without sacrificing cleaning performance.
Safety note: Always work in a ventilated space when using enzyme soaks or chemical pre-treatments. Wear nitrile gloves and avoid splashing solutions near eyes. Keep heat press platens clear of loose fabric edges to prevent burns.
How do you prepare textiles step by step for DTF transfers?
This sequence works for most garments arriving at a small shop or home setup.
-
Inspect the garment. Check for labels, adhesive patches, oil spots, or visible sizing residue. Feel the surface for stiffness, which signals factory starch. Run the water-bead test described above.
-
Pre-wash if needed. Machine wash at 40°C (104°F) with an enzyme detergent. No fabric softener, no dryer sheets. For factory-sized garments, a 30-minute enzyme soak at 50–60°C before washing removes starch sizing more effectively than a standard wash cycle alone.
-
Dry completely. Tumble dry low or air dry. Any residual moisture under a DTF transfer causes steam pockets and edge lifting during cure.
-
Lint roll the print zone. A thorough lint roll removes protruding surface fibers that would create a rough, hairy texture under the film. This is the small-shop substitute for industrial singeing.
-
Pre-press. Place the garment flat on the platen, cover with a lint-free pressing sheet, and press at 300–320°F (149–160°C) for 3–5 seconds with light pressure. This drives out residual moisture and relaxes fabric tension. Lift and let cool for 10 seconds before applying the transfer.
-
Apply the transfer immediately. Once pre-pressed and cooled slightly, the garment is at its most receptive. Don’t let it sit and re-absorb ambient moisture.
Critical warning: Never use caustic soda (sodium hydroxide) solutions at home for scouring. Industrial scouring liquors run at 2–4% NaOH and temperatures up to 130°C — conditions that require pressure vessels and professional handling. For small-batch DTF prep, enzyme soaks and standard detergent washing are both safer and sufficient.
Pro Tip: For a batch of 12 or more garments, pre-press all of them before applying any transfers. Garments cool and re-absorb moisture faster than you think, especially in humid shops.
How does fiber type change your preparation approach?
Fiber type determines which steps are required and which ones will cause permanent damage. There is no one-size-fits-all sequence.
Cotton
Cotton is the most forgiving fiber for DTF work, but factory sizing and natural waxes still block adhesion if left in place.
- Do: Pre-wash with enzyme detergent, pre-press at 300–320°F, lint roll
- Do: Optional light bleach (hydrogen peroxide-based) for heavily discolored or stained areas before pressing
- Don’t: Attempt mercerization at home. The process requires 20–25% caustic soda under tension — it permanently alters fiber structure and is a mill-level process only
Polyester and synthetics
Synthetics carry spinning oils and knitting lubricants rather than starch sizing. The priority is oil removal and heat setting to stabilize dimensions before cure.
- Do: Scour with pH-neutral detergent at moderate temperature, pre-press at 270–300°F (132–149°C) to heat-set and remove tension
- Do: Always pre-press performance fabrics before applying transfers; skipping this step causes post-cure shrinkage and print distortion
- Don’t: Use mercerization or strong alkali on synthetics — it degrades polyester fiber irreversibly
Blends
Follow the more sensitive fiber’s rules. A 60/40 cotton-polyester blend gets the polyester temperature ceiling (stay under 300°F) and the cotton’s enzyme pre-wash.
- Run a test patch on a seam allowance or inside hem before committing to the full print zone
- If adhesion is inconsistent, the blend likely has a finish; re-clean and re-test
Specialty fabrics (wool, silk, performance finishes, water-repellent coatings)
Hard rule for specialty fabrics: If the garment has a DWR (durable water-repellent) coating, silicone finish, or any treatment that beads water, DTF adhesive will not bond reliably. Either strip the finish with a targeted pre-treatment or reject the garment for DTF use. When in doubt, request a sample run before committing to production.
- Wool: Use cool water and pH-neutral detergent only; no high heat, no alkali
- Silk: Degumming is a professional process; for DTF, limit prep to a gentle surface wipe and a low-temperature pre-press (under 250°F)
- Performance/technical fabrics: Test every new style individually — finishes vary by manufacturer
For fabric selection guidance that affects DTF outcomes from the start, the best fabrics for DTF printing resource covers which materials consistently deliver clean adhesion.
How do you run a pre-press test patch?
A test patch takes under five minutes and can save an entire batch.
- Select an inconspicuous area: inside hem, seam allowance, or a scrap from the same fabric lot.
- Pre-press that area at your intended press temperature for 3–5 seconds.
- Apply a small transfer square (2" x 2" is enough) and press at full cure parameters.
- Let it cool completely before evaluating — at least 60 seconds.
- Flex the fabric sharply in both directions and check the transfer edge.
Pass criteria: No edge lifting, no cracking on flex, smooth hand feel, no visible ghosting or distortion in the fabric.
Fail criteria and next steps:
- Edge lifting: Re-clean the garment, repeat pre-press, re-test. If it lifts again, the garment has a surface finish that needs stripping or the garment should be rejected.
- Cracking on flex: Press temperature may be too high, or the fabric has a finish incompatible with DTF film.
- Ghosting or fabric distortion: The pre-press temperature is too high for that fiber, or the garment was not fully heat-set before cure.
When a test patch fails twice on the same garment style, contact Transferkingz before running the full order. A sample run with your specific fabric lets the team confirm parameters before you commit production quantities.
How long does preparation take, and what does it cost?
Per-garment time estimates:
- Inspection and water-bead test: 1–2 minutes
- Pre-wash (if needed): a typical machine washing cycle, plus drying time
- Lint roll and pre-press: 2–3 minutes per garment
- Test patch (first garment of a new style): 8–10 minutes including cool and evaluation
For a batch of multiple garments of a known style (no pre-wash needed), expect roughly an hour or more of active press time including pre-press and transfer application.
Consumables estimate for 100 garments:
- Enzyme detergent: one standard wash load covers 8–10 garments; budget 10–12 loads for a full pre-wash run
- Lint rollers: one standard roller handles approximately 20–30 garments before replacement
- Press time: at a shop rate of $25–$35/hour, pre-pressing 100 garments adds roughly 2–3 hours of labor
Industrial steps like kier scouring or continuous mercerization are not practical for small orders. Those processes require batch or continuous equipment found only at mill scale. For small-batch DTF work, enzyme soaks and standard pre-press cycles cover the same functional goals.
What preparation mistakes cause the most DTF failures?
Most adhesion failures trace back to one of five errors:
- Using fabric softener or dryer sheets before pressing. Softener coats fibers with a hydrophobic film that blocks DTF adhesive. It does not wash out with a single rinse.
- Skipping pre-press. Moisture trapped in fabric creates steam during cure, lifting transfer edges from the inside out.
- Pressing a garment that beads water. A silicone or DWR finish will cause the transfer to peel within one wash, sometimes immediately.
- Attempting home mercerization. Concentrated caustic soda at home is dangerous and the process requires controlled tension equipment. The result on an improperly treated garment is permanent fiber damage.
- Pressing without a test patch on a new style. Every new garment style is an unknown until tested.
Troubleshooting shortcut: If you see edge lifting after cure, the root cause is almost always surface contamination or moisture. Re-clean, re-press, and re-test before assuming the transfer is at fault. If the problem persists across multiple garments of the same style, the fabric has a finish issue.
For a broader look at how prep connects to print quality, the DTF printing best practices guide covers press settings, curing, and durability from the application side.
How does Transferkingz support your prep process?
Transferkingz recommends pre-pressing at 300–320°F for cotton and 270–300°F for synthetics, using a lint-free pressing sheet, and confirming zero moisture before transfer application. For pre-wash, an enzyme detergent at 40°C with no softener is the standard recommendation.
Transferkingz guidance: If you are working with an unfamiliar fabric or a garment style that has failed a test patch, request a sample run before placing a full production order. The team can confirm prep parameters for your specific material and flag finish incompatibilities before they become a batch problem. Reach out via order notes, email, or phone with your fabric details and the team will advise.
Key Takeaways
Proper textile preparation is the single factor most likely to determine whether a DTF transfer bonds cleanly, lasts through washes, and looks sharp from the first press.
| Point | Details |
|---|---|
| Inspect before everything | Run the water-bead test and remove all labels, adhesives, and softener residue before any other step. |
| Pre-wash with enzyme detergent | Use enzyme detergent at 40°C with no fabric softener; soak factory-sized garments at 50–60°C first. |
| Pre-press every garment | Press at 300–320°F for cotton or 270–300°F for synthetics for 3–5 seconds to remove moisture and tension. |
| Match prep to fiber type | Cotton tolerates enzyme scouring; synthetics need heat-setting; specialty fabrics need individual testing. |
| Transferkingz sample runs | Request a sample run for unfamiliar fabrics before committing to full production quantities. |
Pro Tip: Treat the test patch as mandatory, not optional. Five minutes on one garment is cheaper than reprinting an entire batch.
The prep mistake that shows up more than any other
The most common failure pattern in DTF work is not a bad transfer. It is a garment that looked fine but had a softener residue or a factory silicone finish nobody tested for. The water-bead test takes ten seconds and catches it every time. The shops that skip it are the ones calling about peel failures two days after pressing.
The fix is always the same: re-wash without softener, pre-press again, run a test patch. If the bead test still fails after two washes, the finish is durable and the garment is not a good candidate for DTF. Reject it early rather than waste transfers and press time.
When you are unsure about a new fabric or a client-supplied blank, a sample run is the right call before production.
Ready to order DTF transfers with prep support built in?
Transferkingz prints custom DTF transfers with no minimum order, fast turnaround, and prep guidance available on every order. Whether you need a single test sheet to validate a new garment style or a full gang sheet for a production run, the process starts with uploading your design and specifying your material.

If your test patch flagged a finish issue or you are working with a fabric you have not pressed before, add a note at checkout or contact support directly. The team reviews prep questions before your order ships. For intricate designs where adhesion precision matters most, see how Transferkingz handles detailed prints before you commit to production. Place your order at transferkingz.com and get your transfers pressed right the first time.
0 comments