
TL;DR:
- Proper fabric preparation is crucial, as it impacts up to 60% of print quality, more than method choice.
- Small businesses should select digital printing methods like DTF or DTG for short runs and complex artwork.
Textile printing is the application of color in defined patterns onto fabric to create custom apparel and merchandise. Unlike dyeing, which colors fabric uniformly, printing places design exactly where you want it. This textile printing process guide covers the methods, preparation steps, and execution details that matter most for individuals and small business owners. Whether you are decorating a single T-shirt or building a product line, understanding screen printing, Direct-to-Film (DTF), sublimation, and heat transfer printing gives you the foundation to produce professional results without wasted materials or money.
What are the main textile printing methods for custom apparel?
The four fabric printing methods most relevant to small businesses are screen printing, digital printing (DTG and DTF), sublimation, and heat transfer. Each serves a different combination of fabric type, run size, and design complexity.
Screen printing forces ink through a mesh screen onto fabric. It produces bold, durable colors and is the standard for streetwear and branded merchandise. Screen printing machines can print up to 1,400 pieces per hour, but that speed only pays off at high volumes. For a run of 12 shirts, the screen setup cost makes it impractical.
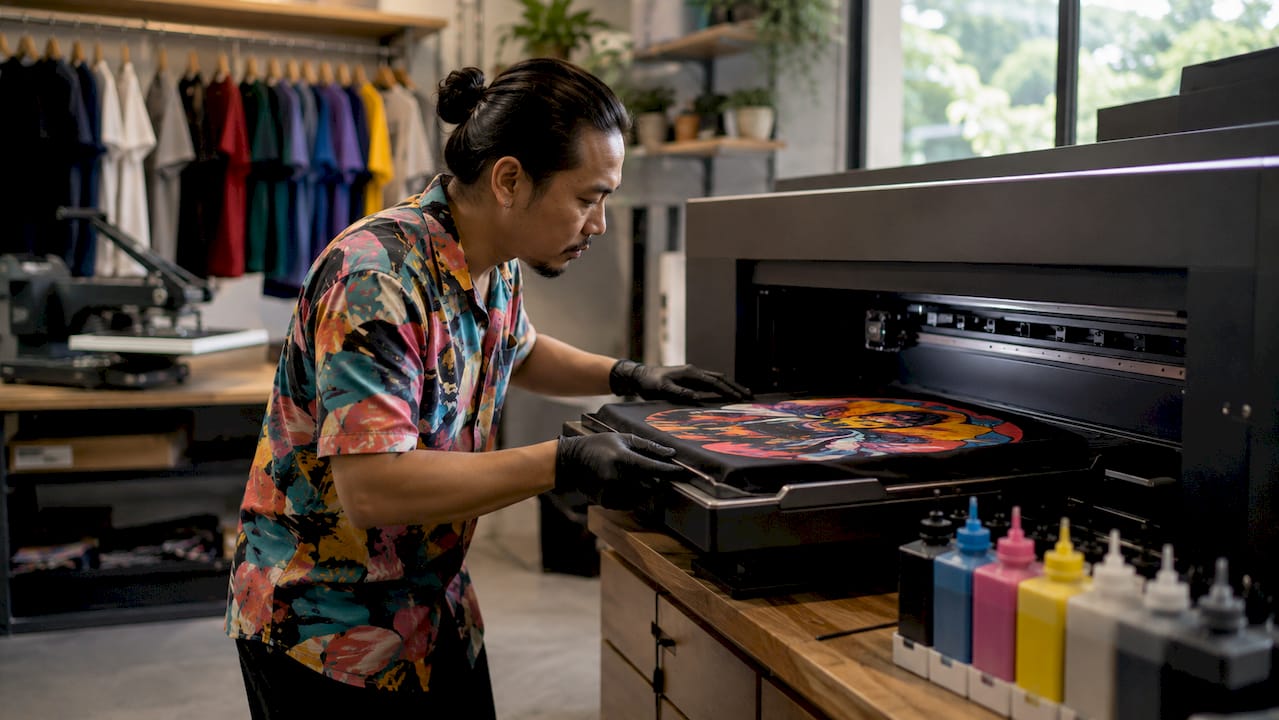
Digital printing (DTG and DTF) uses inkjet technology to apply ink directly to fabric or to a film that transfers to fabric. Digital methods require zero screen setup, making them the clear choice for short runs and complex graphics. DTF transfers in particular work on cotton, polyester, blends, leather, and nylon, giving you more fabric flexibility than any other method.
Sublimation printing converts dye into gas that bonds permanently with the fabric. The tradeoff is fabric specificity: sublimation works only on polyester or coated surfaces. On a 100% cotton shirt, sublimation ink simply will not bond.
Heat transfer printing applies a pre-printed design using heat and pressure. It is accessible, fast, and works well for one-off pieces or small batches. You can read more about how heat transfer works on clothing to understand the mechanics before investing in equipment.
| Method | Best for | Fabric compatibility | Min. run size |
|---|---|---|---|
| Screen printing | Bold designs, high volume | Cotton, most naturals | 24+ pieces |
| DTG | Complex art, cotton garments | Cotton, cotton blends | 1+ piece |
| DTF | Versatile custom transfers | Cotton, poly, blends, nylon | 1+ piece |
| Sublimation | All-over prints, sportswear | Polyester only | 1+ piece |
| Heat transfer | Quick single pieces | Most fabrics | 1+ piece |
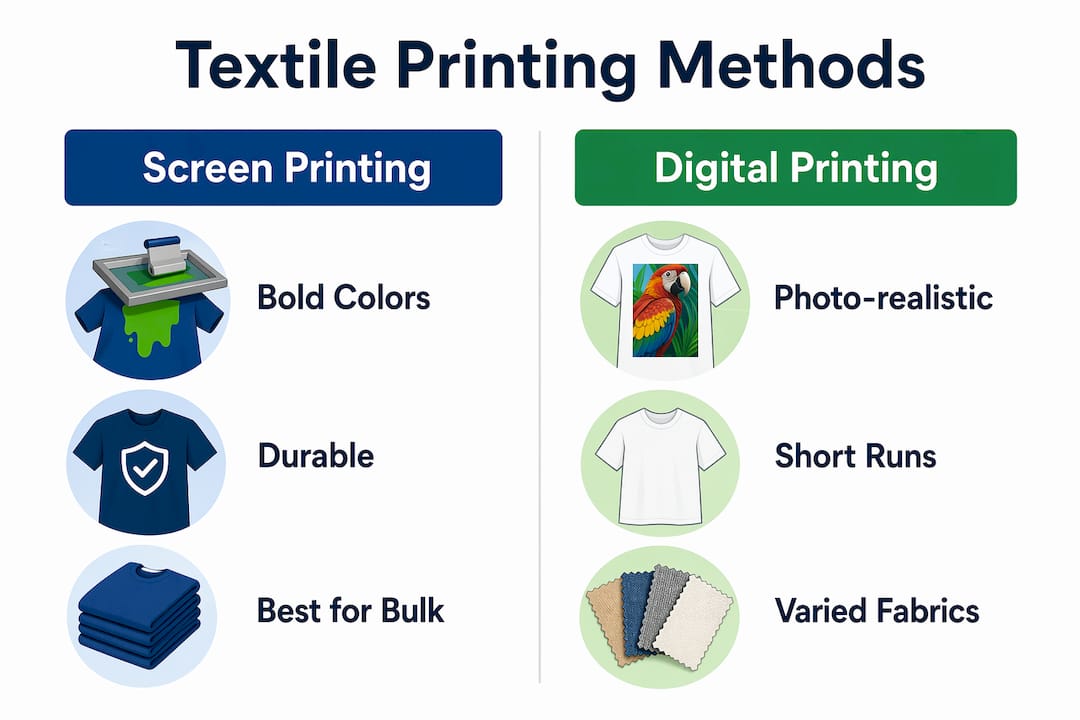
Pro Tip: Match your method to your design first, then your fabric. A photorealistic design with gradients belongs in DTF or DTG, not screen printing. A simple two-color logo on 500 cotton shirts belongs in screen printing.
How to prepare fabric and designs for successful textile printing
Fabric preparation is the step most beginners skip and most professionals never compromise on. Up to 60% of printing defects come from poor pretreatment, including insufficient scouring or bleaching. That single statistic explains why two prints from the same file can look completely different on two pieces of fabric.
Fabric preparation steps
Scouring removes oils, waxes, and sizing agents left from manufacturing. Bleaching creates a uniform white base so colors appear true. Mercerizing, used on cotton, swells the fiber and increases dye uptake. For DTF and heat transfer, you skip most of this chemistry because the transfer film carries the ink. For DTG and reactive printing on cotton, skipping pretreatment is the fastest way to get washed-out, uneven prints.
Skipping chemical pretreatment is the leading cause of poor ink acceptance and color saturation in digital textile printing. A properly scoured and pretreated fabric surface accepts ink evenly and holds color through repeated washing.
Design file preparation
Your design file is just as important as your fabric. Design resolution should be 150–300 dpi with the correct ICC color profile for your printer. A file that looks sharp on screen at 72 dpi will print blurry and pixelated on fabric. Color profiles matter because your monitor displays RGB while most textile printers output CMYK or a proprietary ink set. Submitting the wrong profile causes color shifts that no amount of reprinting will fix without correcting the source file.
| Requirement | Specification | Why it matters |
|---|---|---|
| Resolution | 150–300 dpi at print size | Prevents pixelation and blur |
| Color profile | ICC profile matching your printer | Ensures accurate color output |
| File format | PNG, TIFF, or PDF | Preserves transparency and detail |
| Background | Transparent for transfers | Avoids white box around design |
Pro Tip: Always request your printer’s ICC profile before finalizing colors. What you see on screen is almost never what prints without profile matching.
Step-by-step textile printing process for small businesses
A clear workflow prevents the most common and costly mistakes. The steps below apply across fabric printing methods, with notes on where the process differs.
-
Prepare your fabric. Wash and dry the fabric to remove sizing and preshrink it. For DTG, apply pretreatment spray and heat press it dry before printing. For DTF and heat transfer, a clean, lint-free surface is all you need.
-
Set up your design file. Confirm resolution, color profile, and file format. For DTF, build a gang sheet to fit multiple designs on one film and reduce cost per print. Transferkingz offers a gang sheet builder that makes this step straightforward for small orders.
-
Load and align your substrate. Place the fabric flat on the platen or heat press. Misalignment at this stage means a crooked print you cannot fix. Use registration marks or a laser guide if your equipment supports it.
-
Execute the print. For DTG, the printer applies ink directly to the fabric. For DTF, the printer outputs to film, which is then powder-coated and cured. For screen printing, you pull ink across each screen layer in sequence.
-
Fix and cure the ink. This step locks color into the fabric. DTG ink cures under a heat press at around 320°F for 45–60 seconds. DTF transfers bond to fabric under heat and pressure. Sublimation requires 380–400°F for full dye conversion. Skipping or rushing fixation causes ink to wash out after the first launder.
-
Wash and finish. After curing, wash a test piece to check colorfastness before fulfilling a full order. Trim threads, fold, and inspect for defects before packaging.
The biggest difference between digital and screen printing at this stage is setup time. Digital goes from file to finished print in minutes. Screen printing requires screen exposure, registration, and cleanup between runs.
Common mistakes to avoid:
- Printing on damp fabric, which causes ink to bleed and colors to shift
- Using the wrong cure temperature for your ink type
- Ignoring color profile settings and printing straight from an RGB file
- Skipping a test print before running a full production batch
- Applying too much pressure during heat transfer, which flattens fabric texture
How do you troubleshoot common textile printing problems?
Print defects fall into three categories: fabric issues, ink issues, and fixation issues. Knowing which category caused your problem tells you exactly where to intervene.
Fabric-related defects include uneven color, poor saturation, and ink beading. These almost always trace back to inadequate scouring or skipped pretreatment. The fix is to prep a new piece correctly and reprint rather than adjusting ink settings.
Ink-related defects include color mismatch, banding, and clogged nozzles. Color mismatch points to a color profile problem in your design file. Banding means your print head needs cleaning or calibration. Clogged nozzles on a DTG printer are a maintenance issue, not a design issue.
Fixation defects show up in the wash. If a print fades or cracks after one wash, the cure was incomplete. Check your temperature, time, and pressure settings against your ink manufacturer’s specifications.
Troubleshooting tips that save time and material:
- Run a test print on a scrap piece of the same fabric before committing to a full run
- Keep a log of your cure settings for each fabric and ink combination
- Check fabric compatibility for DTF before ordering transfers, since not every fabric bonds equally well
- Use a color spectrophotometer or Pantone swatch book to verify color accuracy before production
- Wash test prints inside out in cold water to simulate real-world durability
Pro Tip: Order a sample run of 3–5 pieces before any production batch over 50 units. The cost of a sample run is always less than the cost of reprinting 50 defective shirts.
Small businesses benefit most by choosing their printing method based on fabric type and run size. That single decision controls both quality and cost more than any other factor in the process.
Key takeaways
The most effective textile printing process for small businesses combines proper fabric preparation, correct design file specs, and a printing method matched to fabric type and run size.
| Point | Details |
|---|---|
| Fabric prep drives quality | Up to 60% of print defects come from poor pretreatment; never skip scouring or pretreatment. |
| Method selection matters | Match your printing method to fabric type and order size before anything else. |
| Design file specs are non-negotiable | Use 150–300 dpi and the correct ICC profile to avoid color and detail errors. |
| Fixation determines durability | Cure at the correct temperature and time or prints will fail after the first wash. |
| Test before full production | A sample run of 3–5 pieces prevents costly defects across large orders. |
Why fabric prep is the skill most guides underestimate
I have reviewed a lot of content on textile printing techniques, and the consistent gap is this: most guides spend 80% of their words on method comparisons and almost nothing on fabric preparation. That is backwards. The method you choose matters far less than the condition of the fabric you print on.
I have seen DTF transfers applied to unwashed, heavily sized fabric and the results were genuinely embarrassing. The same transfer on a properly prepped piece of the same fabric looked sharp and professional. The transfer did not change. The fabric did.
The other thing I would push back on is the idea that screen printing is the gold standard for durability. For high-volume, simple designs, it absolutely holds up. But digital printing has closed the durability gap significantly, and for anyone running short custom runs with complex artwork, the math simply does not favor screen printing anymore. Zero screen setup cost, no minimum order, and the ability to change your design between pieces are advantages that compound quickly for a small business.
If you are just starting out, pick one method, learn it deeply, and master your fabric prep before you experiment with anything else. The businesses I have seen grow fastest in custom apparel are not the ones with the most equipment. They are the ones with the most consistent process.
— Anthony
Ready to print your first custom order with Transferkingz?
Transferkingz specializes in high-quality DTF transfers that work on cotton, polyester, blends, and more, with no minimum order requirements and fast turnaround times. Whether you are printing a single custom piece or building out a product line, the process starts with uploading your artwork and selecting your transfer size.

Transferkingz uses premium inks and films to deliver vibrant, wash-resistant prints that hold up in real-world use. The gang sheet builder lets you fit multiple designs on one sheet to cut your cost per print. For individuals and small businesses in Texas and beyond, custom DTF printing services from Transferkingz are built to scale with your needs, from one piece to full production runs.
FAQ
What is the textile printing process?
Textile printing is the application of color in defined patterns onto fabric using methods like screen printing, DTF, DTG, sublimation, or heat transfer. The standard process includes fabric preparation, printing, fixation, and finishing.
Which fabric printing method is best for small businesses?
DTF and DTG digital printing are best for small businesses because they require no screen setup, work on short runs, and handle complex designs. Digital methods are the industry standard for custom and small-batch apparel production.
Can you print on any fabric with any method?
No. Sublimation printing works only on polyester or coated fabrics. DTF transfers bond to cotton, polyester, blends, and nylon. Matching your method to your fabric type is the first decision in any printing project.
What resolution should my design file be for textile printing?
Your design file should be 150–300 dpi at the final print size, with the correct ICC color profile for your printer. Files below 150 dpi will print with visible pixelation and loss of detail.
Why do my prints fade after washing?
Fading after washing is almost always a fixation problem. Incomplete curing at the wrong temperature or for too short a time prevents ink from bonding fully to the fabric. Check your cure settings against your ink manufacturer’s specifications and run a wash test before any full production run.
0 comments