

TL;DR:
- Applying the correct heat, pressure, and surface conditions ensures durable, vibrant transfers at home. Using a hard, heat-reflective surface and turning off steam improves adhesion and prevents failures. Proper technique with quality transfer materials enables professional results for small-scale apparel production.
The role of iron on transfers home is straightforward: heat and pressure from a household iron activate the adhesive layer on transfer paper or Direct-to-Film (DTF) film, bonding the design permanently to fabric fibers. Get the temperature wrong, and the transfer peels after two washes. Get it right, and you have a durable, vibrant print that holds up through dozens of cycles. For individuals and small business owners producing custom apparel without a heat press, the iron is the most accessible tool available. Mastering it requires treating it like a precision instrument, not a wrinkle remover.
How does the role of iron on transfers home affect quality and durability?
Heat and pressure work together to create adhesion. When the iron reaches the correct temperature, it melts the adhesive layer on the transfer film or paper, pushing it into the fabric’s fiber structure. Once cooled, that adhesive locks the design in place. Without enough heat, the adhesive stays partially liquid and never fully bonds. Without enough pressure, air pockets form between the transfer and the fabric, leading to cracking or peeling after the first few washes.
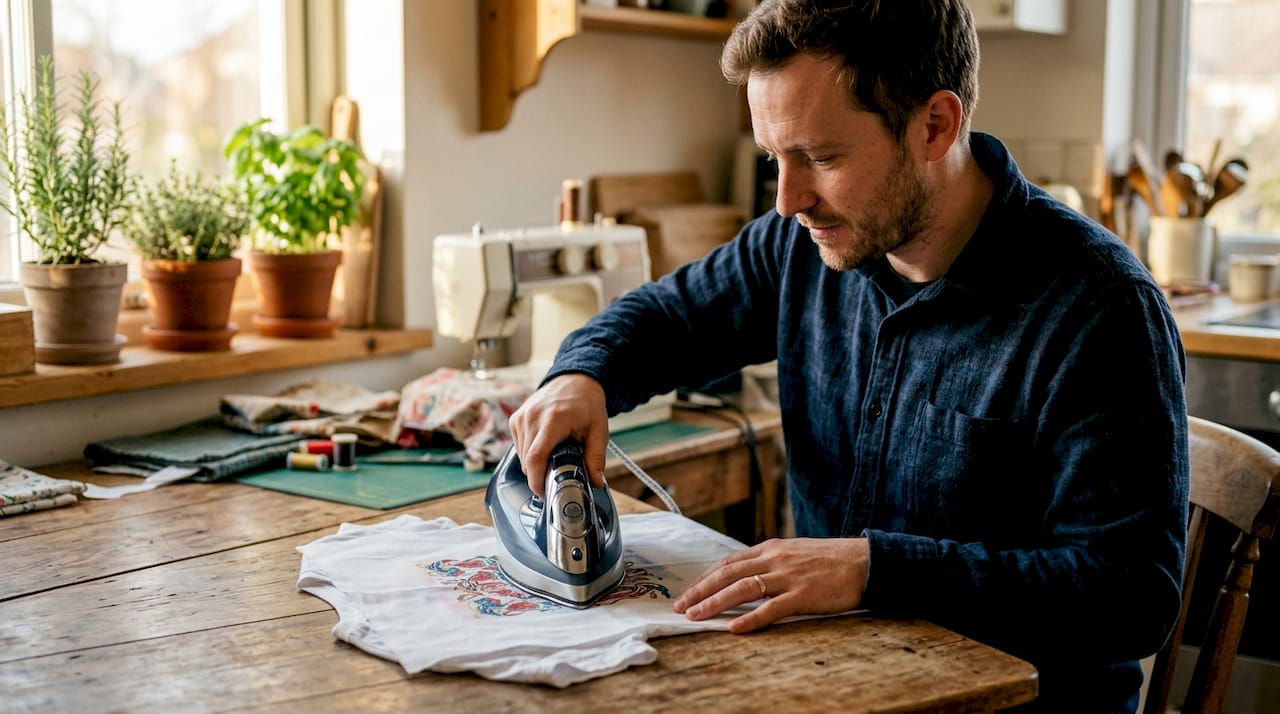
The recommended iron setting is the highest cotton or dry setting, approximately 310°F (155°C), with no steam, applying firm and steady pressure for 20–30 seconds per section and a total pressing time of 60–180 seconds depending on the material. That range matters because thicker films need longer contact time to fully activate. Pressing for only 20 seconds total on a DTF transfer almost guarantees early failure.
Steam is the single biggest mistake home users make. Water vapor creates micro-bubbles under the transfer film, preventing full contact between the adhesive and the fabric. Always turn the steam function completely off before pressing.
Key settings for successful home iron transfers:
- Temperature: Highest cotton or dry setting, approximately 310°F (155°C)
- Steam: Off, always
- Pressure: Firm and static, not sliding
- Duration per section: 20–30 seconds
- Total pressing time: 60–180 seconds depending on transfer type
- Surface: Hard and flat, never a padded ironing board
Pro Tip: If your iron does not display temperature, set it to the highest setting and let it heat for a full three minutes before pressing. A cold iron is the most common cause of failed transfers.
What are the best surfaces and techniques for ironing transfers at home?
The surface under your garment controls how much heat and pressure actually reach the transfer. Most people reach for their ironing board out of habit. That is the wrong choice.
Ironing boards absorb heat through their padding and dissipate it downward, reducing the effective temperature at the fabric surface. A kitchen counter or wooden table covered with a pillowcase or Teflon sheet gives you a hard, heat-reflective base. That surface pushes heat back up through the garment, making every press more effective. The difference in adhesion quality between an ironing board and a hard counter is significant enough to turn a failed transfer into a successful one.
Step-by-step surface and technique setup:
- Choose a hard, flat surface. A kitchen counter or sturdy table works well. Cover it with a clean pillowcase or a Teflon pressing sheet to protect both the surface and the garment.
- Pre-iron the garment for 10–15 seconds. Pre-pressing removes moisture and wrinkles that would otherwise cause bubbling or early peeling after washing.
- Position the transfer carefully. Place it design-side down on light fabrics (mirrored print required) or design-side up for DTF films. Smooth out any air pockets by hand before pressing.
- Apply static pressure, not sliding motion. Press the iron down firmly and hold it in place for 20–30 seconds per section. Sliding the iron shifts the transfer and creates uneven adhesion.
- Move section by section. For designs larger than the iron’s soleplate, lift and reposition rather than sliding. Overlap each section slightly to avoid cold spots.
- Peel at the correct temperature. Follow the transfer manufacturer’s instructions. Some require a hot peel, others a cold peel. Peeling at the wrong temperature tears the design.
Pro Tip: Place a second pillowcase or thin cotton cloth over the transfer before pressing. This protects the design from direct iron contact and distributes heat more evenly across the surface.
How do different types of iron-on transfers respond to home iron application?
Not all transfers behave the same under a home iron. The two most common types for home use are standard inkjet iron-on transfers and DTF transfers. Each has different heat requirements, durability expectations, and application procedures.
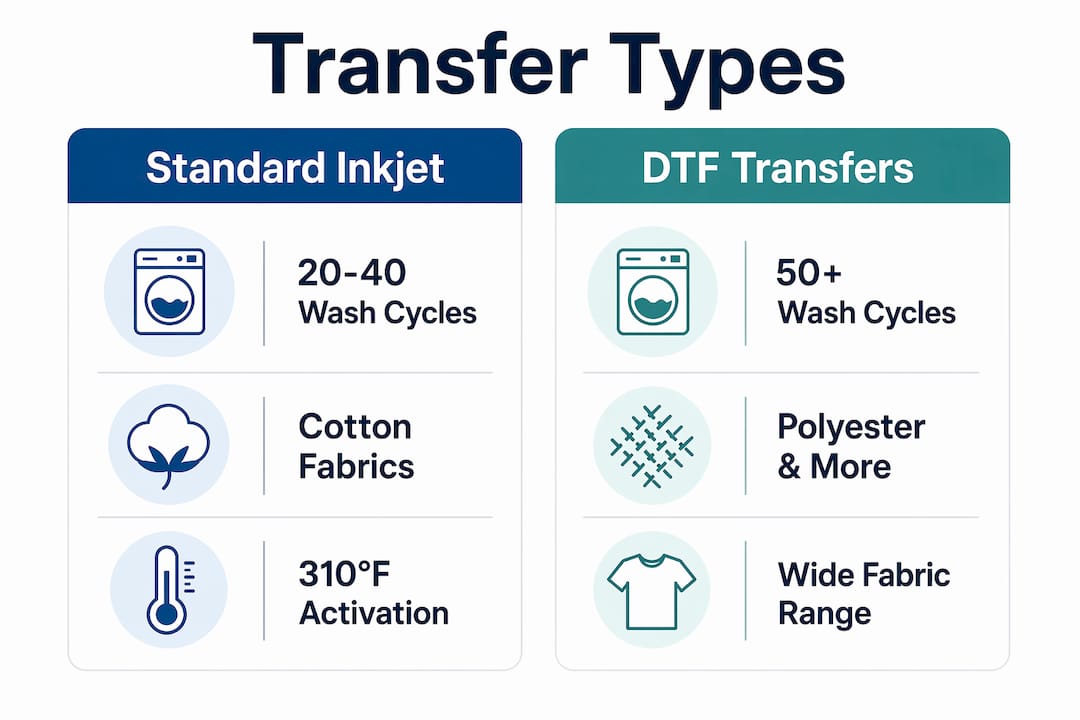
Standard inkjet iron-on transfers typically last 20–40 wash cycles when properly applied. They require approximately 310°F and a total pressing time within the 60–180 second range. Light-fabric paper must be printed as a mirrored image because it applies face-down. Dark-fabric paper does not require mirroring but has a thicker backing that needs longer pressing time. Both types work best on 100% cotton or high-cotton blends.
DTF transfers adhere to a much wider range of fabrics, including polyester, denim, and canvas, with heat activation at approximately 310°F. When properly applied and cared for, DTF transfers last 50 or more wash cycles. That durability advantage comes from the polyurethane adhesive layer used in DTF film, which bonds more deeply into fabric fibers than standard inkjet paper adhesives. For small business owners producing custom apparel at volume, DTF transfers offer a better return on material cost. You can learn more about DTF versus HTV to understand which method fits your production needs.
| Feature | Standard inkjet transfers | DTF transfers |
|---|---|---|
| Wash durability | 20–40 cycles | 50+ cycles |
| Heat required | ~310°F | ~310°F |
| Fabric compatibility | Cotton and cotton blends | Cotton, polyester, denim, canvas |
| Peel method | Varies by paper type | Usually hot or warm peel |
| Cost per shirt (materials) | $1–$3 | Varies by order size |
| Best for | Light home use | Small business and volume production |
Selecting transfer materials compatible with your fabric type and color directly impacts how well the design adheres and how it looks after washing. Using a light-fabric transfer on a dark shirt produces a washed-out result regardless of how well you apply the iron.
What common mistakes affect iron-on transfers at home and how to avoid them?
Most transfer failures trace back to a short list of avoidable errors. Recognizing them before you press saves both time and materials.
Most failures result from insufficient heat, inadequate pressure, or peeling the backing at the wrong time. Steam, padded surfaces, and skipping the pre-press step are the three most common causes. Each one is easy to eliminate once you know what to look for.
Common mistakes and how to fix them:
- Using steam: Steam creates moisture under the film. Turn steam off completely before heating the iron.
- Pressing on an ironing board: Padding absorbs heat and reduces pressure effectiveness. Switch to a hard, flat surface.
- Peeling too early or too late: Peeling while the transfer is too hot or fully cold can tear the design. Follow the specific peel instructions for your transfer type.
- Skipping the pre-press: Moisture trapped in the fabric causes bubbles. Pre-iron for 10–15 seconds before applying the transfer.
- Sliding the iron: Motion shifts the transfer mid-press. Hold the iron still and lift to reposition.
- Printing without mirroring: Light-fabric paper applied face-down produces a reversed image. Always mirror the design before printing on light-fabric paper.
Pro Tip: If a transfer partially peels after cooling, do not pull it off. Reposition it, cover with a pressing cloth, and re-press for another 20–30 seconds. Many partial failures are recoverable with a second pass.
What practical steps ensure professional transfer results with a home iron?
Consistent results come from following a repeatable process every time. Skipping any step, even a small one, compounds into a visible flaw or early failure.
Step-by-step application process:
- Match your transfer paper to your printer and fabric. Use inkjet paper with an inkjet printer. Choose light-fabric paper for white or light shirts, dark-fabric paper for dark shirts. For broader fabric compatibility, use DTF transfers from a provider like Transferkingz.
- Set printer quality to “best” and select the correct paper type. Lower print quality produces thinner ink layers that fade faster after washing.
- Mirror the design if using light-fabric inkjet paper. Print, then let the sheet dry completely before handling.
- Prepare your pressing surface. Place a pillowcase or Teflon sheet on a hard counter. Lay the garment flat and smooth out any folds.
- Pre-iron the garment for 10–15 seconds. This removes moisture and wrinkles. Let the fabric cool for 5 seconds before placing the transfer.
- Set the iron to the highest cotton or dry setting, approximately 310°F, with steam off. Allow the iron to fully heat before pressing.
- Press section by section with firm, static pressure for 20–30 seconds each. Cover the full design area, overlapping sections slightly.
- Peel the backing according to the transfer type’s instructions. Hot peel or cold peel, follow the manufacturer’s guidance exactly.
- Allow a full 48-hour cure time before the first wash. A 48-hour cure period lets the adhesive fully set, significantly extending transfer life.
- Wash inside-out in cold water on a gentle cycle. Cold water and gentle cycles prevent cracking and fading, extending the life of both inkjet and DTF transfers. Tumble dry on low or hang dry.
For a deeper look at applying DTF transfers specifically, Transferkingz provides a detailed guide on applying DTF transfers that covers technique nuances beyond what a general iron guide addresses.
Key Takeaways
A home iron produces durable, professional-quality transfers when used at 310°F with no steam, firm static pressure, and a hard flat surface beneath the garment.
| Point | Details |
|---|---|
| Temperature is non-negotiable | Set the iron to the highest cotton or dry setting, approximately 310°F, every time. |
| Surface choice determines adhesion | Use a hard counter with a pillowcase, never a padded ironing board. |
| DTF transfers outlast inkjet | DTF transfers last 50+ washes versus 20–40 for standard inkjet transfers. |
| Pre-press and cure time matter | Pre-iron for 10–15 seconds and wait 48 hours before the first wash. |
| Steam destroys transfers | Always turn steam off completely before pressing any transfer type. |
What I’ve learned from treating the iron as a precision tool
Most people underestimate what a home iron can do. They treat it like a household chore tool and then wonder why their transfers crack after three washes. The truth is that a well-used iron, on the right surface, at the right temperature, with the right technique, produces results that are nearly indistinguishable from a basic heat press.
The biggest shift for me was stopping the sliding motion. Every time you slide the iron, you risk shifting the transfer a fraction of an inch. That fraction shows up as a blurry edge or a lifted corner after the first wash. Holding the iron still and lifting to reposition feels unnatural at first, but it becomes second nature quickly.
The other thing I tell every small business owner who asks: do not cheap out on the transfer material. A $1 sheet of low-quality inkjet paper pressed perfectly will still fail faster than a quality DTF transfer pressed with average technique. The iron is only half the equation. The material it is pressing matters just as much. Transferkingz offers iron-on transfer alternatives worth reviewing if you want to understand the full range of options before committing to a method.
Mastering the iron at home is genuinely worth the effort. It keeps production costs low, gives you creative control, and scales surprisingly well for small batch orders. The learning curve is short. Most people get consistent results within their first five or six attempts once they follow the process correctly.
— Anthony
Transferkingz: quality transfer films built for home and small business use
Custom apparel production does not require a commercial print shop. Transferkingz supplies high-quality DTF transfer films designed to work with a home iron, giving you professional-grade durability without professional-grade equipment.

Whether you are printing one shirt or fulfilling a small batch order, Transferkingz offers transfer films compatible with cotton, polyester, denim, and canvas. No minimum order requirements mean you can test designs before committing to volume. Visit the Transferkingz Print Point to explore the full product range, or check out digital transfer film capabilities to see how detailed and intricate designs hold up through repeated washing. Quality materials make every press count.
FAQ
What temperature should I set my iron for home transfers?
Set your iron to the highest cotton or dry setting, approximately 310°F (155°C), with steam turned off. This temperature activates the adhesive layer on both standard inkjet and DTF transfer films.
How long do home iron-on transfers last after washing?
Standard inkjet iron-on transfers last 20–40 wash cycles when properly applied. DTF transfers last 50 or more wash cycles, making them the better choice for garments that see frequent use.
Why is my iron-on transfer peeling after one wash?
Peeling after one wash usually means the iron temperature was too low, the pressing time was too short, or the garment was washed before the 48-hour cure period ended. Re-press with firm static pressure at 310°F and wait the full 48 hours before washing.
Can I use an ironing board for home iron-on transfers?
An ironing board is not recommended. Its padding absorbs heat and reduces the pressure reaching the fabric, leading to weak adhesion. Use a hard, flat surface like a kitchen counter covered with a pillowcase or Teflon sheet instead.
Do I need to mirror my design before printing?
Light-fabric inkjet transfer paper requires a mirrored design because it applies face-down onto the garment. Dark-fabric paper and DTF transfers do not require mirroring. Always check the instructions for your specific transfer type before printing.
0 comments