

If your UV DTF transfer won’t stick, the problem is almost always one of three things: surface contamination, a mismatch between the B-film tack and the substrate, or a peel that happened too fast or too soon. This guide walks through fast checks first, then substrate-specific fixes, and closes with a repeatable QA process so the fix actually holds on the next hundred pieces, not just the one you’re staring at.
If it sticks now, contamination was your culprit, and you just saved yourself an afternoon of chasing lamp settings.
Try these five things in order before you touch your printer settings:
- Wipe the substrate with IPA and let it flash dry fully before pressing.
- Check your B-film’s tack by pressing a scrap piece onto glass or metal and tugging gently after a few seconds.
- Slow down your peel angle. Low and slow beats fast and flat almost every time.
- Confirm press temperature with a contact thermometer rather than trusting the digital readout.
- Re-check pressure across the platen. Cold or light-pressure zones cause spotty failures on otherwise identical parts.
Pro Tip: Once you’ve cleaned a part with IPA, don’t touch that surface with bare fingers. Skin oil undoes the cleaning in seconds, and it’s the single most common way shops recontaminate a “fixed” test piece.
Key Takeaways
Adhesion failures in UV DTF trace back to contamination, tack mismatch, or peel timing far more often than to the film or ink itself.
| Point | Details |
|---|---|
| Check contamination first | Wipe with IPA, let it fully flash dry, and retest before adjusting equipment. |
| Confirm B-film tack | Press a scrap sample and tug gently to verify the film bonds before a full run. |
| Slow the peel | Use a low, slow peel angle and match cold or warm peel timing to the film’s spec. |
| Test substrates individually | Run a dyne test or cross-hatch test per material rather than assuming one recipe fits all. |
| Order tested transfers | Transferkingz ships UV DTF and DTF transfers with adhesion already verified per batch. |
Table of Contents
- What Causes UV DTF Adhesion Issues, Step by Step?
- How Do You Fix Press and Peel Problems Fast?
- Which Substrate Fixes Actually Work for UV DTF?
- When Should You Use an Adhesion Promoter or Surface Treatment?
- Is Your Curing Setup Causing the Adhesion Problem?
- How Do You Test and Prove an Adhesion Fix Works?
- What Daily Habits Prevent Repeat Adhesion Failures?
- A One-Page UV DTF Application Checklist for the Press Floor
- Why Testing Beats Guessing on Adhesion Fixes
- Prefer to Skip the Troubleshooting Entirely?
- Sources
What Causes UV DTF Adhesion Issues, Step by Step?
Chasing adhesion problems without a system wastes film, ink, and time. Run through this sequence and you’ll usually land on the cause within three tests.
- Contamination check. Wipe with IPA, let it flash off completely, then press a fresh sample on that spot. A pass here means your root cause was oil, mold release, or fingerprints, not equipment.
- Wet-out and burnish check. Press the transfer, then rub firmly across the surface with a burnishing tool or credit card edge before peeling. UV DTF transfers behave like pressure-sensitive adhesives, so poor contact during application is a common, overlooked failure mode.
- Press and cure sequence check. Confirm temperature, dwell time, and pressure are all within spec before blaming the film.
Use these branches to interpret what you find:
- Cross-hatch or tape test fails even after cleaning → move to a promoter or mechanical abrasion.
- The adhesive feels tacky or soft after full cure time → suspect lamp output or cure dose, not surface prep.
- Identical parts pass and fail inconsistently → look at film lot variability or storage conditions, not your process.
For a controlled test, set up one control zone per press run, change only one variable at a time (temperature, then pressure, then peel timing), and write down the result before moving to the next variable.
Pro Tip: Keep a sacrificial tile of glass, aluminum, or acrylic on your bench specifically for A/B testing. Running a new promoter or film lot on scrap first, instead of your customer’s product, turns a costly failure into a two-minute test.
How Do You Fix Press and Peel Problems Fast?
Most adhesion failures resolve with press and peel adjustments alone, before you ever need a chemical treatment. Wrong temperature, insufficient pressure, and poor peel timing account for the majority of sticking failures reported by DTF shops, and UV DTF shares the same weak points.
Check temperature with an actual contact thermometer, not the number on the display, since heat platens develop cold spots as they age. Adjust in 5 degree increments and retest rather than jumping straight to a big change.
Pressure needs to be even across the entire platen. Run a test grid, transfer a control sticker to each corner and the center, and compare results side by side. A part that sticks in the middle but lifts at the corners is telling you pressure, not chemistry, is the issue.
Peel technique matters more than most decorators assume. Dwell time needs to match your film’s spec sheet, and peel angle should stay low and slow rather than snapping the film back at 90 degrees. Some B-films are formulated for cold peel, others for warm peel, and using the wrong one is a frequent, invisible cause of edge lift.
Test one variable at a time:
- Temperature only: hold pressure and dwell steady, change heat, and check adhesion on a fresh sample.
- Pressure only: hold temperature and dwell steady, adjust pressure, and look for even coverage.
- Peel timing only: hold everything else constant and slow down your peel by a few seconds.
A passing result means the transfer resists a firm scratch and doesn’t lift at the edges after 24 hours. A failing result shows white edges, visible film outline, or ink that scratches off with a fingernail. Push temperature or pressure too far past spec, though, and you risk scorching film or warping thin plastics, so move in small steps.
Which Substrate Fixes Actually Work for UV DTF?
Different materials fail for different reasons, and treating glass like plastic (or plastic like metal) wastes film and time. Surface energy, texture, and cleanliness together determine whether a UV coating actually bonds, and each substrate class needs its own quick test.
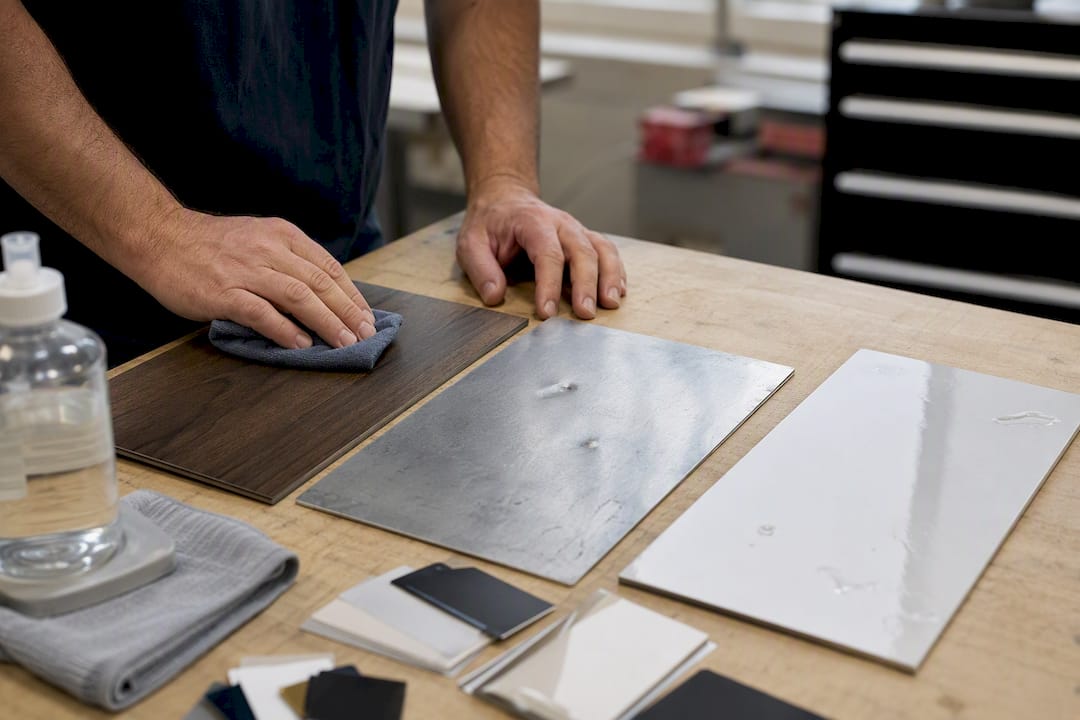
Glass. Clean thoroughly with IPA, then test B-film tack directly on a scrap panel. Silane-based promoters work well here because silane chemistries are formulated specifically for glass and similar coatings. For anything going through a dishwasher, run a soak test before committing to a production run.
Metals. Degrease first, then add light mechanical abrasion or a metal-specific promoter if the clean test still fails. A coin-scratch test after 24 hours tells you fast whether the bond survives real-world handling like keys in a pocket or a mug bumping a sink edge.
Plastics. Low-surface-energy polymers like polypropylene and polyethylene are notorious for rejecting adhesives outright. A dyne test in the 40 to 50 range is the benchmark UV inks generally need to hit; below that, flame treatment or corona/plasma exposure raises surface energy enough for a proper bond. Custom UV DTF stickers on hard plastic goods fail almost exclusively for this reason.
Fabric and flexible substrates. Confirm the film is rated for flexible use, since a rigid-substrate B-film will crack on a garment. Verify the powder adhesive fully cured, since under-cured powder is a top cause of DTF film not sticking to fabric.
Silicone and soft-touch coatings. These generally reject adhesives outright, even with promoters. Test a control piece first, and if it fails clean, plan on a different decoration method entirely rather than fighting the material.
Pro Tip: Curved items like tumblers add a second variable, uneven pressure, on top of substrate chemistry. If a flat test panel sticks but the curved product doesn’t, your issue is contact, not adhesion.
When Should You Use an Adhesion Promoter or Surface Treatment?
Not every failed transfer needs chemistry. Sometimes a clean and a slower peel fixes it. But when a substrate fails a clean control test, you’re choosing between a promoter or a physical treatment, and the right pick depends on volume and material.
Wipe-on promoters are the easiest entry point for small shops: apply a thin, even coat, respect the flash time on the label, and toss anything past its dating, since most promoters carry a usable shelf life of 6 to 12 months before performance drops. Silane-based promoters target glass and glazed ceramics specifically. Jettable primers integrate into the print pass itself, which suits higher-volume shops running the same substrate repeatedly, but they add a real cost per sheet that a wipe-on doesn’t. Practical options range from wipe-on chemistry to standalone flame or plasma units, each changing the surface a different way.
Physical treatments skip chemicals entirely. Flame treatment works well on PP, PE, and curved goods but demands real ventilation and PPE, since you’re running an open flame near solvents. Corona and plasma units suit industrial volume where consistency matters more than upfront cost. Light mechanical abrasion is often enough for metals alone.
| Method | Best for | Key limitation |
|---|---|---|
| Wipe-on promoter | Low volume, mixed substrates | Requires exact flash time; degrades with age |
| Silane-based promoter | Glass, glazed ceramics | Substrate-specific; won’t help on plastics |
| Jettable primer | High-volume repeat runs | Adds per-sheet cost; needs printer integration |
| Flame treatment | PP, PE, curved parts | Fire risk; needs ventilation and PPE |
| Corona/plasma | Industrial batch runs | Equipment cost not justified for small shops |
Test any promoter with a control zone left untreated next to a treated zone, then run a cross-hatch and tape test on both, followed by a soak test if the end product gets washed. Remember that IPA cleans but doesn’t promote adhesion on its own; it’s prep, not a fix.
Pro Tip: Never store wipe-on promoters near heat or open flame stations. Most are solvent-based and flammable, and cross-contamination between a flame-treatment area and your promoter shelf is a real fire hazard, not a theoretical one.
Is Your Curing Setup Causing the Adhesion Problem?
A UV lamp that’s aging quietly is one of the most underdiagnosed causes of tacky, weak bonds. Curing performance is one of the core factors determining whether a UV coating adheres properly, right alongside surface energy and cleanliness.
Track lamp hours the same way you’d track any consumable with a defined lifespan. LED modules and mercury bulbs both lose intensity gradually, well before they fail outright, so a lamp that “still works” can be underdelivering UV dose for weeks before you notice tacky prints.
Reflected UV off shiny or metallic substrates can overexpose ink near the printhead, a problem flat matte substrates rarely show. If your prints look fine on one material but blister or discolor on foil or polished metal, check for reflection, not curing time.
Statistic Callout: UV inks bond most reliably when the treated surface measures 40 to 50 dyne, a range worth confirming with a dyne test rather than assuming your promoter or flame treatment hit the target.
Check these printer settings when adhesion drifts without any obvious cause:
- Print speed and pass count, since rushing a job under-cures the top layer.
- Clear or varnish pass usage, which changes both gloss and surface chemistry.
- Lamp intensity readings, logged against hours run.
Pro Tip: Put lamp hours on the same maintenance calendar as your press temperature checks. A five-minute log entry each week catches drift long before a customer catches a peeling print.
How Do You Test and Prove an Adhesion Fix Works?
A fix that isn’t tested isn’t a fix, it’s a guess that happened to work once. These four tests turn one lucky result into a repeatable shop recipe.
- Dyne test. Apply dyne test fluid or pens to the cleaned surface and read where the fluid beads versus spreads evenly; UV inks want that 40 to 50 dyne range confirmed before you print.
- Cross-hatch and tape test. Score a grid into the cured print, apply firm tape, and pull it back sharply. Anything more than minor edge flaking at the grid lines is a fail.
- Coin or scratch test. Drag a coin edge across the cured surface with moderate pressure to simulate keys, zippers, or daily handling.
- Wash and soak test. Run the finished piece through the actual use cycle it’ll face, dishwasher cycles for mugs, wash cycles for garments, and check for lifting afterward.
Record every test with a control ID, date, promoter or treatment used, cure settings, and pass/fail result. That log becomes your shop’s playbook: the next time a new hire hits the same substrate, they’re not guessing, they’re pulling a proven recipe off the shelf.
What Daily Habits Prevent Repeat Adhesion Failures?
Most adhesion problems that keep coming back trace to inconsistent habits, not bad materials. Gloves and lint-free cloths during handling, plus a full IPA flash time before pressing, stop the majority of contamination issues before they start.
Track film lot numbers and promoter expiry dates the same way you’d track ink cartridges. A film lot that behaves differently from the last batch is a data point, not a mystery.
Keep a simple sample log with fields for date, substrate, promoter, cure settings, and result, and retest any new batch before running it at volume.
Pro Tip: Train every operator to press one control piece before starting a high-value job, especially after switching film lots or substrate suppliers. It costs one sheet and five minutes, and it catches the batch that would’ve cost you a full reprint.
A One-Page UV DTF Application Checklist for the Press Floor
Tape this sequence next to your press. It’s the order that catches problems before they become finished, failed product.
- Clean the substrate with IPA and let it flash dry completely.
- Test tack on a scrap piece of the same substrate.
- Print or apply the transfer with even pressure across the full contact area.
- Cure fully, confirming lamp hours and settings are current.
- Peel low and slow, matching the film’s cold or warm peel spec.
- Second-press if the film calls for it.
Watch for these three mistakes every time:
- Touching the cleaned area before pressing.
- Peeling before the adhesive has fully set.
- Skipping the control swatch to “save time” on a rush job.
Any time you switch substrate suppliers or film lots, run this full checklist on a sample piece first. Reordering your existing DTF transfer application checklist from a trusted supplier removes one variable entirely from this troubleshooting chain.
Why Testing Beats Guessing on Adhesion Fixes
Most shops treat adhesion failures as one-off emergencies, fixing the piece in front of them and moving on without writing anything down. That’s how the same failure comes back three weeks later on a different job. Testing one variable at a time and logging what worked turns a string of lucky guesses into a process someone else on your team can repeat without you standing over their shoulder.
Pro Tip: A single control tile, tested before a big run, is the cheapest insurance in the shop. It costs one sheet of film and five minutes, and it’s usually the difference between catching a bad lot and reprinting an entire order.
Prefer to Skip the Troubleshooting Entirely?
Every fix above assumes you’re running the press yourself, which is the right call for shops with volume and control over their process. But if adhesion testing is eating hours you’d rather spend on design or sales, Transferkingz already runs that testing on your behalf, on every batch of UV DTF and DTF transfers it ships.

Transferkingz builds transfers with tested application recipes baked in, so the film that arrives at your shop has already cleared the cross-hatch, tape, and soak tests this guide walks through. There’s no minimum order, and both local pickup and nationwide shipping are available depending on your location. If you’re switching substrates or scaling up a new product line, request a production quote through Print Point or check custom DTF printing options in Dallas to get a sample run started before committing to volume.
Sources
- Testing adhesion promoters for UV printing: a substrate guide
- DTF Film Not Sticking? 12 Causes and Exact Fixes
0 comments