

Yes. UV DTF decals hold up on car windows, bumpers, and painted body panels when the film, ink, and application are done right, and they reproduce photographic detail no cut vinyl can match. UV curing hardens the ink into a scratch and fade-resistant layer within seconds of printing, which is what gives these decals their outdoor life span. If you’re ready to move past the “is this real” stage, jump to the application checklist below or go straight to Transfer Kingz’s UV DTF sticker page to spec a custom order.
TL;DR:
- UV DTF decals are more cost-effective for complex, multi-color, and photographic designs due to no weeding or setup costs, especially for small batches.
- Proper surface preparation and application between 50°F and 90°F significantly extend decal lifespan, but exposure to sunlight, salt, and abrasion still impact durability.
- The cured ink and varnish layers provide weather resistance comparable to vinyl, but application errors like trapped air or insufficient adhesion are common failure points.
- Artwork should be submitted as vector files in CMYK with at least 300 PPI resolution and proper bleed to ensure accurate, high-quality printing.
- UV DTF decals typically last several seasons outdoors if applied correctly, with lifespan affected by sun exposure, placement, and environmental conditions.
Table of Contents
- What Are UV DTF Car Decals and How Is the Printing Process Different?
- UV DTF vs. Vinyl and Other Decal Methods: What Actually Works Best on a Car?
- How Long Do UV DTF Car Decals Actually Last Outdoors?
- What File Specs Do You Need for Production-Ready UV DTF Artwork?
- How Much Do Custom UV DTF Car Decals Cost and How Long Do They Take?
- How Do You Apply a UV DTF Car Decal Without Ruining It?
- What Do Print Shops See Go Wrong Most Often?
- Ready to Order Custom UV DTF Car Decals?
- Where to Learn More Before You Order
- Sources
What Are UV DTF Car Decals and How Is the Printing Process Different?
UV DTF stands for ultraviolet direct-to-film. The design gets printed onto a specialty film, cured under UV light on the spot, then transferred onto the final surface, whether that’s tempered glass, a painted fender, or a laptop lid. This is a distinct process from direct-to-substrate printing, where a machine prints straight onto the object itself. DTF gives you a portable, peel-and-stick product instead of a printed object.
The “UV” part matters more than most buyers realize. Standard solvent or eco-solvent inks air-dry or oven-cure over minutes or hours, leaving a softer ink layer prone to scuffing. UV-curable inks cross-link almost instantly under ultraviolet light exposure, forming a hard, glossy shell over the pigment the moment it passes under the lamp. That shell is doing double duty: it locks in color and it acts as the first line of defense against sun, rain, and road grime.
A typical UV DTF stack for vehicle use runs four layers. Bottom to top: a release liner, the adhesive layer (usually a permanent or semi-permanent acrylic adhesive), the printed ink layer, and a protective varnish or laminate on top. That varnish is not decorative. It’s what separates a decal that survives a Texas summer from one that chalks and fades within a season. Some printers offer gloss, matte, or textured varnish finishes, which changes how the decal reflects light without changing the underlying durability.
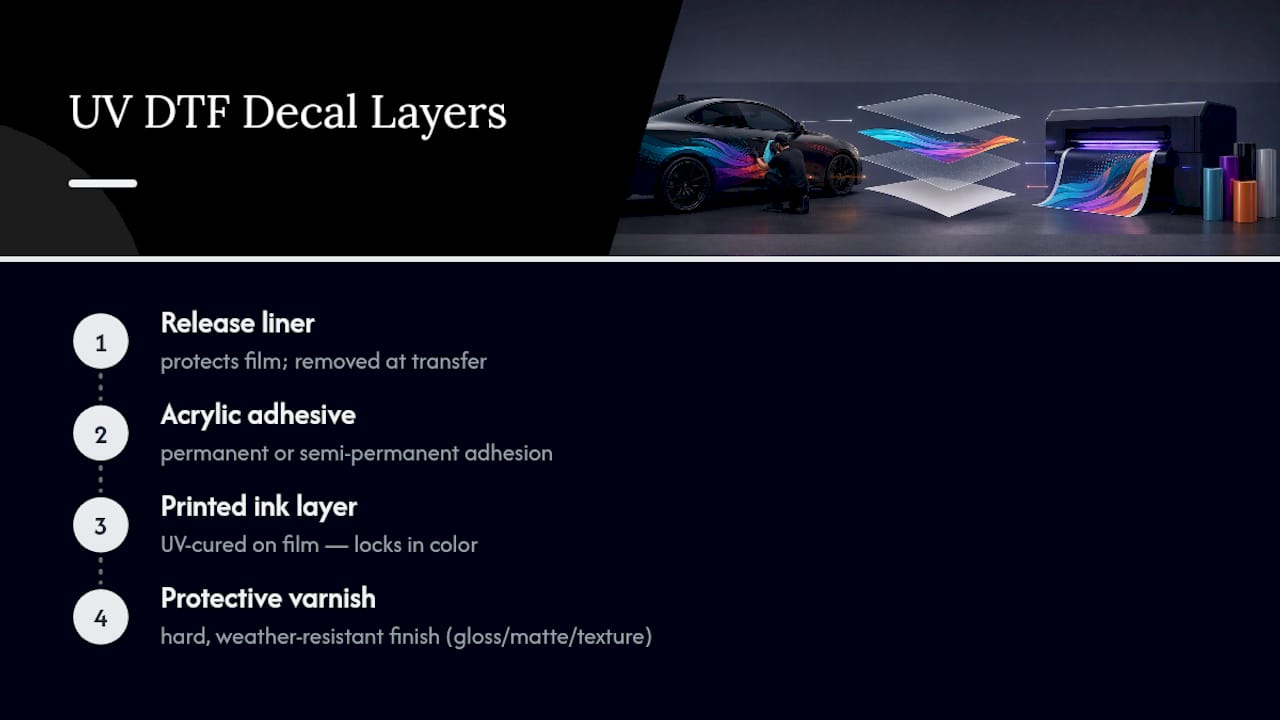
The workflow difference that actually affects your bottom line: because the image is printed and cured before it ever touches the film’s adhesive backing, there’s no weeding. Cut vinyl requires a technician to manually peel away the negative space around letters and fine details, which is slow and gets worse as designs get more intricate. UV DTF printing skips that step entirely, which is why complex photographic designs, gradients, and multi-color logos cost less to produce this way than they would in cut vinyl. That’s also why one-off or small-batch orders make more financial sense with UV DTF than with methods that charge a premium for setup and weeding time on a single piece.
The trade-off is thickness. UV DTF decals sit slightly raised off the surface compared to thin cast vinyl, which some buyers actually prefer for a premium, dimensional look on a bumper or tailgate but which matters less on a flat window application.
UV DTF vs. Vinyl and Other Decal Methods: What Actually Works Best on a Car?
Every decal method trades something for something else. None of them wins across the board, so the right pick depends on what the design looks like and where it’s going on the vehicle.
Durability and UV resistance. Cast and cut vinyl with a laminate can last several years outdoors, but unlaminated vinyl fades faster and is more prone to edge lifting. UV DTF’s cured ink and top varnish give it comparable weather and wash resistance out of the gate, since the protective layer is baked into the print process rather than added as a separate laminate step.
Visual fidelity. This is where UV DTF pulls ahead for detailed work. Photographic gradients, fine text, and metallic or glossy special effects reproduce cleanly without the banding or color limitations that come with spot-color vinyl cutting. If your design has more than three or four colors, or any photo-realistic element, cut vinyl starts to struggle and screen printing on film gets expensive fast.
Installation and failure modes. Vinyl decals fail mostly through edge lifting, especially at complex cut lines where the adhesive has less surface area to grip. UV DTF decals, being a single continuous printed sheet, don’t have those vulnerable cut edges. The more common UV DTF failure is bubbling from trapped air or moisture during application, not edge peel.
Best-use cases, in practical terms:
- UV DTF: photographic or multi-color logos, gradient designs, small-batch or one-off orders, curved surfaces where a continuous print is easier to wrap.
- Cut vinyl: simple single or two-color text and logos, large fleet runs where per-unit cost drops with volume, situations needing a raised 3D letter look.
- Printed and laminated vinyl: full-color designs at large scale, like wraps or oversized window graphics, where laminate cost is justified by the size of the job.
- Perforated window film: one-way visibility graphics for rear windows, a category vendors typically stock separately from standard opaque decal film.
Pro Tip: If your artwork has a photo, a gradient, or more than three colors, don’t even price out cut vinyl. UV DTF will look better and often cost less once you factor in the setup and weeding time vinyl requires.
How Long Do UV DTF Car Decals Actually Last Outdoors?
Expect a well-applied UV DTF decal on a properly prepped surface to hold color and adhesion through normal seasonal exposure, with the varnish layer doing most of the work against fading and surface scratches. That’s the realistic range, not a guarantee, because three variables outside the print shop’s control shape how long any exterior decal survives.
Sun exposure is the big one. UV rays break down pigment molecules over time in any printed material. The UV-curable ink and varnish combination is built specifically to resist this better than standard inks, since the cured layer forms a harder, more chemically stable shell than ink that simply air-dries. But “resistant” is not “immune.” A decal on a south-facing dashboard behind glass, cooking under magnified sunlight, will degrade faster than the identical decal on a rear bumper.
Salt and road chemicals matter more than most people expect. Vehicles in coastal regions or states that salt roads in winter see accelerated adhesive breakdown at the decal edges, particularly on lower body panels that catch spray from the road. This isn’t unique to UV DTF. Any adhesive-backed graphic is vulnerable here, but it’s worth factoring into where on the vehicle you place a decal meant to last years rather than months.
High-abrasion placement shortens lifespan regardless of print method. Rocker panels, lower doors, anywhere a decal sits in the path of grit kicked up by tires, will show wear faster than a hood or upper window placement. If a decal is decorative and semi-permanent, that’s a fine trade. If it’s a business logo meant to represent your brand for years, steer it toward a lower-abrasion zone.
Vendors across the category routinely market these decals as waterproof and built to withstand weather and washing when the printing and lamination are done correctly, and that claim holds up in normal use. The word “correctly” is doing a lot of work in that sentence, though. Surface prep failures, not ink or film quality, cause most of the early failures that get blamed on the material itself.
Common failure modes to watch for:
- Edge lifting from insufficient adhesion during application, usually traced back to a surface that wasn’t fully clean or dry.
- Bubbling from trapped air, which shows up within the first day or two if the applicator rushed the squeegee pass.
- Premature fading concentrated in one spot, which almost always points to a hot, direct-sun placement rather than a defective print run.
- Cracking at flex points, which happens when a decal is applied across a seam or a panel edge that moves slightly with temperature changes.
None of these are inherent flaws in UV DTF as a technology. They’re application errors, and they’re avoidable with the prep steps covered further down.
What File Specs Do You Need for Production-Ready UV DTF Artwork?
Get the file wrong and you’ll be looking at a second proof round, which eats into your turnaround time. Here’s what a print shop actually needs to run your design without back-and-forth.
- File type: Vector formats (AI, EPS, or PDF built from vector paths) are strongly preferred for logos, text, and flat-color graphics because they scale to any size without quality loss. If your design includes a photo or a painted illustration, high-resolution raster files (PSD, TIFF, or flattened PDF) work, but resolution has to be right at final print size, not just on your screen.
- Resolution: Raster elements need at least 300 PPI at the actual size the decal will print. A logo that looks sharp on a phone screen at 72 PPI will look soft and pixelated blown up to an 8-inch decal.
- Color mode: Submit in CMYK, not RGB. Screens display color in RGB, but printers mix CMYK, and colors shift, sometimes dramatically, in that conversion. If brand color accuracy matters (matching a Pantone or a specific hex code), attach an ICC profile reference or a physical color swatch note.
- Bleed and safe area: Build in at least a 0.125 inch bleed around any element that touches the edge of the decal shape, and keep critical text or logos at least that same distance inside the cut line so nothing gets clipped during trimming.
- Layer naming for varnish or effects: If you want a spot-gloss varnish, metallic accent, or raised texture on part of the design, that needs to live on its own clearly labeled layer (something like “VARNISH” or “SPOT_GLOSS”) so the printer knows exactly which elements get the special treatment and which stay flat.
- Scale check before submission: Print a rough copy at actual size on standard paper and hold it up to the spot on the vehicle where it’s going. Designs that look perfectly proportioned on a monitor sometimes look oversized or cramped once they’re next to a door handle or wheel well in real life.
Pro Tip: Convert your text to outlines (vector paths) before submitting the file, even if you used a common font. If the print shop’s software doesn’t have that exact font installed, your carefully chosen typeface can get substituted with something generic, and you won’t catch it until the proof comes back wrong.
How Much Do Custom UV DTF Car Decals Cost and How Long Do They Take?
Pricing on UV DTF work is driven mainly by size, quantity, and finish complexity, in that order. A small single-color logo decal costs less per unit than a large photographic graphic, and that gap widens if the design calls for spot varnish or a metallic finish layer, since those require an extra printing pass.
Quantity behaves differently here than with screen printing. Because UV DTF has no screen setup cost and no weeding labor, unit prices drop more gradually as quantity increases rather than dropping off a cliff at some minimum order threshold. That’s part of why shops built around this method, Transfer Kingz among them, can run single decals without charging a punishing setup fee that only makes sense at volume.
Turnaround windows vary by shop and order size, but the general shape is consistent across the category: standard production runs a few business days from approved artwork to ship-ready product, with rush options available for time-sensitive orders at an added cost. Bulk orders for fleet branding or event merchandise take longer simply because more sheets have to run through the printer and cure cycle.
Before production starts, expect a digital proof. This is the point to actually check color, scale, and layer placement, because once a large batch is printed, corrections mean reprinting the whole run. A good proof process catches font substitution, color drift, or a bleed error before it becomes an expensive mistake instead of after.
Shipping and returns follow standard custom-print logic: because these are made-to-order goods, returns are typically limited to production defects rather than buyer’s remorse over a design choice, so get the proof approval right the first time. If you’re ordering for local pickup instead of shipping, some producers, Transfer Kingz included, support that option in specific service areas, which is worth asking about directly if lead time is tight.
How Do You Apply a UV DTF Car Decal Without Ruining It?
Application is where most decal failures actually happen, not in the printing. Get the surface prep right and the rest is mechanical.
Surface prep, before you even open the decal package:
- Wash the application area with regular car soap and water, then dry it completely.
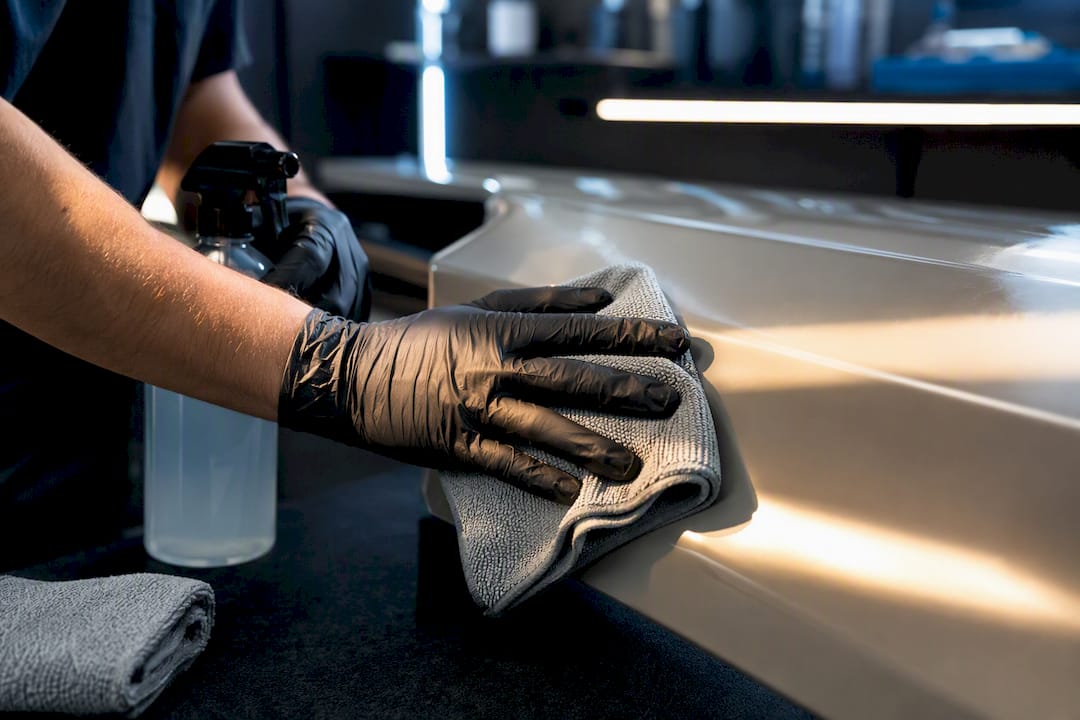
- Wipe the same area down with isopropyl alcohol on a clean microfiber cloth to strip any wax, oil, or silicone residue that soap alone won’t remove.
- For heavily contaminated painted surfaces, a clay bar pass beforehand pulls out embedded grime that plain washing leaves behind.
- Check the temperature. Most UV DTF decals apply best between roughly 50°F and 90°F; extreme cold makes adhesive stiff and unresponsive, extreme heat makes it grab too fast for repositioning.
- Avoid applying in direct, high humidity or right before rain. Moisture trapped under the decal during application is a leading cause of bubbling.
Step-by-step application:
- Peel back a small section of the backing paper, not the whole sheet, to expose just enough adhesive to start positioning.
- Place that exposed edge onto your marked spot and check alignment before committing further.
- Slowly peel the rest of the backing away while smoothing the decal down with a squeegee or a credit card edge, working from center outward to push out air as you go.
- If your decal uses a cold peel or hot peel top film (rather than a full backing removal), follow the specific peel temperature the product calls for. Peeling too early or at the wrong temperature can lift ink along with the film.
- Run the squeegee over the full decal a second time with firm, even pressure to lock down adhesion, paying extra attention to edges and corners.
Post-application care:
- Give the adhesive at least 24 to 48 hours to fully bond before washing the vehicle.
- Skip high-pressure spray washes and touchless car washes for at least a week; the pressure and chemical concentration can lift a fresh decal’s edges before the adhesive has cured to full strength.
- Hand wash with mild soap around the decal area going forward, and avoid parking exclusively nose-in toward direct afternoon sun if you want to slow fading.
Products like those covered in detailed cleaning and decontamination guides can help you get glass and paint genuinely clean before application, which matters more for long-term adhesion than most people assume. Transfer Kingz’s own application walkthrough covers this same sequence with surface-specific notes for glass versus painted panels, worth a look before your first order arrives.
What Do Print Shops See Go Wrong Most Often?
The single most common mistake isn’t in the printing. It’s a design submitted in RGB with a font that never got outlined, followed by a rushed application on a surface that was wiped down but never actually degreased. Those two errors account for more redo requests than bad film or bad ink ever do.
The second pattern worth flagging: buyers underestimate how much finish choice matters for where a decal is going. A high-gloss varnish looks great on a hood emblem and terrible on a dashboard piece that catches glare while driving. Matching the finish to the placement, not just to what looks best in a mockup, separates decals that get complimented from ones that get peeled off in frustration.
None of this is exotic knowledge. It’s the boring, repeatable groundwork of clean files and clean surfaces, and it’s the difference between a decal that lasts and one that becomes a cautionary story. The technology behind UV DTF is genuinely solid. Most of what determines whether a specific decal succeeds happens before the print job even starts.
— Anthony
Ready to Order Custom UV DTF Car Decals?
If everything above sounds like a lot to coordinate on your own, that’s the actual value Transferkingz offers here: you upload a file, pick your specs, and skip the vinyl weeding, screen setup fees, and minimum order quantities that make small custom jobs expensive elsewhere.

Some UV DTF printers run printing with no minimum order requirements, so a single decal for your own car costs roughly what you’d expect, not a marked-up “small batch” rate. The process is straightforward: upload your artwork (vector files preferred, but the team can advise on raster specs too), get a digital proof back, approve it, and production starts. Turnaround runs fast on standard orders, with local pickup available for customers in the Dallas area and shipping nationwide for everyone else, including Texas-wide production support for larger fleet or business orders. Once your decals arrive, the step-by-step application guide walks through the same surface-prep and installation sequence covered above, tailored to what Transferkingz ships. Start by browsing the UV DTF sticker product page to see finish options and get a quote on your design.
Where to Learn More Before You Order
For a deeper technical look at how UV curing changes ink performance, KEDITEC’s breakdown of UV printer applications covers the chemistry side in more detail than most buyers need but worth knowing if you’re comparing suppliers. MTU Tech’s piece on UV DTF for automotive customization goes further into how the process handles complex, photo-realistic designs.
On the material-selection side, Decals.com’s overview of custom car decals and Signs.com’s vehicle decal category page both walk through when to choose clear, opaque, or perforated film depending on whether you’re working with glass or painted body panels.
For surface prep specifically, Diamondbrite’s guide to removing water spots is a solid companion to the cleaning steps above, and their full product shop covers the broader maintenance side once your decal is installed. And for the production and application side from a working UV DTF printer, Transferkingz’s own durability review notes and hard goods decal guide are worth bookmarking before your next order.
Sources
- Car stickers by uv printer - KEDITEC
- UV DTF Printing for Car Decals and Automotive Customization
- Decals
- Signs
0 comments