
TL;DR:
- Cold peel transfer involves removing the film after the garment completely cools, resulting in sharper and more durable prints. It offers a wider peeling window, better edge precision, and a softer finish compared to hot peel, especially on complex designs and textured fabrics. Proper step-by-step processes and a second press enhance the transfer’s washability and professional appearance.
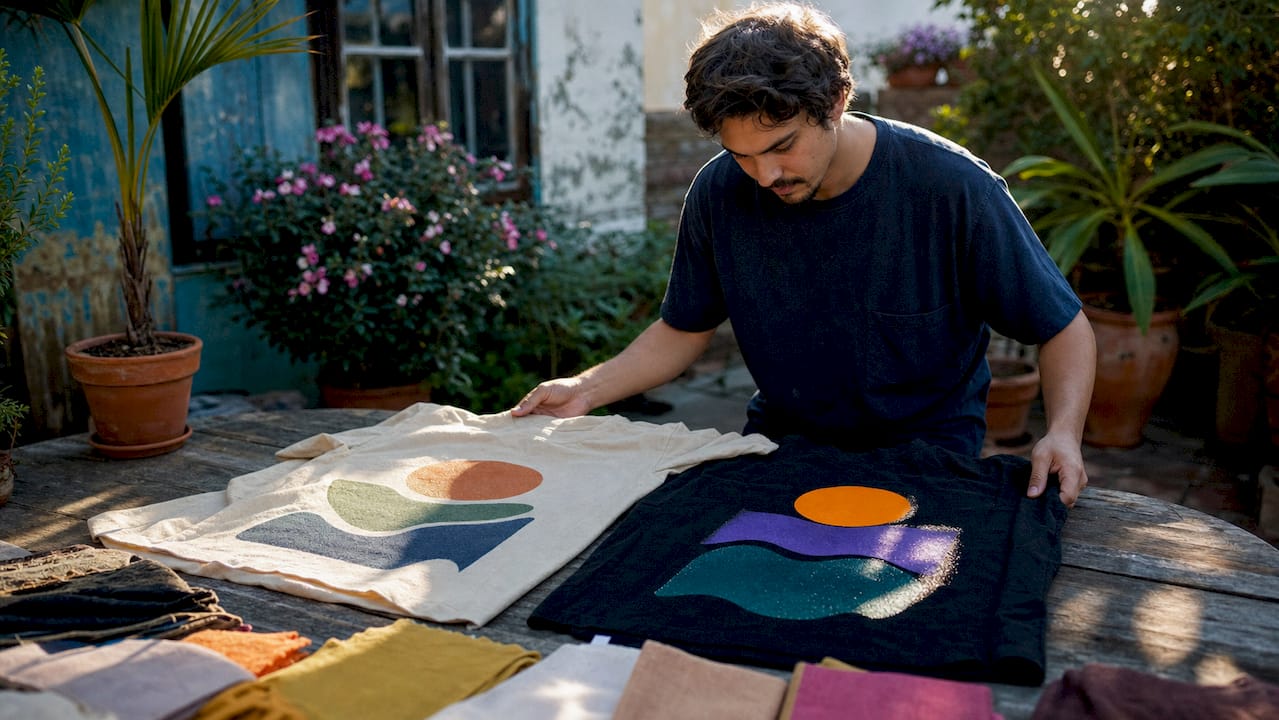
Cold peel transfer is defined as a heat transfer printing method where you remove the transfer film only after the garment has fully cooled, allowing the adhesive to solidify completely and bond tightly with fabric fibers. This technique, widely used in Direct-to-Film (DTF) printing, delivers sharper edges, stronger wash durability, and a softer finish than its counterpart, hot peel. If you run a small clothing brand, decorate custom apparel, or press transfers at home, understanding the cold peel transfer process is the difference between prints that last and prints that peel after three washes.
What is cold peel transfer and how does it differ from hot peel?
Cold peel transfer is the quality-focused method in DTF printing, preferred for detailed, durable prints, while hot peel excels in speed for high-volume production. The core difference is timing. With hot peel, you pull the film immediately after pressing, within a 10–15 second window. With cold peel, you wait. That waiting period is not a flaw in the process. It is the process.
Cold peel and hot peel films are also chemically distinct. Using the wrong peel method on the wrong film leads to failed adhesion or damaged edges. You cannot substitute one method for the other and expect clean results. Always confirm which film type you are working with before pressing.
The cold peel printing technique produces a matte, textured finish that sits close to the fabric surface. Hot peel tends to leave a glossier, stiffer feel. For premium garments where the hand feel matters as much as the visual, cold peel finishes are the clear choice.
How does the cold peel transfer process work step by step?
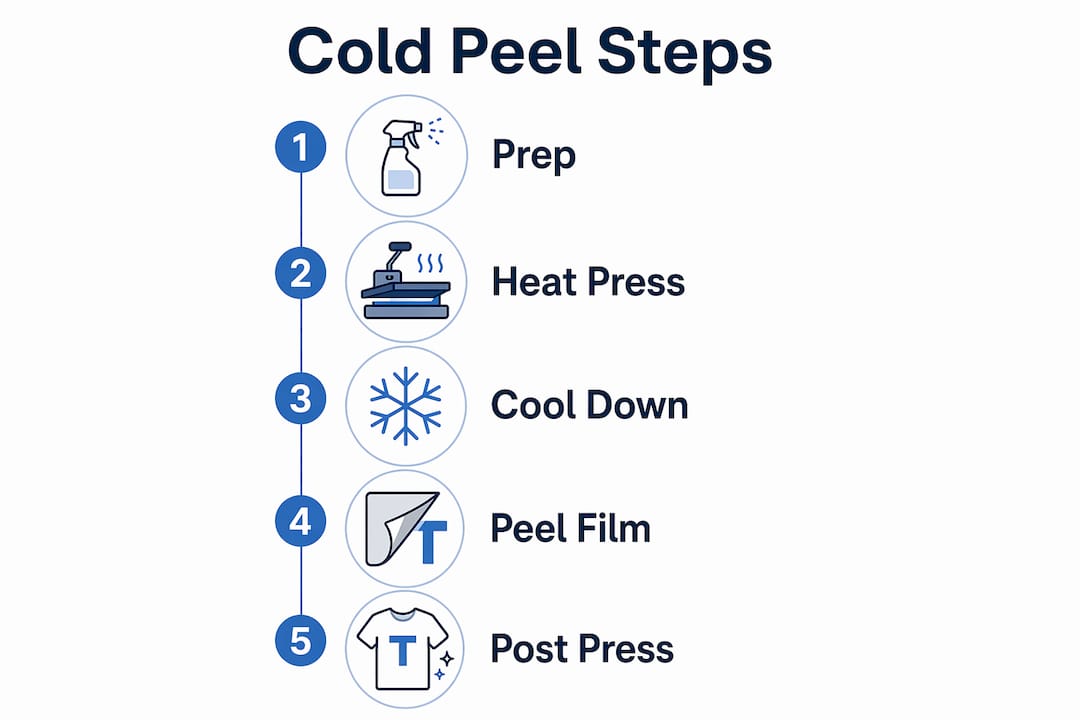
The cold peel transfer process follows a specific sequence. Skipping or rushing any step produces inconsistent results.
- Pre-press the garment. Run your heat press over the fabric for 3–5 seconds to remove moisture and wrinkles. A flat, dry surface gives the adhesive the best chance to bond evenly.
- Position the transfer. Place the DTF transfer film face-down on the garment. Align it carefully before closing the press.
- Apply heat and pressure. Press at the temperature and time specified for your film, typically around 300–320°F for 10–15 seconds with medium-to-firm pressure. Follow your film supplier’s exact specs.
- Wait for full cooling. After pressing, set the garment aside and wait 60–90 seconds before touching the film. The adhesive needs this time to cure and grip the fabric fibers.
- Peel slowly and evenly. Once the film is neutral to the touch, peel it back at a low angle, pulling steadily. Do not jerk or rush. A slow, consistent pull preserves fine lines and small text.
- Apply a second press. After peeling, place a cover sheet over the design and re-press for 5–10 seconds. This step flattens micro-bubbles and seals the design into the fabric, dramatically improving wash durability.
Pro Tip: Instead of relying on a fixed timer, touch the edge of the film lightly. If it still feels warm, wait longer. Film that is neutral to the touch is ready to peel. Temperature sensing beats clock-watching every time.
One often-overlooked detail is the second press after peeling. Many decorators skip it and wonder why their prints crack after a few washes. The re-press is not optional. It is what separates a durable, professional result from a fragile one.
What are the benefits of cold peel transfer compared to hot peel?
The benefits of cold peel transfer are most visible on complex designs and demanding fabrics. Here is how the two methods compare directly:
| Feature | Cold Peel | Hot Peel |
|---|---|---|
| Wash durability | Superior | Moderate |
| Edge precision | High | Lower |
| Finish | Soft, matte | Glossy, stiffer |
| Peel timing window | 60 seconds to 60 minutes | 10–15 seconds |
| Best for | Fine detail, premium garments | High-volume, speed-focused runs |
| Fabric compatibility | Polyester, blends, textured | Cotton, smooth fabrics |
Cold peel transfer offers superior wash durability and better edge precision than hot peel. That matters most when your design includes thin lines, small text, or a complex logo where a blurry edge would ruin the look.
The wider timing window is a practical advantage that gets overlooked. Cold peel transfers can be peeled anytime between 60 seconds and 60 minutes after pressing without compromising quality. Hot peel demands you act within a narrow 10–15 second window. Miss it, and the film bonds too firmly. The cold peel window removes that pressure entirely, which reduces operator errors in small-batch production.
Pro Tip: If you are running a small shop and pressing one or two pieces at a time, cold peel’s forgiving window lets you press a batch, handle other tasks, and return to peel when you are ready. That flexibility is worth more than it sounds.
Additional benefits of cold peel transfer worth noting:
- Softer hand feel. The matte finish sits close to the fabric, making the print feel like part of the garment rather than sitting on top of it.
- Better adhesion on difficult fabrics. Polyester, fabric blends, and textured surfaces bond more reliably with cold peel due to the longer adhesive curing time.
- Reduced risk of smearing. Because the adhesive has fully set before you peel, there is no risk of the ink shifting or smearing during film removal.
What fabrics and designs work best with cold peel transfers?
Cold peel is preferred on polyester, blends, and textured fabrics for better adhesion and less risk of edge lifting. The longer bonding time gives the adhesive a chance to work into the surface irregularities of textured materials, creating a stronger grip than hot peel can achieve.
For designs, cold peel excels when the artwork demands precision. If you are pressing intricate design details like fine text under 12 points, thin outlines, or photorealistic gradients, cold peel is the right choice. Hot peel’s faster removal can pull at delicate ink layers before they have fully bonded, leaving ragged edges or missing detail.
Fabrics and design types where cold peel consistently outperforms:
- Polyester and poly-blend jerseys. Athletic wear and performance fabrics respond well to cold peel’s extended bonding time.
- Fleece and textured sweatshirts. The uneven surface of fleece needs more adhesive contact time to hold a clean edge.
- Designs with fine text or thin lines. Cold peel preserves detail that hot peel can distort or lift.
- Premium retail garments. When the finished product needs to look and feel like a screen-printed piece, cold peel’s matte, low-profile finish delivers that result.
One caution: heat-sensitive fabrics like some nylons or thin synthetics require lower press temperatures. Always test a scrap piece before committing to a full run. Cold peel’s longer bonding time does not compensate for a press temperature that damages the fabric underneath.
Common mistakes and how to fix them
Most cold peel failures come down to one of three errors: peeling too soon, skipping the second press, or forcing the cooling process.
- Peeling before the film cools. This is the most common mistake. Peeling cold peel film before it cools increases resistance and causes ink lifting or edge damage. If you catch it immediately, lay the film back down and re-press for 10–15 seconds before cooling again.
- Forcing cooling with a fan or cold air. It feels like a time-saver, but forcing cold air causes uneven adhesive contraction, which leads to cracking or lifting after washing. Let the garment cool at room temperature.
- Skipping the second press. A 5–10 second re-press with a cover sheet after peeling is non-negotiable. Skipping it leaves micro-bubbles under the design that break down in the wash.
- Uneven pressure during the initial press. If your heat press has hot spots or uneven platens, parts of the design will not bond properly. Check your press calibration regularly.
- Discarding a failed transfer too quickly. If a cold peel transfer shows lifting or partial failure after peeling, re-laying the film and re-pressing for 10–15 seconds can rescue the print. Do not throw out the garment before attempting a re-press.
Pro Tip: Keep a silicone cover sheet at your press station at all times. Using it for both the initial press and the post-peel re-press protects the design surface and produces a finish that looks closer to screen printing than most customers expect from a transfer.
For a full application walkthrough, the DTF transfer application checklist from Transferkingz covers each step with the detail a decorator needs to get consistent results.
Key takeaways
Cold peel transfer produces the most durable and detail-precise results in DTF printing when you allow full cooling, apply a second press, and match the method to the right fabric and design type.
| Point | Details |
|---|---|
| Full cooling is required | Wait 60–90 seconds before peeling to let the adhesive bond completely with fabric fibers. |
| Second press is non-negotiable | Re-press for 5–10 seconds after peeling to seal the design and improve wash durability. |
| Cold peel beats hot peel on detail | Fine text, thin lines, and complex logos hold sharper edges with cold peel than hot peel. |
| Fabric match matters | Polyester, blends, and textured fabrics bond more reliably with cold peel than with hot peel. |
| Never force the cooling | Ambient room-temperature cooling prevents uneven adhesive contraction and later cracking. |
Why cold peel is worth the extra time
I have worked with decorators who switched from hot peel to cold peel and immediately noticed the difference in customer returns. Shirts that used to come back after a few washes with cracked edges stopped coming back. That alone justifies the extra 90 seconds per piece.
The pushback I hear most often is about speed. Hot peel is faster per piece, and in a high-volume shop running hundreds of shirts a day, that gap adds up. But for small-batch production, custom orders, and premium garments, the math flips. One ruined shirt costs more in materials and reputation than the time you saved by peeling hot.
What I tell beginners is this: master cold peel first. The forgiving peel window gives you room to learn without wrecking garments. Once you understand how the adhesive behaves, how different fabrics respond, and what a properly bonded transfer feels like before you peel, you will have the foundation to use any transfer method confidently.
The second press is the step most people skip, and it is the step that separates amateur results from professional ones. Post-peel pressing with a cover sheet produces a finish that genuinely resembles screen-printed quality. Your customers will notice, even if they cannot name why it looks better.
Invest in a quality heat press with even platen pressure. Inconsistent pressure is the hidden cause of most adhesion failures, and no cooling technique or film quality can compensate for a press that runs hot on one side.
— Anthony
Get cold peel transfers that perform from Transferkingz
Transferkingz supplies DTF transfers built for decorators who care about quality. Whether you are pressing a single custom piece or running a small-batch production order, the Print Point category offers cold peel transfer films and supplies designed for sharp detail, strong adhesion, and wash-resistant results.

Transferkingz uses premium inks and films that hold fine lines and complex artwork through repeated washing. There are no minimum order requirements, so you can test a design before committing to a full run. Turnaround times are fast, and the application process is straightforward enough for beginners while delivering the consistency that production shops demand. If you want to understand how heat transfer printing works before placing your first order, that resource covers the fundamentals clearly. Visit Transferkingz to find the right transfer film for your next project.
FAQ
What is cold peel transfer in DTF printing?
Cold peel transfer is a DTF printing method where the transfer film is removed only after the garment cools completely, typically 60–90 seconds after pressing. This allows the adhesive to fully bond with the fabric, producing sharper edges and stronger wash durability.
How long do you wait before peeling a cold peel transfer?
You wait 60–90 seconds for ambient cooling before peeling. Cold peel transfers can actually be peeled anytime up to 60 minutes after pressing without affecting design quality, giving you a wide and forgiving production window.
Is cold peel or hot peel better for detailed designs?
Cold peel is better for detailed designs. It preserves fine text, thin lines, and intricate logos more reliably because the adhesive fully cures before the film is removed, preventing ink lifting or edge distortion.
Can you fix a cold peel transfer that started to lift?
Yes. If lifting occurs immediately after peeling, re-lay the film over the design and re-press for 10–15 seconds, then allow it to cool fully before peeling again. This rescue technique prevents discarding the garment.
Does cold peel work on all fabric types?
Cold peel works best on polyester, fabric blends, and textured surfaces like fleece. It is less suited to heat-sensitive fabrics like thin nylon, where lower press temperatures are required and fabric compatibility should always be tested first.
0 comments