

Raster art is pixel-based and resolution-dependent. Vector art is math-based and resolution-independent. The short rule: use raster for photographs, digital paintings, and complex textures; use vector for logos, text, icons, and anything that must scale cleanly to any size. For print jobs, Adobe explains that vectors scale without quality loss while rasters pixelate when enlarged beyond their native resolution.
- Send vector files (AI, EPS, PDF) to printers for logos and line art.
- Send raster files (PNG or TIFF) at 300 DPI at the final print size for photos and painterly artwork.
- When in doubt, keep both: a vector layout with embedded high-resolution raster elements is the standard hybrid approach for apparel and packaging.
Key Takeaways
Vector scales without quality loss; raster captures photographic detail — knowing which to send before you upload prevents the most common and costly print mistakes.
| Point | Details |
|---|---|
| Raster for photos and textures | Use JPEG, PNG, or TIFF at 300 DPI at the final print size for photographs and complex imagery. |
| Vector for logos and scalable art | Submit AI, EPS, or PDF for logos and line art so the printer rasterizes at its own native resolution. |
| Check DPI before sending | A 72 DPI web image printed large will always look soft; confirm resolution at actual print dimensions first. |
| Conversion has real limits | Running Image Trace on a low-res JPG does not produce a true vector; manual redraw is the reliable fix. |
| Transferkingz reviews artwork | Transferkingz accepts vector and high-res raster files and checks artwork before printing to prevent reprints. |
Table of Contents
- What is a raster image, and how does it work?
- What is a vector image, and why does it scale perfectly?
- Raster vs vector at a glance: the key differences
- When should you use raster, vector, or both?
- How can you tell if an image is raster or vector?
- What happens when you convert between raster and vector?
- Print prep: what you need to get right before sending files
- A quick reference to file formats and what they preserve
- How to prepare artwork for DTF and apparel transfers
- The one thing most designers get wrong about raster and vector
- Transferkingz handles the file work so you can focus on the design
- Sources
What is a raster image, and how does it work?
A raster image is a grid of colored pixels, each assigned a specific color value. Zoom in far enough on any raster file and you will see those individual squares. The total number of pixels determines the image’s resolution, measured in pixels per inch (PPI) for screens or dots per inch (DPI) for print.
That resolution is fixed at the moment of capture or creation. Scale the image larger than its native size and the software has to invent pixel data it does not have, producing the blurry, blocky edges known as pixelation. Adobe confirms that raster files will lose quality and become pixelated when scaled beyond their original dimensions. A 72 DPI web image printed at 12 inches wide is a common, painful example.
Common raster formats and their practical uses:
- JPEG/JPG: Lossy compression, small file size, no transparency. Best for photographs and web images where file size matters more than pixel-perfect edges.
- PNG: Lossless compression, supports transparency. The go-to for graphics with clean edges, logos on colored backgrounds, and web assets that need a transparent layer.
- GIF: Limited to 256 colors, supports simple animation. Rarely used for print.
- TIFF: Lossless, large file size, supports layers. The professional standard for print-ready photography and scanned artwork.
- PSD: Adobe Photoshop’s native format. Preserves layers, masks, and adjustment layers for ongoing editing. GIMP is a free alternative that reads and edits many of the same raster formats.
Photographers and scanned artwork are almost always raster files. High-resolution camera captures create large raster files that retain photographic detail, which is exactly what makes them the right choice for that type of imagery.
Pro Tip: Before sending any raster file to a printer, check the image dimensions and DPI at the actual print size, not the screen preview size. In Photoshop, go to Image → Image Size and confirm the resolution reads 300 DPI at the final printed dimensions.
What is a vector image, and why does it scale perfectly?
Vector images are not built from pixels at all. They are defined by mathematical equations: points, lines, curves, and fills calculated by the software on the fly. GeeksforGeeks describes vector images as mathematical path-based graphics that can scale indefinitely without any loss of quality, because the math recalculates at whatever size the output requires.
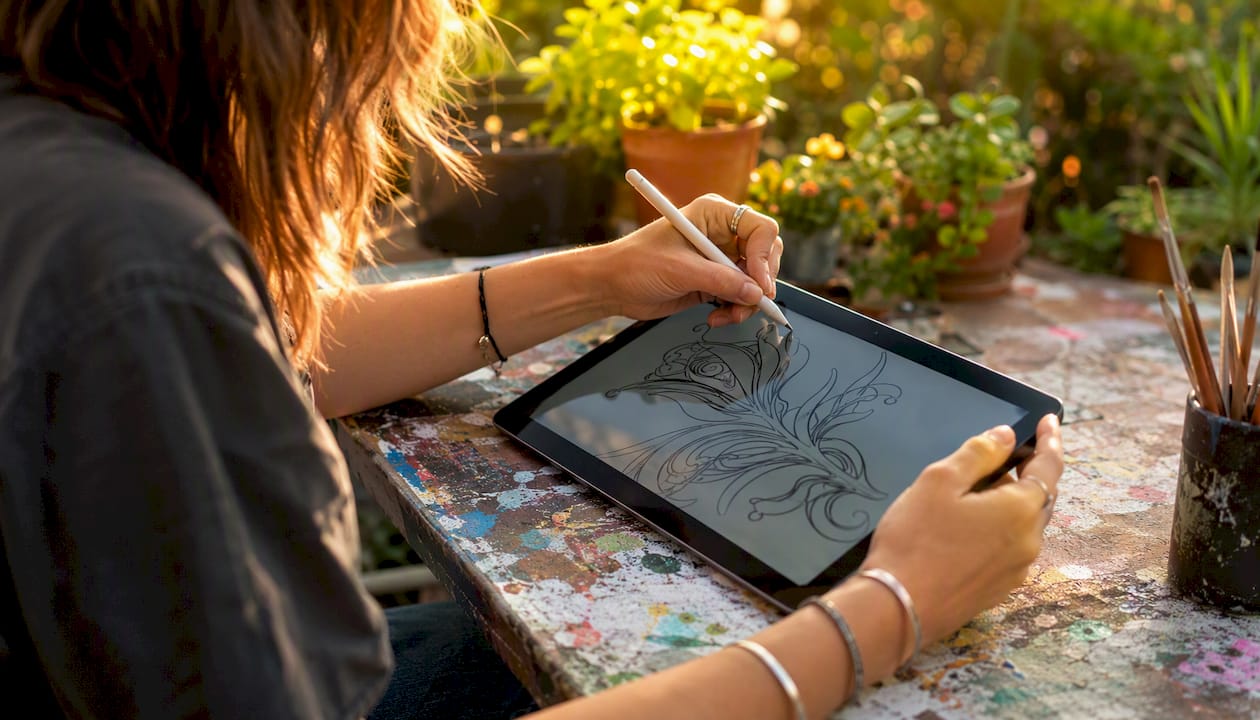
Think of a company logo drawn as a vector. The letter shapes, the icon, the color fills — all of them are stored as coordinates and curve definitions. Print it at one inch on a business card or ten feet on a banner, and the printer recalculates the paths at its own native resolution. The edges stay sharp either way.
Common vector formats:
- AI: Adobe Illustrator’s native format. Fully editable, preserves layers and artboards. The standard for professional logo and illustration work.
- EPS: Encapsulated PostScript. An older but widely supported format that most print vendors and RIP software can open without issue.
- SVG: Scalable Vector Graphics. An open, XML-based standard that works natively in web browsers and is increasingly supported by design tools.
- PDF: When saved from a vector application, a PDF can preserve vector paths, fonts, and embedded rasters in a single file that nearly any printer can open.
The primary editing tools are Adobe Illustrator (industry standard, subscription-based) and Inkscape (free, open-source, SVG-native, and a practical alternative when Illustrator is not available). A simple logo or a set of icons are the clearest examples of pure vector work: flat colors, defined shapes, text outlines, no photographic gradients.
Raster vs vector at a glance: the key differences
| Dimension | Raster | Vector |
|---|---|---|
| Scalability | Resolution-dependent; pixelates when enlarged | Resolution-independent; scales to any size cleanly |
| Best for | Photos, digital painting, scanned art, complex textures | Logos, icons, typography, cut-vinyl, line art |
| Editability | Pixel-level editing; destructive at reduced resolution | Node/path editing; fully non-destructive |
| File size | Large for high-res images | Small for simple shapes; grows with complexity |
| Color/gradients | Excellent for photographic gradients and subtle tones | Solid fills and gradient meshes; less suited to photographic realism |
| Printing suitability | Good at 300 DPI at final size; poor if low-res | Ideal for logos and line art; rasterized at printer’s native resolution |
| Typical extensions | JPG, PNG, GIF, TIFF, PSD | AI, EPS, SVG, PDF |
For print, the rule is straightforward: send vector for anything with sharp edges and text, and send a high-resolution raster at 300 DPI at the final print size for anything photographic.
When should you use raster, vector, or both?
Raster is the right call for:
- Photography and photorealistic digital art
- Scanned hand-drawn illustrations
- Complex textures, skin tones, and painterly gradients
- Social media graphics where the output size is fixed
Vector is the right call for:
- Logos that appear on business cards, shirts, billboards, and everything between
- Icons, UI elements, and infographics
- Typography and lettering that must stay crisp at any size
- Cut-vinyl graphics and CNC routing paths, where the software reads the vector path directly
Hybrid workflows are common. Packaging artwork, for instance, typically uses a vector layout for the structural elements, text, and barcodes, with a high-resolution raster photograph placed inside. Apparel designs with photographic elements work the same way. CorelDRAW’s guide notes that designers commonly use both formats in a single project, and that neither is categorically better.
Pro Tip: When embedding raster images inside a vector layout in Illustrator, link rather than embed during the design phase to keep file sizes manageable. Before sending to print, use File → Package or embed all linked files so the printer receives a self-contained document.
For specific print jobs: printers generally prefer vector files for logos and line art, and 300 DPI raster files for photographs. Sending a 72 DPI web logo to a screen printer is one of the most common causes of reprints.
How can you tell if an image is raster or vector?
Three checks cover almost every situation:
- Scale test. Open the file and zoom in to 400% or more. If the edges become blurry or you can see individual squares, it is raster. If the lines stay perfectly sharp at any zoom level, it is vector. Adobe recommends this test as the fastest way to identify file type.
- Check the file extension. JPG and PNG are almost never vector. AI, EPS, and SVG are almost always vector. PDF can be either, depending on how it was created — open it in Illustrator to check whether it contains live paths or a flattened raster.
- Open in a vector editor. In Adobe Illustrator or Inkscape, switch to Outline view (View → Outline in Illustrator). If you see paths and anchor points, the file is vector. If you see a flat embedded image with no paths, it is a raster placed inside a vector container — not the same thing as a true vector file.
What happens when you convert between raster and vector?
Conversion works in one direction much better than the other.
Raster to vector (tracing) works well for simple, high-contrast artwork: a two-color logo, a bold icon, a clean silhouette. Adobe Illustrator’s Image Trace and Inkscape’s Trace Bitmap can produce usable results from these. For photographic images, the result is almost always a stylized, posterized approximation rather than a faithful reproduction. The University of Michigan’s guide is direct on this point: simply changing a file’s extension does not produce a true vector. Successful conversion requires tracing tools or manual redraw, and the quality depends entirely on the source image’s complexity.
Vector to raster (rasterizing) is straightforward and lossless in the other direction. You choose the output resolution and color mode, and the software renders the vector paths as pixels. This is the standard final step before uploading to a web platform or sending a flattened file to a printer that requires a raster format.
- Automatic tracing (Illustrator Image Trace, Inkscape Trace Bitmap): fast, good for simple shapes, unreliable for photos
- Manual redraw in Illustrator or Inkscape: time-consuming but produces clean, editable results for any source image
- Rasterizing (Export As in Illustrator, Export in Inkscape): always reliable, choose 300 DPI for print output
Pro Tip: If you must trace a raster logo, start from the highest-resolution version available — a 2000-pixel-wide file will trace far more cleanly than a 200-pixel thumbnail pulled from a website.
Print prep: what you need to get right before sending files
Getting files right before they reach a printer prevents the most common and costly mistakes. Britannica notes that raster graphics can produce stair-step artifacts on fine curves when resolution is insufficient, which is exactly what happens when a low-DPI file goes to press.
The non-negotiables:
- Resolution: 300 DPI at the actual final print size. A file that looks fine at 72 DPI on screen will print soft and muddy.
- Color mode: RGB is for screens; CMYK is for most commercial print. Convert to CMYK before sending unless the printer specifically requests RGB (as some DTF and UV printers do — always confirm).
- Dimensions: Set up your file at the exact final print size, not a scaled-down proxy you plan to resize later.
- Bleeds: For any design that prints to the edge, add a bleed (typically 0.125 inches) beyond the trim line.
- Fonts: Outline all text in vector files (Type → Create Outlines in Illustrator) or embed fonts in the PDF. Missing fonts cause text to reflow or substitute.
- Transparency: Flatten transparency before export or use PDF/X-4, which supports live transparency in compatible workflows.
- Linked assets: Embed all linked raster images or package the file so the printer receives every asset.
Common mistakes that cause reprints: sending a 72 DPI web image, submitting an RGB file to a CMYK press without conversion, leaving fonts unoutlined, and scaling a low-resolution raster up in the layout software rather than sourcing a higher-resolution original. A printing workflow checklist can help you catch these before the file leaves your hands.
A quick reference to file formats and what they preserve
Raster formats:
- JPEG/JPG: Lossy compression. No transparency. Best for photos and web; not ideal for print logos or graphics with hard edges.
- PNG: Lossless. Supports transparency (PNG-24 for full color with alpha). The preferred raster format for DTF transfers with transparent backgrounds.
- TIFF: Lossless. Large files. Supports layers in some applications. The professional standard for print-ready photography.
- PSD: Photoshop native. Preserves all layers, masks, and smart objects. Send to a printer only if they specifically accept PSD.
Vector formats:
- AI: Illustrator native. Fully editable. Not universally readable outside Adobe apps.
- EPS: Broadly compatible with print vendors and older RIP software. Preserves vector paths but limited layer support.
- SVG: Open standard, web-native, increasingly supported in print workflows. Fully editable in Inkscape and Illustrator.
- PDF: The most universally accepted format for print delivery. PDF/X-1a and PDF/X-4 are the standard variants for commercial print. A PDF from Illustrator preserves live vector paths; a PDF exported from Photoshop is a raster PDF.
One compatibility note: some web-based design tools do not fully support SVG import, and some older print vendors cannot process AI files without Illustrator installed. When in doubt, export a PDF/X-4 for print and an SVG or PNG for web.
For DTF-specific format guidance, Transferkingz’s file format guide covers exactly which formats their workflow accepts and prefers.
How to prepare artwork for DTF and apparel transfers
DTF printing rasterizes every file at the printer’s native resolution, so the quality of your output depends entirely on what you send in. Getting this right the first time means no reprints and no delays.
Recommended submissions by artwork type:
- Logos and line art: Submit native vector files (AI, EPS, or a vector PDF). The printer’s RIP will rasterize at its own resolution, producing the sharpest possible output.
- Photographs and complex imagery: Submit PNG-24 or TIFF at 300 DPI at the exact final print size. Do not upscale a low-resolution file and submit it at a larger size.
- Mixed artwork (vector outlines with photographic fills): A layered PDF with embedded high-resolution rasters is the preferred format. Keep vector elements as live paths and embed raster images at 300 DPI.
DTF printer-ready checklist:
- File is sized at the exact final print dimensions (not a scaled proxy)
- Raster elements are 300 DPI at that final size
- Background is transparent (PNG-24 with alpha, or a PDF with no background fill) unless a white underprint is specified separately
- All fonts are outlined or embedded
- White-underprint areas are indicated on a separate layer or channel if required by the printer
- Color mode matches the printer’s requirement (confirm RGB vs CMYK with your vendor)
- File is saved as a lossless format (PNG or TIFF for raster; PDF or AI for vector)
For a step-by-step walkthrough of the full DTF workflow, Transferkingz’s DTF print workflow guide covers each stage from artwork setup through transfer application. If you want to know exactly what to avoid, the DTF artwork requirements guide lists the most common file problems that cause reprints.
The one thing most designers get wrong about raster and vector
The most persistent mistake is treating raster-to-vector conversion as a quick fix. A client sends a JPG logo pulled from their website, someone runs Image Trace in Illustrator, and the result ships to the printer as if it were a clean vector. It is not. The traced file is a collection of approximated paths built from a low-resolution source, and the print will show it.
The better habit: ask for the original source file before doing anything else. If the client does not have a vector original, a manual redraw in Illustrator takes an hour for a simple logo and saves every future print job. That one-time investment pays off every time the logo appears on a shirt, a banner, or a sticker at a size nobody anticipated.
The other underrated rule: never upscale a raster in the layout software and assume the printer will compensate. If your source image is 150 DPI at the final size, the print will be 150 DPI regardless of what the layout file says. Resolution is set at the source, not the layout.
Transferkingz handles the file work so you can focus on the design
Sending the wrong file format to a print vendor costs time and money. Transferkingz takes vector files (AI, EPS, PDF) for logos and line art, and high-resolution PNG or TIFF at 300 DPI for photographic designs — and the team reviews artwork before it goes to press. No minimums, same-day local pickup available, and nationwide shipping means you can place a single transfer order or a full production run without changing your workflow.

If you are not sure whether your file meets the requirements, upload your design and the Transferkingz team will flag any issues before printing starts. For Dallas-area orders or anyone who wants to confirm specs before placing an order, the DTF transfers page has current turnaround times and ordering details.
Sources
- Raster vs. vector: What are the differences? - Adobe
- Vector vs Raster Graphics - GeeksforGeeks
- Raster vs Vector Images - All About Images - Research Guides
- Raster vs Vector | CorelDRAW
- How do vector and raster graphics differ? | Britannica
- Inkscape
0 comments