

Set your RIP to object-area white, increase white laydown until it reads fully opaque, and add a 1 to 2 pixel choke. Those three moves resolve most white underbase problems in DTF printing. If your white still looks gray or patchy after that, the issue is almost always mechanical: a partial nozzle clog or settled ink sitting in your white channel.
Run this sequence before you touch anything else:
- Print a nozzle check and confirm every jet fires clean.
- Circulate or agitate your white ink; TiO2 pigment settles fast when idle.
- Switch the underbase mode to Object Area Fill for dark-garment PNGs.
- Print 2 to 3 test passes at your target dpi and check opacity.
- Evaluate the print under a bright light, not just your monitor.
Key Takeaways
Opaque, clean white underbase in DTF printing comes down to matching ink laydown to your dpi, choking the underbase correctly, and keeping white ink circulating so pigment never settles.
| Point | Details |
|---|---|
| Use Object Area Fill | Default to object-area white for dark-garment PNGs; it follows your artwork shape and saves significant ink. |
| Match passes to dpi | Start near 2 passes at 720 dpi or 3 passes at 1200 dpi, then adjust based on test results. |
| Set choke first | Apply a 1 to 2 pixel choke and test with fine text and solid fills before changing other settings. |
| Diagnose by symptom | Streaks mean clogs, patchiness means settling, overall gray means insufficient density or bad alpha. |
| Test before scaling | Order a small test sheet from Transfer Kingz to confirm opacity and hand feel before a full production run. |
Table of Contents
- What White Ink Underbase Dtf Printing Actually Does
- Why White Prints Gray, Patchy, or Peeks Around Edges
- Getting Choke and Registration Right
- Dialing In Passes, Ink Limits, and Curing
- A Step-By-Step Troubleshooting Checklist
- Advanced Techniques for Production Runs
- Cleaning and Prepping Your Printer for White Ink
- How Substrate Type Changes Your White Underbase Settings
- Routine Maintenance That Extends White Ink Component Life
- Frequently Asked Questions
- Sources
What White Ink Underbase Dtf Printing Actually Does
White underbase is the opaque layer your printer lays down first, before any CMYK color, to block the garment’s color so your design prints true instead of dirty. Skip it or underpower it, and a black shirt bleeds through your reds and turns them muddy brown. This is the entire reason DTF works on dark fabric at all.
Most RIP software gives you four white fill modes, and picking the wrong one is a common source of wasted ink and soft edges:
- No Fill — prints zero white; used only when transferring onto white or very light substrates.
- Image Area Fill — fills the entire rectangular canvas of your design with white, including transparent background space.
- Object Area Fill — fills white only under the visible pixels of your artwork, following the actual shape.
- Transparent Area Fill — a hybrid mode some RIPs use for partial transparency effects like fades or shadows.
Object Area Fill is the practical default for most PNG designs going onto dark garments, and it typically saves 40 to 60 percent of your white ink compared to Image Area Fill, since it isn’t wasting ink on transparent space nobody sees.
Statistic to remember: as a rough starting point, 720 dpi setups often need around 2 white passes to reach solid opacity, while 1200 dpi setups often need about 3. Your specific ink and printer combination will shift that number, so treat it as a place to start testing, not a fixed rule.
Why White Prints Gray, Patchy, or Peeks Around Edges
Gray white underbase almost always comes down to one of four causes, and each one has a distinct look.
- Not enough ink laid down. The white layer is technically there, but it’s thin enough that the garment color optically mixes through it, which reads as gray rather than true white.
- Registration is off, or choke is set wrong. You’ll see a thin colored halo at the edges of your design, or spots where white is visibly missing under the CMYK layer.
- Ink settling or partial clogs. TiO2 pigment is heavy and drops out of suspension if it sits still, producing streaky or uneven laydown across a single print, not just at the edges.
- Bad alpha channels in your artwork. Semi-transparent or gray-tinted edge pixels in your PNG generate unpredictable, hazy underbase even when every printer setting is dialed in correctly.
The fix depends entirely on which of these you’re looking at, which is why guessing at printer settings before checking your file and your ink system wastes time and film.
Getting Choke and Registration Right
Choke is a deliberate, slight pullback of the white underbase relative to your CMYK layer, designed to prevent white from peeking out past the edges of your color print. Too little choke and you get a visible white halo. Too much choke and you lose white underneath fine lines and small text, leaving gaps in your color.
Start here and adjust from actual test prints, not guesswork:
- Set a 1 to 2 pixel inward choke on your CMYK layer relative to white, or a 0 to 3 pixel outward expansion on the white underbase itself, depending on which control your RIP exposes.
- Print a small test file that includes both fine text (under 8pt) and a large solid fill block, then inspect it at 1:1 scale and again under strong light.
- Adjust choke by 1 pixel in either direction based on what you see, then reprint the same test file before touching any other setting.
Pro Tip: Change only one variable per test print. If you adjust choke and ink laydown in the same run, you won’t know which change actually fixed or broke your result.
Dialing In Passes, Ink Limits, and Curing
Passes and dpi are the two biggest levers on opacity, and they interact more than most operators expect. More passes at a given dpi means more ink laid down, which means more opacity, but also a heavier, stiffer hand feel once cured.
- Start near the 720 dpi at roughly 2 passes, 1200 dpi at roughly 3 passes benchmarks, then adjust based on your actual film and ink.
- Push ink limits higher only for large solid-fill designs; for detailed artwork, a higher limit just blurs fine lines and wastes ink.
- Watch for undercuring signs like a tacky feel or smudging under light pressure, and overcuring signs like a stiff, plastic-like hand feel with visible sheen.
- Reduce laydown and increase your curing time or powder application together, never one without the other, or you’ll trade one defect for another.
Keep two named RIP presets on hand: one tuned for detail work with fine lines and small text, and one for solid white jobs with large fill areas. Testing them side by side on the same garment tells you fast which one a given job actually needs, and documenting both as reproducible presets means any operator on your floor gets the same result.
A Step-By-Step Troubleshooting Checklist
When a print comes out wrong, work through causes in this order rather than jumping straight to RIP settings, since most white ink failures start upstream of software.
- Run a nozzle check. Streaky white with thin missing lines almost always traces back to a partially clogged print head.
- Check capping station and fans. Dried ink around the cap station or airflow issues over the print bed both accelerate clogging.
- Confirm white ink circulation. Patchy, uneven density across a single print points to settled pigment, not a printer fault.
- Review your RIP profile and choke settings. Consistent gray-looking white across every print, with no streaking, usually means insufficient density or a bad choke value.
- Check substrate and curing. A correctly printed transfer can still look weak if it’s undercured or applied to film that’s degraded.
- Print a fresh test file after each fix, and only move to the next step if the problem persists.
Symptom mapping saves time here: streaks mean a partial clog, uniform patchiness means settling, and overall gray with no texture issues means an opacity or artwork alpha problem rather than a mechanical one.
Pro Tip: If you’re mid-production and can’t afford downtime to fully diagnose a printer issue, switch to your solid-white preset for large fills and order a small test batch from an outside provider to keep jobs moving while you troubleshoot.
For a deeper dive into isolating specific defects, the DTF transfer troubleshooting guide covers additional edge cases beyond white ink specifically.
Advanced Techniques for Production Runs
Once your basics are solid, a few production-level habits keep opacity consistent without sacrificing detail or handfeel across larger runs.
- Selective multi-pass builds. Use a heavier white build for large solid areas of a design and a lighter build for fine detail, within the same print job, rather than applying one flat setting everywhere.
- Documented profile management. Keep named presets, dated test logs, and a rollback copy of your last known-good profile before updating RIP software or switching ink brands.
- Recirculation hardware. Pumps or scheduled agitation cycles for your white ink channel cut down on manual circulation work and reduce clog frequency significantly in high-volume shops.
- Single-pass white systems. Some newer RIPs claim brighter whites in a single pass, which can cut ink use and print time, though it often requires upgraded ink formulations and comes with trade-offs in hand feel or powder adhesion worth testing before switching.
Pro Tip: Keep a physical binder or shared document logging every preset change with the date and the printer it applies to. When a new operator asks why a job looks different from last month, you want an answer faster than “I don’t remember what I changed.”
More maintenance-focused tips live in the DTF troubleshooting tips guide if you’re building out a full shop protocol.
Cleaning and Prepping Your Printer for White Ink
White ink is the single biggest maintenance burden on any DTF printer, and most clogging problems trace back to skipped prep rather than bad ink. TiO2 pigment is dense and settles out of suspension faster than any CMYK ink, which means white channels clog first and clog worst if you neglect them.
Before starting any print run, agitate or run your white ink circulation system, even a manual shake cycle on cartridge-based setups, since ink that’s sat overnight has already started to settle. Run a nozzle check every single time you power on the printer, not just when you notice a problem. Catching a partial clog before a print run saves you a ruined transfer and wasted film.
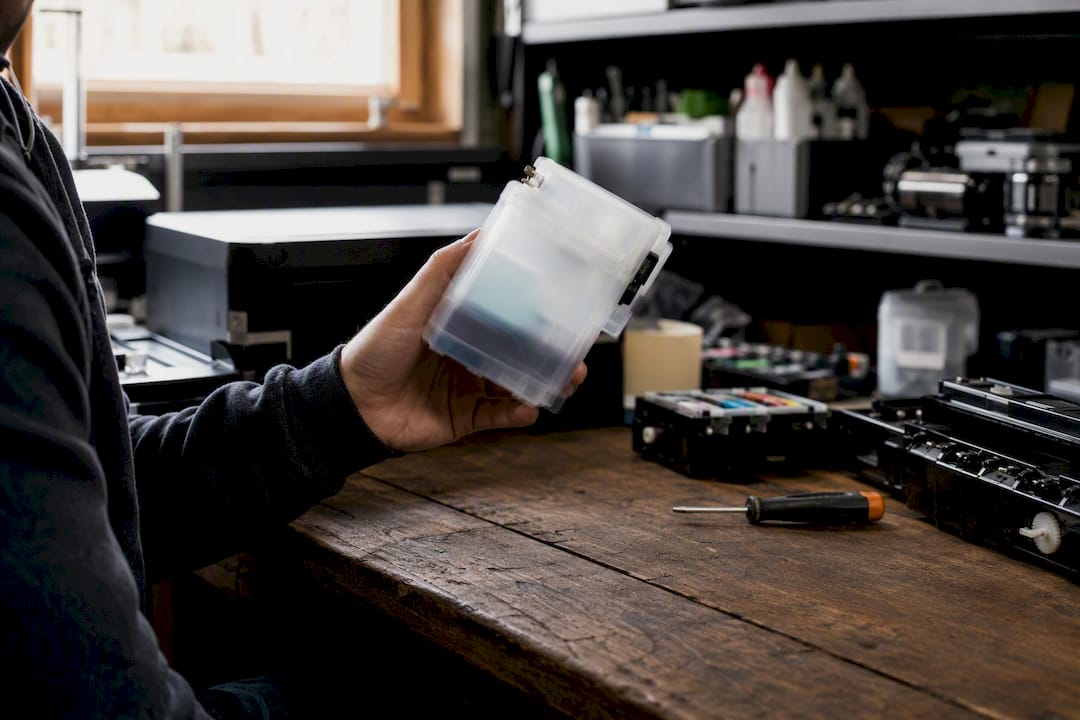
Wipe down capping stations and wiper blades daily. Dried white ink residue around the cap station is one of the most common causes of slow, progressive clogging that operators mistake for an ink quality issue. If your printer has a maintenance or purge cycle, run it on a schedule tied to your production volume, not an arbitrary calendar date. A shop running four heads eight hours a day needs more frequent purges than one running two hours a day.
Never let white ink sit idle in the lines for more than a few days without at least a short circulation cycle. If a printer is going offline for a week or more, follow your ink manufacturer’s shutdown procedure, which usually involves purging lines with cleaning solution rather than leaving pigmented ink to settle in place. Ink quality itself plays into this too. Cheaper white inks with poor anti-settling additives clog faster regardless of how well you maintain the hardware, and it’s worth reading up on how ink quality affects DTF results before assuming a maintenance issue is purely mechanical.
How Substrate Type Changes Your White Underbase Settings
The fabric or surface you’re transferring onto changes how much white you actually need, and printing the same settings across every substrate is a common source of inconsistent results.
Cotton is the most forgiving substrate for DTF transfers. It takes standard white underbase settings well and generally needs the least adjustment from your baseline preset. Polyester and poly blends are trickier, since some polyester fabrics have a slight sheen or dye migration risk, especially with dark or saturated colors, that can bleed through a thinner white layer over time even if the initial print looked fine. For these, err toward a slightly heavier white build and confirm with a test wash if the fabric is unfamiliar to your shop.
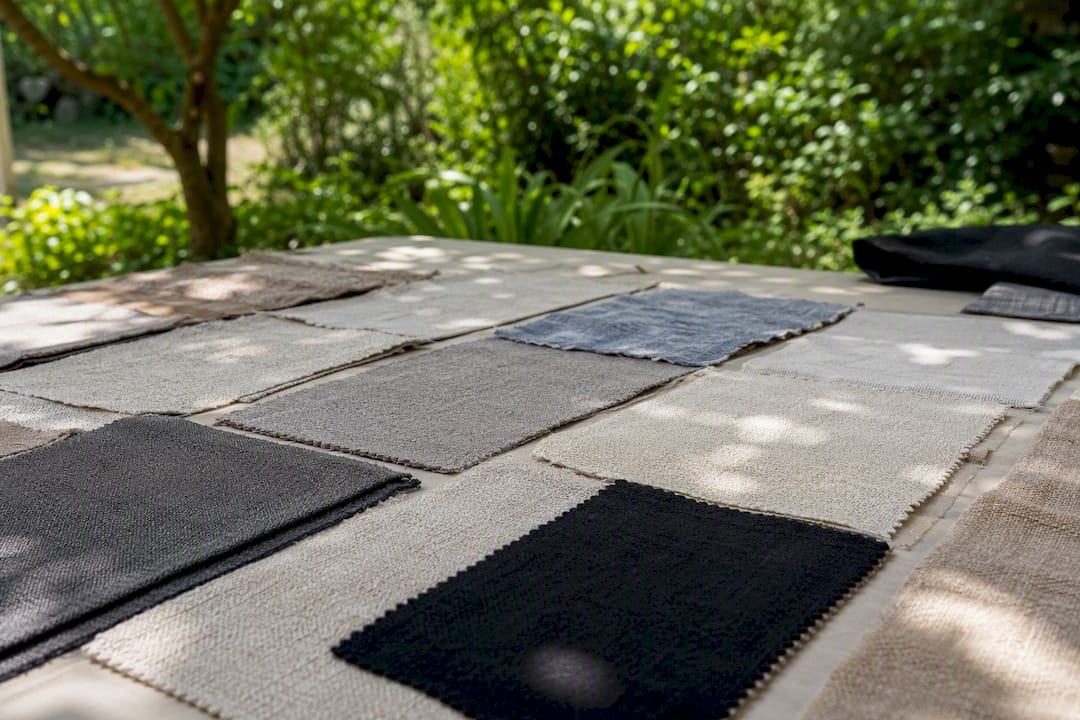
Blended fabrics with a high polyester content sometimes need adjusted curing temperatures alongside your white settings, since polyester scorches at lower temperatures than cotton. Getting the ink laydown right doesn’t help if the curing step damages the fabric or underperforms the transfer.
Textured or heavier fabrics like fleece or terry cloth need a heavier white underbase than smooth cotton, simply because the texture creates more surface area and shadow that a thin white layer won’t fully cover. Hard surfaces like glass or acrylic, common with UV DTF applications, behave completely differently from textile printing and typically need denser, more controlled white layers since there’s no fabric texture to help hide minor inconsistencies.
The takeaway: keep a substrate-specific note attached to each preset rather than assuming one white setting works everywhere. A five-minute test print on a new fabric type saves a full batch of misprinted transfers.
Routine Maintenance That Extends White Ink Component Life
White ink components wear faster than the rest of your printer, and a maintenance schedule built around that reality pays for itself in avoided head replacements.
Print heads dedicated to white ink typically need replacement more often than CMYK heads simply because TiO2 pigment is more abrasive and prone to clogging over time. Track head hours or print volume specifically for your white channel, separate from your overall printer maintenance log, so you can spot a head that’s degrading before it fails mid-run.
Dampers and ink lines carrying white should get inspected on a shorter interval than color lines. Look for visible pigment buildup or discoloration inside clear tubing, which signals settling is happening even between your regular circulation cycles. Replace dampers proactively rather than waiting for a visible print defect, since by the time white ink problems show up on a garment, the underlying component issue has usually been building for a while.
Capping stations and wiper blades specific to the white channel need cleaning more frequently than their CMYK counterparts, given how fast dried white pigment builds up compared to dye-based color inks. A simple weekly deep clean, on top of daily wipe-downs, catches buildup before it turns into a stubborn clog.
Keep a written maintenance log, even a simple spreadsheet, tracking nozzle check results, circulation cycles, and any component replacements by date. Patterns emerge over weeks that you’d never notice print to print, like a head that’s been degrading slowly for a month before finally failing. That log becomes your best diagnostic tool the next time a print run goes sideways.
A Shop Note on What Actually Cuts Rejects
In practice, one large-white preset, daily short nozzle checks, and weekly recirculation cycles eliminate most of the white ink headaches. If you can’t test settings in-house, order a printed test from Transfer Kingz to validate your presets before committing to a full run.
Verify Your White Underbase Before You Scale Up
Guessing at settings on a full production run is expensive. Transfer Kingz lets you test first with no minimum order requirement, so you confirm opacity, choke, and hand feel on a small sheet before committing film and ink to a hundred-piece batch.

Order a small gang sheet or single test transfer to check exactly how your white underbase settings translate to a finished, pressed garment, not just what looks right on screen. This matters most when you’re switching fabric types, testing a new preset, or troubleshooting a recurring opacity issue you can’t isolate on your own equipment. Transfer Kingz ships nationwide with fast turnaround, and shops in the Dallas area can also arrange local pickup through the custom DTF printing services in Dallas page. Upload your file, order a test sheet, and see the actual opacity and edge quality before you print at scale.
Frequently Asked Questions
Why does my white underbase look gray instead of solid white? It’s usually insufficient ink laydown letting the garment color mix through optically, or a dirty alpha channel in your artwork creating semi-transparent edges. Check your white density and file alpha quality before adjusting anything else.
What white fill mode should I use for most designs? Object Area Fill works for the vast majority of PNG designs on dark garments, since it only prints white where your artwork actually has pixels rather than filling the entire canvas.
How much choke should I apply to my white underbase? Start with a 1 to 2 pixel inward choke on your CMYK layer, or a small outward expansion on white, then fine-tune based on a printed test with both fine text and solid fills.
Why is my white ink clogging faster than my color inks? White ink pigment, typically TiO2, is heavier and settles faster than dye-based CMYK inks, which makes daily circulation and nozzle checks essential specifically for the white channel.
Do different fabrics need different white underbase settings? Yes. Cotton generally needs the least adjustment, while polyester blends, textured fabrics, and hard surfaces like glass or acrylic often need heavier or differently tuned white layers.
Sources
- White Ink Underlay of DTF Printing - D2 DTF Printer Lesson 8 – HTVRONT
- DTF pigment ink deep dive: CMYK + white ink system explained – KungFuDTF
- The White Underbase & Underbase Choke
0 comments