

Yes, DTF works on many smooth leathers, but the method you pick decides whether it lasts. Standard heat-activated DTF suits flexible garments and accessories that need to flex with movement, while UV DTF fits rigid or heat-sensitive pieces where a press would scorch the finish. Always run a test patch first, and steer clear of suede, heavily embossed, or oily and waxed leathers unless you’ve confirmed adhesion holds.
TL;DR:
- Standard DTF provides better flexibility and durability on garments, but it risks scorching or cracking softer, dyed, or finished leathers at higher temperatures.
- UV DTF avoids heat altogether, making it suitable for rigid, heat-sensitive, or coated leathers where a sticker-like finish resists cracking under movement.
- Smooth, synthetic, vegetable-tanned, or chrome-tanned leathers accept transfers reliably, while suede, heavily embossed, oily, or waxed surfaces generally require testing or are unsuitable.
- Proper preparation involves thorough cleaning, degreasing, light deglazing, and testing on scrap to ensure adhesion, especially on glossy or sealed finishes.
- Transfer longevity depends on placement and wear; low-abrasion spots can last years, while high-friction areas may wear or peel within months if not maintained properly.
Table of Contents
- What’s the Difference Between Standard DTF and UV DTF on Leather?
- Which Leather Types Actually Accept DTF Transfers?
- How Do You Prep Leather Before Applying a DTF Transfer?
- How to Apply DTF Transfers to Leather Step by Step
- Equipment Settings and Fixing Common Application Failures
- How Long Does DTF Last on Leather?
- What Transfer Kingz Recommends for Leather Projects
- Do Leather Finishes Affect How Well DTF Ink Sticks?
- How Do You Finish a DTF Transfer for Better Leather Adhesion?
- When Should You DIY and When Should You Order Custom Transfers?
- Order Leather-Ready DTF Transfers From Transferkingz
- Where to Learn More About DTF on Leather
- Sources
What’s the Difference Between Standard DTF and UV DTF on Leather?
Standard DTF bonds through a TPU adhesive layer that melts under heat and pressure, gripping the leather’s surface as it cools. That adhesive is what gives finished transfers their stretch, which matters on garments and anything that bends at a seam or joint. The tradeoff is heat exposure. Push the temperature too high and you risk scorching dye, cracking a finish coat, or warping thinner hides.
UV DTF skips the heat entirely. Ink cures under UV light onto an AB transfer film, creating a thin, sticker-like layer you burnish onto the surface by hand or with a low-pressure roller. Once cured, it’s flexible, waterproof, and resistant to scratching, which makes it a strong match for rigid accessories like wallets, phone cases, and belt straps where a heat press either won’t fit or would do damage.
Here’s how the two stack up in practice:
- Standard DTF: better flex and durability on wearables, but heat risk on delicate or dyed finishes.
- UV DTF: no heat required, so it avoids hardening or color shifts on sensitive leathers.
- Standard DTF: ideal for jackets, bags with fabric panels, and anything that gets folded or worn.
- UV DTF: ideal for flat, rigid panels where a sticker-like finish won’t crack under movement.
If your leather piece has any embossed texture or a glossy sealed top coat, lean UV DTF. If it’s a smooth, flexible garment panel, standard heat DTF usually wins on durability.
Which Leather Types Actually Accept DTF Transfers?
Not every leather takes a transfer the same way, and guessing wrong wastes both material and film. PU and faux leather are the most forgiving because their smooth, synthetic surface gives adhesive something consistent to grip. Smooth vegetable-tanned leather works well too, especially once lightly prepped, and select chrome-tanned pieces with a flat, closed finish accept transfers reliably.
Skip these without testing first:
- Suede or nubuck: the napped surface has no flat plane for adhesive to bond to.
- Heavily embossed leather: texture creates air gaps under the film that peel within days.
- Oily or waxed leather: surface oils repel adhesive before it ever sets.
- Heavily conditioned or greased hides: same problem, just harder to see until it fails.
Two quick checks tell you a lot before you commit a good hide to a test transfer. Drip water on the surface. If it beads up and sits rather than soaking in, there’s likely a wax or oil finish that needs stripping first. Then press a clean white cloth against the leather and check for oil transfer. If the cloth picks up residue, that’s your answer. A test patch on a scrap corner is not optional here. It’s the cheapest insurance you have.
How Do You Prep Leather Before Applying a DTF Transfer?
Adhesion problems almost always trace back to skipped prep, not bad film or a wrong press setting. Work through this sequence every time:
- Wash with mild soap and water. A diluted saddle soap or leather cleaner lifts dust and surface grime without stripping the finish.
- Degrease with isopropyl alcohol. Wipe the application area with a lint-free cloth dampened in 70% isopropyl alcohol to cut through oils the soap missed.
- Dry completely. Trapped moisture under a transfer is a guaranteed peel point later, so give it a full air dry, not a quick wipe.
- Deglaze lightly if the finish is glossy. A fine abrasive pad, worked gently and only over the transfer area, dulls a sealed top coat enough for adhesive to grip. Skip this step on already-matte or unfinished leather; there’s nothing to cut through, and you’ll just scuff a texture you didn’t need to touch.
- Apply an adhesion promoter if the leather still resists. Solvent-based primers bite into finished leather more aggressively; water-based versions are gentler and better suited to lighter or unfinished hides.
Pro Tip: Test your degreaser and primer on the same scrap piece you’ll use for the transfer test patch. Some leather dyes bleed or lighten under isopropyl alcohol, and you want to know that before it happens on your actual project.
Work in a ventilated space and wear gloves when handling solvent-based primers or heavy-duty degreasers. Beyond the fumes, some of these products strip natural oils from your skin as effectively as they strip them from the hide, and repeated exposure adds up.
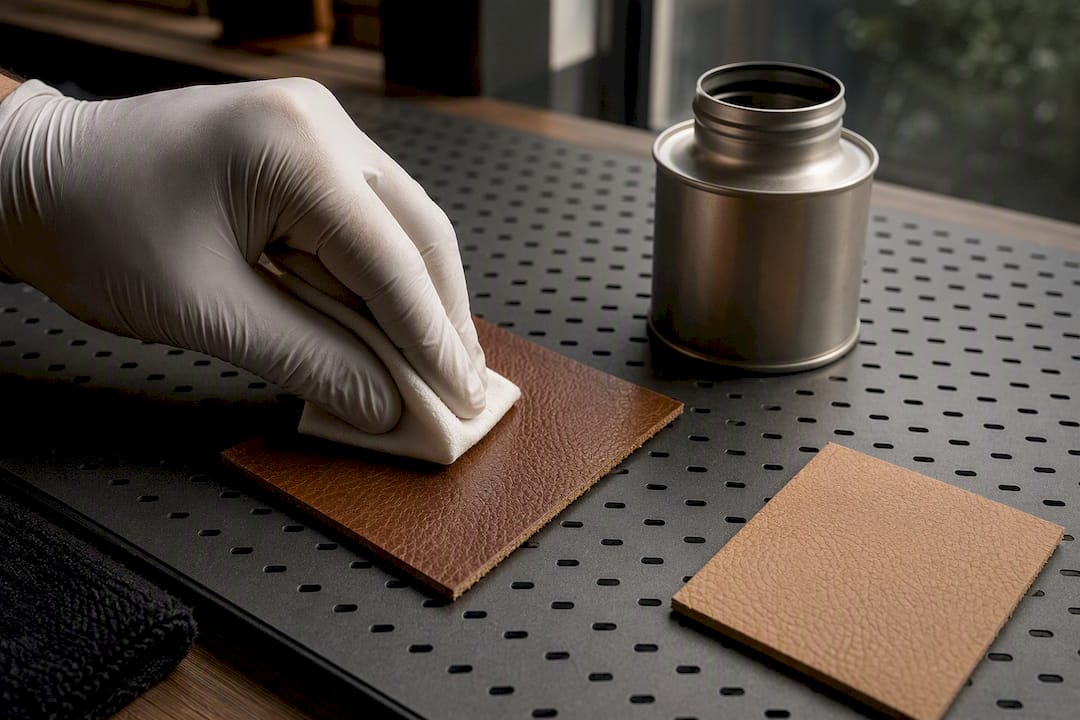
How to Apply DTF Transfers to Leather Step by Step
Before touching a press or a UV lamp, run through this checklist: confirm your test patch passed, mask off any area you don’t want adhesive touching, and let the leather sit at room temperature for at least 15 minutes if it’s come from a cold storage area. Cold leather contracts slightly and can cause uneven adhesive contact.
Standard heat DTF process:
- Pre-press the leather for 3 to 5 seconds at low heat to remove residual moisture and flatten the surface.
- Position the transfer film, adhesive side down, and confirm placement before applying any pressure.
- Press at a reduced temperature window, generally in the 250°F to 285°F range depending on leather thickness, since commercial fabric guidance sits around 300°F to 310°F and leather runs hotter risks scorching or hardening the finish.
- Hold medium pressure for 8 to 12 seconds, checking a corner lift after the shorter end of that range on thinner or dyed leathers.
- Peel according to the film’s rating. Cold peel films need full cooling; hot peel films come off within seconds of lifting the press. When in doubt, test both on your scrap patch, since leather often behaves differently from fabric under the same film.
- Let the piece rest for a few minutes before flexing or handling to let the adhesive fully set.
UV DTF (cold) process:
- Peel the transfer from its liner slowly to avoid stretching the thin film.
- Position it on the clean, prepped surface and use a burnishing tool or a smooth roller to press out air bubbles, working from the center outward.
- Apply firm, even pressure across the full design, since uneven burnishing is the most common cause of edge lifting on UV transfers.
- If the film wasn’t fully cured before application, follow the supplier’s UV exposure guidance rather than guessing at cure time.
- Skip additional heat unless the manufacturer specifically calls for a low-heat finish step, and if you do add heat, keep it well below standard press temperatures.
A practical way to settle uncertainty on any new leather piece is to run two test patches side by side, one heat-pressed at a lower temperature, one UV applied, then flex and lightly abrade both once cooled or cured. Comparing results this way tells you more in five minutes than any spec sheet will.
If you’re working with a printer or documenting the process for a client, request reference photos or a simple diagram showing placement, the direction pressure was applied, and the peel angle used. That level of detail saves a lot of guesswork on the next piece.
Equipment Settings and Fixing Common Application Failures
Press settings for leather aren’t one-size-fits-all, and the biggest mistake hobbyists make is borrowing fabric settings wholesale. Leather typically requires lower heat and careful testing compared to fabrics, where commercial recommendations often start around 300° to 310°F. Pressure should stay on the lighter end of medium. Too much force on soft leather flattens grain texture permanently.
Peel timing follows the film, not the leather, but leather’s slower heat dissipation means a “cold peel” film may need a few extra seconds of cooling compared to fabric. When something goes wrong, work through this order:
- Peeling shortly after application: almost always a prep failure. Redo degreasing and deglazing before blaming the film.
- Cracking along the design: heat was too high, or the leather flexed before the adhesive fully cured. Drop the temperature or switch to UV DTF entirely.
- Ink bleeding or blurry edges: check print density in your file and confirm the test patch looked clean before scaling to the full piece.
- Uneven adhesion across the design: usually a pressure or burnishing problem, not a temperature one.
Pro Tip: Keep a small notebook of what temperature, pressure, and leather type you tested. It sounds tedious, but after three or four projects it becomes the fastest troubleshooting tool you own.
If a leather piece fails two rounds of testing at different settings, stop adjusting and consider professional printing or an alternate decoration method. Some hides, especially oil-tanned ones, simply won’t cooperate no matter how carefully you dial in the press.
How Long Does DTF Last on Leather?
Build your test patch the same way you’d build the real project: prep it identically, apply the transfer the same way, then flex it repeatedly and rub it against a rough surface 15 to 20 times to simulate wear. If it survives that without lifting at the edges, you’ve got a reasonable baseline.
Placement matters as much as method. A design on a wallet’s interior panel, rarely touched, can last years. The same design on a bag’s bottom corner, dragged across surfaces daily, wears down far faster.
- Low-abrasion spots (jacket backs, interior panels, display pieces): expect strong multi-year durability with proper care.
- High-abrasion spots (bag corners, wallet exteriors, anything pocket-carried): expect visible wear sooner, sometimes within months of heavy use.
- Care routine: clean with a damp cloth and mild soap only. Skip harsh solvents and never machine-dry or blast leather with a heat gun near the design.
- When to switch methods: if a piece takes constant abrasion, embossing or laser marking may outlast any printed transfer.
What Transfer Kingz Recommends for Leather Projects
Testing before committing to a full run is the single habit that separates successful leather DTF projects from frustrating ones. Transfer Kingz’s own application guides walk through exactly this kind of staged testing, and its no-minimum ordering setup means you can order a single small transfer to test rather than committing to a production sheet before you know your leather will cooperate.
Anthony, who covers application technique for the Transfer Kingz blog, points to one recurring theme in his notes: most leather failures trace back to skipped prep steps, not bad film. His practical checklist for readers: confirm surface type, degrease thoroughly, test patch every time, and never assume fabric settings translate directly to leather.
Do Leather Finishes Affect How Well DTF Ink Sticks?
Every leather finish reacts differently to DTF adhesive, and the finish matters more than the leather type underneath it. Aniline-dyed leather, left with minimal surface coating, tends to accept both standard and UV DTF well once degreased, because there’s little standing between the adhesive and the hide’s natural texture. Semi-aniline and pigmented finishes, which carry a thin protective top coat, need that light deglazing step covered earlier. Skip it and you’re bonding to a sealed layer rather than the leather itself.
Fully finished, glossy patent-style leathers present the toughest case. Their coating is often a hard polymer layer designed to resist exactly the kind of surface penetration adhesive relies on. UV DTF tends to perform better here since its bond behaves more like a sticker adhering to a sealed surface, similar to how pressure-sensitive label adhesives are engineered to grip smooth, coated substrates rather than porous ones. Standard heat DTF can still work on these finishes, but expect a shorter functional lifespan unless you deglaze aggressively enough to compromise the gloss, which defeats the purpose for a lot of projects.
Oil and wax finishes remain the hardest compatibility case regardless of which DTF method you choose. These treatments are designed to repel moisture and resist penetration, which is precisely what adhesive needs to avoid. If a leather piece has been conditioned recently, wait several weeks for oils to settle before attempting any transfer, and retest even then.
How Do You Finish a DTF Transfer for Better Leather Adhesion?
A transfer’s first hour on leather isn’t the whole story. What you do in the minutes after application often decides whether it survives the first wash or the first season of wear. Letting the piece rest undisturbed for at least 10 to 15 minutes after pressing or burnishing gives the adhesive time to fully set rather than being flexed or handled while still warm and pliable.
For standard heat DTF, a light post-press pass at reduced temperature and no pressure, sometimes called a “finishing press,” can help seat edges that didn’t fully bond on the first pass. Skip this if the leather already showed any heat sensitivity during your test patch.
For UV DTF, a final burnishing pass around the design’s perimeter, focused specifically on edges and corners, catches the spots most likely to lift first. This is also the moment to check for trapped air pockets you might have missed during initial application.
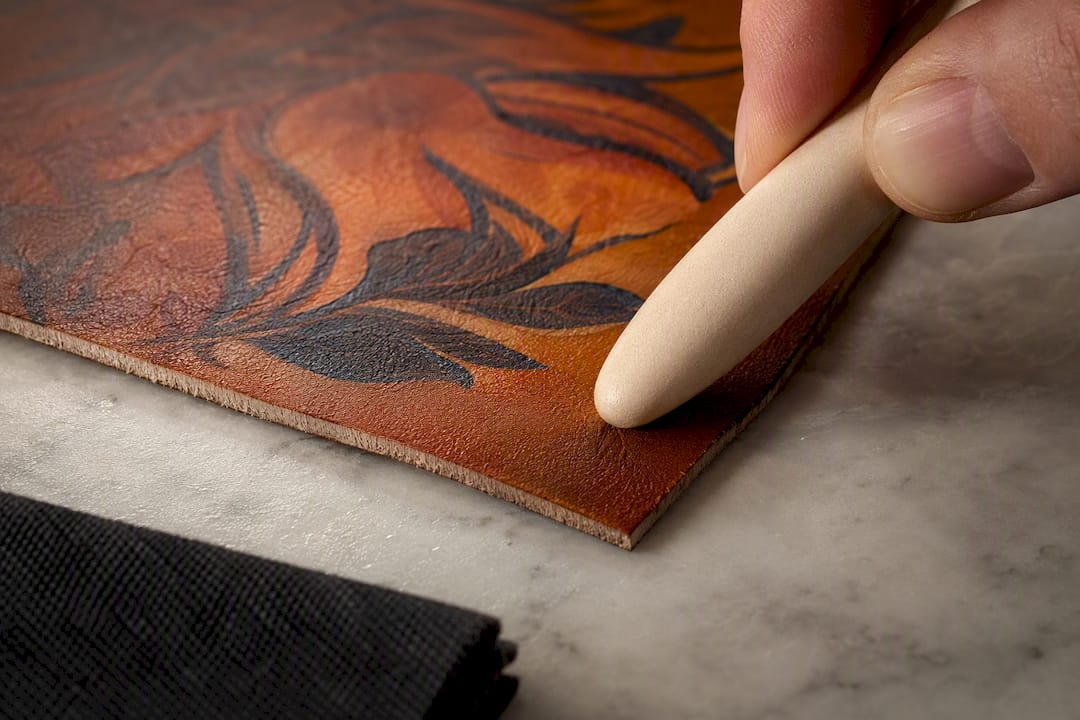
Sealing the surrounding leather area with a compatible leather conditioner, applied carefully around the design rather than over it, can extend how long the surrounding material holds its finish and color, which indirectly protects the transfer edges from cracking leather nearby. Avoid conditioners with heavy oil content directly on or near transfer edges, since they can work their way underneath over time and undermine the same adhesion you worked to establish.
When Should You DIY and When Should You Order Custom Transfers?
A single patch or a one-off prototype is a reasonable DIY project. You’ve got room to fail, learn, and try again without much cost. Production runs are a different calculation entirely. Once you’re applying the same design across a dozen jackets or wallets, one failed test patch scaled across a full batch turns into real material loss.
Risk tolerance matters too. High-value leather, vintage pieces, or client work leaves little room for a heat press mistake. If your skill with press settings is still developing, or the leather itself is expensive or irreplaceable, ordering finished transfers from a supplier who’s already dialed in the film and adhesive removes most of that risk. The time you’d spend troubleshooting a failed batch usually costs more than professionally produced transfers would have in the first place.
Most people underestimate how forgiving standard fabric is compared to leather. A press setting that’s five degrees too hot on a cotton shirt barely registers. That same margin on a dyed leather panel can leave a visible scorch mark you can’t undo. That gap between “close enough” and “ruined” is smaller on leather than on almost any other DTF substrate, and it’s the reason test patches aren’t a suggestion here. They’re the difference between a project that works and one that ends up in the scrap pile.
— Anthony
Order Leather-Ready DTF Transfers From Transferkingz
Transferkingz gives you a way to skip the trial-and-error phase entirely. Instead of burning through scrap leather testing press temperatures on your own, you can order a small sample run built for your specific project, with no minimum order required, and get application guidance alongside it.

For leather work specifically, that means you can request a transfer with a film and adhesive combination suited to your surface, whether that’s a flexible garment panel or a rigid accessory piece. When you place an order, have your file ready at the correct resolution and sizing, and note the leather type and finish you’re applying to so the print matches what your project actually needs. If you’re weighing standard versus UV DTF for a leather piece and want it done right the first time, start an order for custom DTF transfers and skip the guesswork that comes with a first solo attempt.
Where to Learn More About DTF on Leather
For deeper technical reading, AGoodPrinter’s UV DTF leather application guide covers surface prep in detail. Jiffy’s technical press notes explain baseline fabric temperatures worth adjusting downward for leather. Transferkingz’s application blog covers broader DTF workflow questions.
0 comments