

Use a permanent pressure-sensitive adhesive for anything living outdoors, on hard goods, or under safety compliance rules, and reach for a removable or repositionable adhesive when the graphic is seasonal, promotional, or needs exact placement. UV DTF PermaStickers are built around that first category. Test on your actual substrate before you commit to either, and give permanent adhesives their full dwell time before judging the bond.
TL;DR:
- Permanent adhesives develop full bond strength over 24 to 72 hours and resist UV, moisture, and temperature changes for long-term outdoor durability.
- Removable adhesives resist wet-out, allowing clean peeling within a specified window, but may fail prematurely on textured or low-energy surfaces.
- Surface energy of the substrate, not just the environment, determines whether a bond is permanent or removable, especially on plastics and coated materials.
- Testing actual samples on the specific substrate and in conditions similar to final use offers more reliable adhesion predictions than relying solely on product labels.
- Using a small sample test before full application helps identify potential failure modes, especially on tricky surfaces or if the graphic must last years without damage.
Table of Contents
- What Permanent, Removable, and Repositionable Adhesives Actually Do
- How Permanent and Removable Adhesives Actually Perform
- How to Choose the Right Adhesive for Your Vinyl or Label Project
- Removing Adhesive Without Wrecking the Surface
- A Two-Step Test Plan Before You Commit to a Full Order
- What Transfer Kingz Has Learned Testing Adhesion on Hard Goods
- The Real Lesson Buried in Every Adhesive Spec Sheet
- Transfer Kingz: A Straightforward Option for Decals That Need to Last
- Sources
- FAQ
What Permanent, Removable, and Repositionable Adhesives Actually Do
A pressure-sensitive adhesive, or PSA, bonds under light hand pressure with no water, solvent, or heat activation needed. Three properties decide how it behaves: tack (the instant grab you feel on contact), cohesion (how well the adhesive holds itself together internally), and wet-out (how far it flows into the microscopic texture of a surface over time). The Adhesives & Sealants Classification Manual from the ASC, CATIA, and FEICA trade groups uses these same three attributes to sort PSAs into permanent and removable categories.
Dwell time is the variable most DIYers skip. A permanent adhesive keeps building strength for 24 to 72 hours after application, as it wets out into the substrate’s pores. Removable adhesives are formulated to resist that same wet-out, which is why they stay peelable.
Repositionable adhesive sits between the two. Sometimes called re-hesive technology, it lets you lift and reapply a label several times before it eventually sets into a firmer bond, which is why it exists at all:
- Permanent: wet-out increases over days; designed to resist removal once cured.
- Removable: engineered to resist wet-out so it lifts clean within a stated window.
- Repositionable: low initial tack allows multiple placements before eventual permanence.
How Permanent and Removable Adhesives Actually Perform
The gap between these two adhesive types shows up fastest on the substrate, not in a lab spec sheet. Surface energy, measured in dyne levels, decides how well any adhesive wets out. High-surface-energy (HSE) materials like glass, painted metal, and coated cardboard grab adhesive readily. Low-surface-energy (LSE) plastics such as polypropylene and many powder-coated finishes resist it, which is why Jessup’s technical guidance treats “permanent” and “removable” as performance labels tied to the substrate rather than fixed chemical states.
That distinction plays out in real failures. A removable window cling left on a storefront through a Texas summer can wet out anyway, turning what should be a five-minute peel into a scraping job. Flip it around: a permanent vinyl decal applied to an LSE plastic bumper can fail early because the adhesive never got enough surface texture to lock into.
- Longevity and weather: permanent formulations resist UV, moisture, and temperature swings far longer; most removable films are not rated for multi-season outdoor exposure.
- Residue risk: removables carry lower residue risk on painted or coated surfaces, but only inside their rated window.
- Shear vs. peel: permanent adhesives resist shear (sliding force) better, which matters for floor graphics and outdoor signage that face constant foot traffic or wind load.
- Lock-up risk: removable labels left past their rated clean-remove window can behave like permanent adhesive, sometimes taking paint or laminate with them.
Manufacturers typically rate removable clean-remove windows for a limited period, often several months. That rating matters more than any marketing claim about “easy peel” printed on the packaging.
How to Choose the Right Adhesive for Your Vinyl or Label Project
Run through four questions before you buy a roll of vinyl or a batch of labels.
- How long does this graphic need to survive? A storefront promotion running six weeks needs a different adhesive than an asset tag meant to outlast the machine it’s on.
- What’s the substrate’s surface energy? Glass, metal, and coated cardboard are HSE and forgiving. Powder-coated tumblers, certain plastics, and textured finishes are LSE and need a hi-tack formulation to grab at all.
- What environment will it face? UV exposure, humidity, and temperature swings all shorten the practical lifespan of removable films faster than permanent ones.
- Do you need a removal window, and how long? If yes, confirm the manufacturer’s rated clean-remove period. It is not the same for every removable product.
Textured or low-energy surfaces generally call for hi-tack adhesive formulations, which grip aggressively on contact. Delicate finishes like painted furniture or laminated wood do better with low-tack adhesive that won’t lift a finish coat on removal. Some specialty removable films now split the difference, offering strong initial hold on textured surfaces while still engineered for clean removal later.
Pro Tip: Before committing to a full sheet or roll, apply a small sample to the exact material you’re using, not a similar one. A “plastic” bumper and a “plastic” storage bin can have wildly different dyne levels, and that’s the number that actually decides how your adhesive behaves.
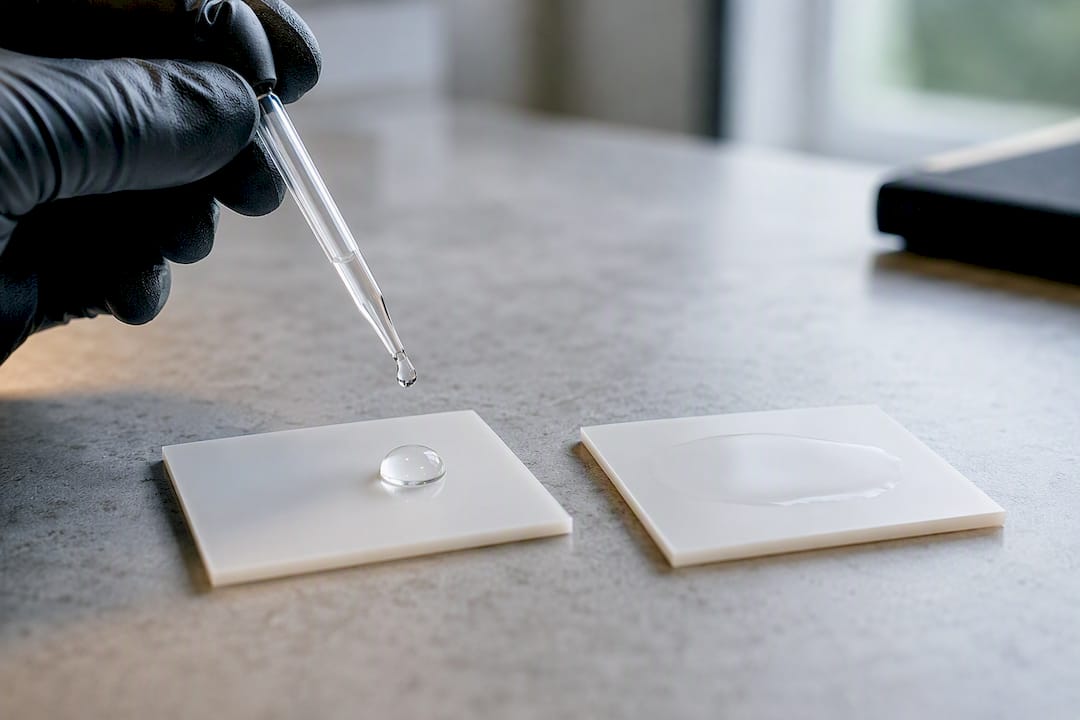
A simple water bead test gives you a rough surface energy read: water that beads up tightly signals low surface energy and a tougher bonding job; water that spreads flat signals higher surface energy and an easier one.
Removing Adhesive Without Wrecking the Surface
Removal technique depends entirely on which adhesive type you’re dealing with and how long it has been down.
- Removable adhesive, within its rated window: peel slowly at a low angle, close to 180 degrees, rather than pulling straight up. This distributes the peel force and reduces the chance of tearing the label or leaving spots of residue behind.
- Permanent adhesive or removable past its window: low, gentle heat from a hair dryer softens the adhesive and makes peeling easier without touching the substrate’s finish.
- Stubborn residue: an adhesive remover safe for the substrate, applied sparingly, usually finishes the job. Test any solvent on a hidden spot first since some finishes discolor or soften on contact.
- Mechanical scraping: reserve a plastic scraper, not metal, for glass or hard-goods surfaces, and always work at a shallow angle.
- When to stop: if the surface finish starts lifting, bubbling, or changing color, stop immediately. Continuing risks permanent substrate damage that no amount of technique will fix.
Avoid aggressive solvents on painted wood, laminate, or anodized metal. Cohesive strength inside the adhesive has to exceed its bond to the substrate for a clean peel. When it doesn’t, you’re not removing a label anymore, you’re removing a finish.
A Two-Step Test Plan Before You Commit to a Full Order
Run this before ordering a full roll, a large gang sheet, or a bulk batch of labels.
- Immediate peel test. Apply a small sample to the actual substrate, then peel it back within a few minutes. Note the peel force qualitatively (light, moderate, firm) and check for any transfer of adhesive onto the surface.
- Dwell time test. Apply a second sample and leave it for 24 to 72 hours in conditions close to the final environment, indoors or outdoors. Peel it and check again for residue, ghosting (a faint outline left behind), or substrate marking.
Document what you see both times. A sample that peels clean immediately but leaves residue after 72 hours tells you the adhesive wet out further than expected, which usually means it’s behaving more like a permanent bond than the label suggested.
On stubborn LSE plastics or heavily textured finishes, a primer coat can improve adhesion for either adhesive type, though it adds a prep step most casual projects skip. Humidity and cold both slow initial tack, so test in conditions close to where the graphic will actually live. For anything mission-critical, an adhesion troubleshooting checklist built for difficult substrates is worth running through, and asking a supplier for actual peel-strength figures beats trusting a generic product description.
What Transfer Kingz Has Learned Testing Adhesion on Hard Goods
Transfer Kingz has run its own durability testing on UV DTF PermaStickers applied to tumblers, laptops, and other hard-goods surfaces. The most common failure mode wasn’t the adhesive itself, it was skipped surface prep: dust, oils, or leftover packaging film under the decal weakening the bond before it ever got a fair test.
A few things that consistently improved results:
- Clean the surface with isopropyl alcohol and let it fully dry before applying anything.
- Order a small sample sheet before committing to a full gang sheet run, especially on an unfamiliar substrate.
- Skip aggressive solvents on delicate coatings; they can dull a finish faster than they lift adhesive.
PermaStickers tend to outperform standard adhesive vinyl specifically on curved or textured hard goods, where vinyl’s flatter film struggles to conform without lifting at the edges.
The Real Lesson Buried in Every Adhesive Spec Sheet
Most buying guides treat “permanent” and “removable” like fixed properties printed on a label, the way you’d read a material’s melting point. They aren’t. They’re performance predictions that only hold up on the substrate the manufacturer tested against, and that’s the gap that trips up more people than adhesive strength itself.
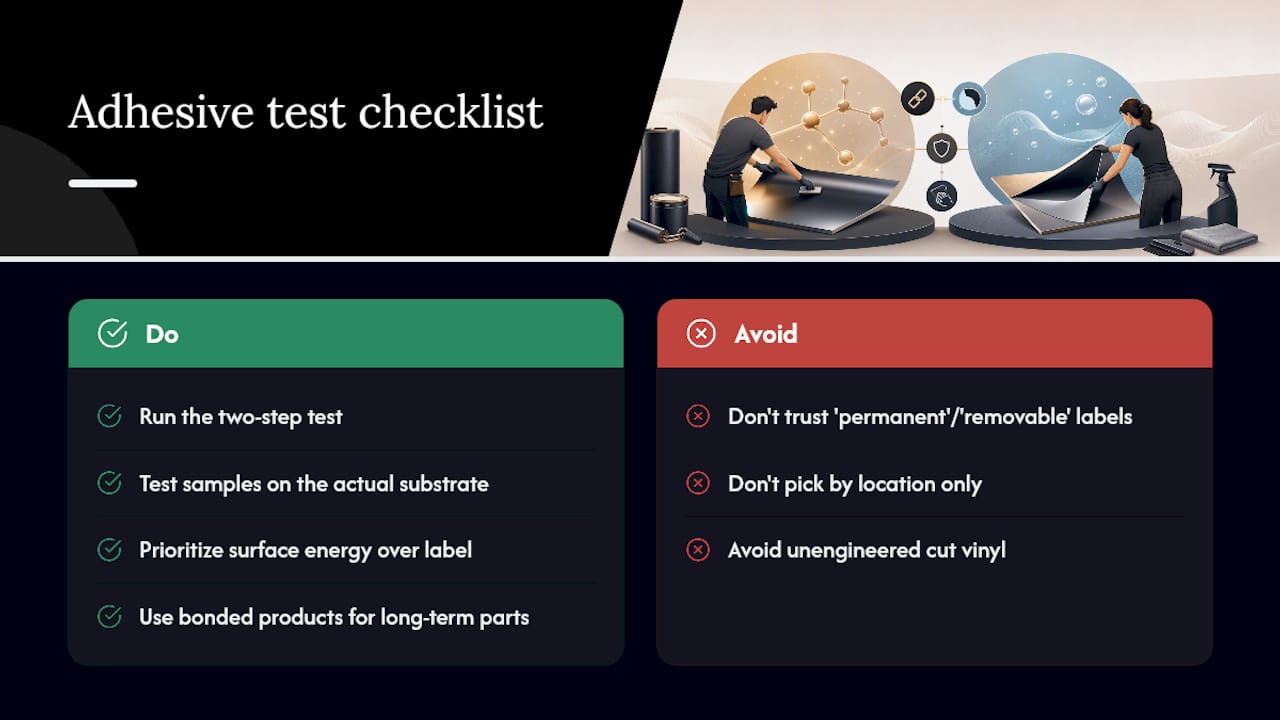
The conventional advice, “just pick permanent for outdoors and removable for indoors,” ignores substrate entirely. A removable film on a hot, south-facing window can wet out and lock up within a season. A permanent decal on an textured, low-energy plastic can fail to bond at all. Surface energy, not location, is the variable doing the real work.
If there’s one thing worth prioritizing over any adhesive spec, it’s the two-step test outlined above. It costs a few dollars in sample material and a couple of days of patience, and it tells you more than any product page will. For anything going on a hard-goods item that has to survive years, not weeks, a bonded product built for that job, like Transfer Kingz’s PermaStickers, tends to beat cut vinyl that was never engineered for that surface.
— Anthony
Transfer Kingz: A Straightforward Option for Decals That Need to Last
For hard-goods branding, outdoor decals, and anything where removal risk means damaging the item underneath, UV DTF PermaStickers provide a permanent bond built for exactly that job, without the substrate guesswork that comes with generic adhesive vinyl.

Alongside PermaStickers, custom DTF transfers and a gang sheet builder that lets you mix multiple designs on one sheet, with no minimum order size, are offered. That matters if you’re testing a new decal on a handful of tumblers before committing to a production run, or if you’re a print shop filling small custom orders alongside bigger jobs. Same-day local pickup and nationwide shipping keep turnaround short.
If your project involves durable outdoor signage, branded merchandise on glass or acrylic, or any case where a failed removal would ruin the item, start with a sample order through the DTF transfer printing services in Dallas page, upload your artwork, and see how it holds up on your actual substrate before scaling to a full batch.
Sources
- Difference Between Permanent, Removable & Repositionable Label Adhesive — Avery
- Permanent vs Removable Label Adhesives — ASAS Label
- Adhesives & Sealants Classification Manual 2021 — ASC/CATIA/FEICA
FAQ
Should I use removable or permanent vinyl for my project?
Use removable vinyl for temporary signage, seasonal displays, or anything you’ll take down within a limited time. Use permanent vinyl for outdoor signage, hard-goods branding, or anything that needs to survive long term outdoors.
What is a removable adhesive?
A removable adhesive is a pressure-sensitive formulation engineered to resist wet-out, so it stays peelable and leaves minimal residue within its rated clean-remove window, often stated in months.
Will permanent vinyl peel off?
Permanent vinyl can be peeled off, but it builds bond strength over 24 to 72 hours of dwell time and typically requires heat or a solvent to remove cleanly without residue afterward.
What are the key differences between permanent and removable labels?
Permanent labels wet out into the substrate over time for a lasting bond, while removable labels resist that wet-out to stay peelable, but only within a specific timeframe before they start behaving like a permanent bond.
Are Transfer Kingz PermaStickers permanent or removable?
Transfer Kingz PermaStickers are built as a permanent option, designed for hard-goods items like tumblers and laptops where long-term durability matters more than easy removal.
0 comments