
Inconsistent DTF transfer quality drains your budget and frustrates customers. One failed print can waste materials, delay orders, and harm your brand reputation. Over 90% of professional printers cite artwork and process control as key to flawless DTF prints. A systematic quality checklist helps you standardize results, reduce errors, and boost profitability. This guide covers everything from artwork prep to final inspection, giving you the precise control needed for durable, vibrant prints every time.
Table of Contents
- Prepare Your Artwork for DTF Printing
- Select the Right Film and Ink Type
- Optimize Gang Sheet Design for Maximum Efficiency
- Calibrate Temperature, Pressure, and Time Settings
- Maintain Printer Environment for Ink Stability
- Inspect Finished Transfer for Quality Assurance
- Summary Comparison of Key Quality Checklist Factors
- Situational Recommendations: Choosing Quality Steps for Your Business
- Enhance Your DTF Printing with Transfer Kingz Solutions
- Frequently Asked Questions About DTF Transfer Quality Checklists
Key Takeaways
| Point | Details |
|---|---|
| Artwork quality impacts print clarity | Use vector files or 300 DPI minimum raster images for sharp, vibrant results. |
| Material choice affects durability | Polyurethane PET films and water-based pigment inks deliver superior wash resistance. |
| Optimized gang sheets reduce costs | Efficient layout can cut printing costs by up to 60% through smarter material use. |
| Heat press settings prevent defects | Maintain 140°C to 150°C with 15 to 20 second dwell time for proper adhesion. |
| Inspection catches defects early | Systematic quality checks save costs and improve yield before garment application. |
Prepare Your Artwork for DTF Printing
Your artwork quality determines print clarity and color vibrancy. Poor file preparation leads to pixelated transfers, washed-out colors, and customer complaints. Start with the right foundation.
Artwork should be vector or high-resolution raster (minimum 300 DPI) for crisp prints. Vector files scale without losing quality, making them ideal for logos and text. If you’re working with photos or complex graphics, ensure raster images meet 300 DPI at final print size.
Key artwork preparation steps:
- Use RGB color mode for best digital color fidelity during printing
- Remove backgrounds and save as transparent PNG format for clean transfers
- Optimize colors and details to enhance photo-realistic transfer quality
- Test print small samples to verify color accuracy before large runs
Pro Tip: Create a template library of properly sized artwork files for your most popular garment types. This streamlines your DTF transfer setup and reduces errors.
Color matching matters more than you think. RGB files preserve the full color spectrum your printer can produce, while CMYK conversions often dull vibrant hues. Always preview your artwork on screen at actual size to catch sizing issues before printing. Your DTF print workflow depends on this foundation.
Select the Right Film and Ink Type
Your material choices directly impact transfer durability and appearance. Cheap films crack after a few washes. Low-quality inks fade quickly under sunlight. Smart material selection protects your brand reputation.
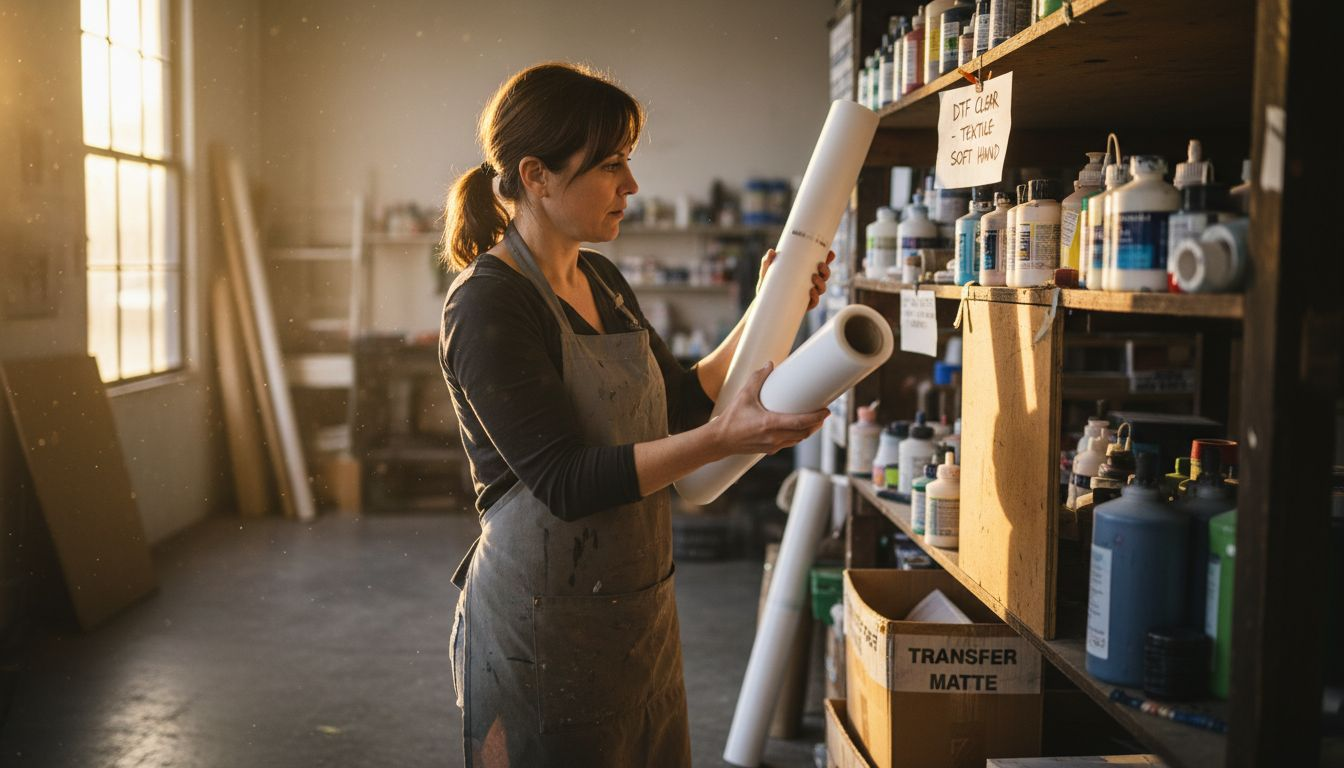
Polyurethane PET films outperform cheaper alternatives for durability. These films stretch with fabric during wear and washing, preventing cracks. Water-based pigment inks deliver superior color vibrancy and wash resistance, lasting 50+ washes when applied correctly.
Material selection checklist:
- Match ink and film specifications to your fabric types for optimal adhesion
- Consider film adhesive powder types to balance strong bond and flexibility
- Choose TPU or PU-based adhesive powders for cotton and blends
- Select specialized formulations for performance fabrics like polyester
Different fabrics require different approaches. Cotton bonds well with standard TPU powders at moderate temperatures. Polyester needs lower temperatures to avoid scorching but demands longer dwell times for proper adhesion. Blends fall somewhere in between, requiring careful testing.
Your DTF film and ink types create the foundation for washability. Premium materials cost more upfront but reduce warranty claims and boost customer satisfaction. Check your DTF printing glossary to understand material specifications before purchasing.
Optimize Gang Sheet Design for Maximum Efficiency
Gang sheet layout transforms production economics. Smart designers pack more prints per sheet, slashing material waste and labor costs. Gang sheet layout can reduce cost-per-print by up to 60% through efficient material use.
Efficient packing minimizes transfer waste and printing time. Use software tools to arrange designs neatly and consistently, avoiding overlaps that ruin prints. Consider garment size and placement when creating sheets to ensure transfers align properly during pressing.
Gang sheet optimization strategies:
- Group similar-sized designs together to maximize sheet utilization
- Leave adequate spacing between designs for clean cutting
- Orient designs to minimize film waste along sheet edges
- Batch recurring orders to fill sheets completely
| Gang Sheet Factor | Impact on Efficiency | Recommended Approach |
|---|---|---|
| Design spacing | Affects cutting ease | Maintain 0.5 inch minimum between designs |
| Sheet utilization | Reduces material cost | Target 85%+ coverage per sheet |
| Design orientation | Minimizes waste | Rotate designs to fit gaps |
| Batch grouping | Speeds production | Combine orders with similar garment types |
Pro Tip: Create gang sheet templates for your most popular product combinations. This speeds up order processing and ensures consistent results across production runs.
Your DTF troubleshooting guide covers common gang sheet mistakes. Software automates much of the layout work, but manual review catches errors before printing. Follow DTF printing best practices to balance efficiency with quality.
Calibrate Temperature, Pressure, and Time Settings
Heat press calibration makes or breaks transfer quality. Wrong settings cause peeling, cracking, or poor adhesion. Precise control ensures consistent results across every press.
Optimal temperature range is 140°C to 150°C for TPU powders. Dwell time generally runs 15 to 20 seconds for standard fabrics. Apply consistent medium-high pressure during pressing to activate adhesive without damaging prints. A second press step improves wash durability by up to 40%.
Critical calibration steps:
- Verify actual platen temperature with infrared thermometer monthly
- Test pressure distribution across platen using heat-sensitive paper
- Document settings for each fabric type in a reference chart
- Perform test presses on scrap fabric before production runs
- Implement double-press technique for high-durability applications
Temperature consistency matters more than absolute numbers. A press that fluctuates 5°C during cycles produces uneven adhesion. Pressure must distribute evenly across the entire platen, or edge areas will peel prematurely.
Your DTF print workflow guide includes detailed pressing instructions. Invest in quality equipment with digital controls for repeatable results. Follow heat press calibration best practices from industry experts to avoid costly mistakes.
Maintain Printer Environment for Ink Stability
Environmental conditions affect ink performance dramatically. Humidity swings cause nozzle clogs. Temperature fluctuations alter ink viscosity and color accuracy. Controlled conditions ensure reliable printing.
Keep relative humidity between 45% and 55% in your printing area. Maintain stable room temperature between 20°C and 25°C for consistent ink flow. Circulate white ink daily for at least 10 minutes to prevent settling and clogs. Regular cleaning avoids head blockages and color inconsistencies.
Daily maintenance checklist:
- Run white ink circulation cycle before first print job
- Check nozzle test patterns for missing or misaligned jets
- Wipe print heads gently with lint-free cloths as needed
- Monitor humidity and temperature with digital sensors
- Document maintenance activities in a log for troubleshooting
White ink causes the most headaches. Titanium dioxide pigments settle quickly, clogging nozzles if left stagnant overnight. A simple circulation routine prevents 90% of white ink problems. Set calendar reminders to ensure daily circulation never gets skipped.
Temperature affects everything from ink droplet formation to film feeding. Cold rooms make ink sluggish, causing banding and color shifts. Hot environments thin ink too much, reducing color saturation. A dedicated climate-controlled space pays for itself through reduced waste.
Your DTF troubleshooting guide addresses common environmental issues. Small investments in dehumidifiers or space heaters protect expensive printheads and preserve ink quality year-round.
Inspect Finished Transfer for Quality Assurance
Inspection catches defects before they reach customers. A systematic review identifies problems when fixes cost pennies, not dollars. Inspection checkpoints include adhesive powder coverage, film clarity, print registration, and color accuracy.
Systematic inspection reduces defects and saves costs by catching issues before garment application. Check every transfer under good lighting before pressing. Your eyes are the final quality gate.
Comprehensive inspection checklist:
- Verify color accuracy against approved samples or digital proofs
- Confirm print registration aligns all color layers precisely
- Examine adhesive powder coverage for gaps or clumps
- Assess film clarity and flexibility without tears or weak spots
- Look for surface defects like bubbles, streaks, or incomplete curing
| Inspection Criterion | Acceptable Standard | Rejection Trigger |
|---|---|---|
| Color accuracy | Matches approved sample within 5% variance | Visible color shift or fading |
| Print registration | All layers align within 0.5mm | Ghosting or visible misalignment |
| Adhesive coverage | Uniform coating with no gaps | Bare spots larger than 2mm |
| Film integrity | Smooth, flexible surface | Cracks, tears, or stiff areas |
| Surface finish | Clean, bubble-free appearance | Texture defects or incomplete cure |
Create a reject bin for failed transfers. Analyze patterns monthly to identify recurring problems. Is one color consistently off? That points to ink or printhead issues. Do edges peel frequently? Check heat press pressure distribution.
Your DTF troubleshooting guide helps diagnose root causes of common defects. Quality inspection takes seconds per transfer but prevents hours of rework and customer service headaches.
Summary Comparison of Key Quality Checklist Factors
This consolidated view helps you quickly reference best practices across all quality dimensions. Use it as a daily checklist or training guide for new team members.
| Quality Factor | Key Requirements | Impact on Results | Common Mistakes to Avoid |
|---|---|---|---|
| Artwork Resolution | 300 DPI minimum, vector preferred | Determines print sharpness and detail | Using low-res web images, wrong color mode |
| File Format | Transparent PNG, RGB color mode | Affects color accuracy and background quality | CMYK files, embedded backgrounds |
| Film Type | Polyurethane PET for durability | Controls flexibility and wash resistance | Choosing cheap films to save money |
| Ink Quality | Water-based pigment formulation | Determines vibrancy and longevity | Mixing incompatible ink brands |
| Gang Sheet Layout | 85%+ utilization, proper spacing | Reduces cost per print significantly | Overcrowding designs, poor orientation |
| Temperature | 140°C to 150°C for TPU powder | Ensures proper adhesive activation | Not calibrating regularly |
| Pressure | Medium-high, evenly distributed | Prevents peeling and ensures bond | Uneven platen pressure |
| Dwell Time | 15 to 20 seconds standard fabrics | Activates adhesive without damage | Rushing presses to boost speed |
| Environment | 45% to 55% humidity, 20°C to 25°C | Maintains ink stability and flow | Ignoring seasonal variations |
| Inspection | Check all criteria before pressing | Catches defects when fixes are cheap | Skipping inspection during rushes |
This comparison clarifies how each factor contributes to overall quality. No single element guarantees success, but systematic attention to all factors produces consistent, professional results.
Situational Recommendations: Choosing Quality Steps for Your Business
Your business context determines which checklist items deserve priority focus. Not every shop needs identical procedures. Tailor your approach to match your scale, budget, and brand positioning.
Startup artists should master artwork preparation first. Perfect your file setup before investing in premium materials. Simple but quality film and ink combinations keep costs manageable while you build skills and clientele.
Small production shops benefit most from optimizing gang sheet layouts. A 60% cost reduction per print directly impacts profitability. Standardize heat press settings across operators to ensure consistency as you scale.
Key recommendations by business type:
- Durability-focused brands must prioritize rigorous quality inspections and incorporate a second pressing step for enhanced washability
- High-volume operations should automate gang sheet creation and implement statistical process control for quality monitoring
- Custom design shops need comprehensive artwork workflows and color management systems
- Local production partners can speed turnaround time without sacrificing quality through efficient processes
Budget constraints often force tradeoffs. Invest first in areas that directly touch customer satisfaction. Better artwork preparation costs nothing but attention. Premium films cost more but prevent warranty claims. Quality inspection takes time but catches expensive mistakes.
Your DTF printing business branding strategy should align with your quality priorities. Position yourself as the reliability choice, the speed option, or the premium provider. Then optimize checklist elements to deliver on that promise consistently.
Enhance Your DTF Printing with Transfer Kingz Solutions
Ready to implement this quality checklist? Transfer Kingz provides everything you need. Our premium DTF films and inks meet every specification discussed in this guide, ensuring compatibility and consistent results.

Explore our DTF transfer quality solutions designed specifically for small clothing businesses and independent artists. We offer digital transfer film for detailed prints that handles complex artwork with precision. Our custom DTF printing services deliver vibrant, durable transfers without minimum orders, perfect for testing new designs or filling rush orders.
Leverage our expert resources and technology to streamline production. We provide detailed application guides, troubleshooting support, and material recommendations tailored to your specific garments. Whether you’re printing your first transfer or scaling to thousands monthly, Transfer Kingz helps you maintain quality standards that build customer loyalty. Visit our site to discover custom DTF transfers for business growth and start producing professional results today.
Frequently Asked Questions About DTF Transfer Quality Checklists
How often should I calibrate my heat press for DTF transfers?
Calibrate your heat press monthly using an infrared thermometer to verify actual platen temperature. Perform quick pressure checks weekly with heat-sensitive paper to ensure even distribution. Recalibrate immediately if you notice inconsistent results or after any equipment maintenance.
What is the best way to prevent white ink clogging in DTF printers?
Circulate white ink for at least 10 minutes before each printing session to keep pigments suspended. Run nozzle checks daily and perform gentle cleaning cycles when patterns show gaps. Store printers in climate-controlled environments between 20°C and 25°C with 45% to 55% humidity.
Can optimized gang sheet layouts really save printing costs?
Yes, efficient gang sheet design reduces material waste by maximizing sheet coverage. Proper layout cuts cost per print by up to 60% compared to inefficient spacing. Software tools automate optimal placement, saving both material and labor time across production runs.
What inspection tools help detect transfer defects before pressing?
Use bright LED lighting and magnification for detailed visual inspection of prints. Keep approved color samples for comparison checking. Employ peel tests on sample transfers to verify adhesive strength before full production runs. Your DTF troubleshooting guide offers additional diagnostic techniques.
Are there recommended environmental conditions to keep during DTF printing?
Maintain room temperature between 20°C and 25°C for stable ink viscosity and consistent printing. Control humidity between 45% and 55% to prevent ink drying in nozzles or moisture affecting film. Use dehumidifiers or humidifiers as needed to stay within these ranges year-round for reliable results.
Recommended
- DTF Printing: 50+ Washes & 40% Lower Setup Costs – Transfer Kingz
- Affordable Bulk DTF Transfers for Your Business Needs: Quality, Speed, – Transfer Kingz
- Affordable Bulk DTF Transfers for Your Business Needs: Quality, Speed, – Transfer Kingz
- Are Bulk DTF Transfers Worth It? Cost, Benefits, and Comparison for Bu – Transfer Kingz
0 comments